Older Dependencies
Older packages may linger around and your Python code will happily use them. This is not a problem if your Python scripts are meant to run locally, and not for industrial purposes. Data scientists, students and even regular people automating their everyday task can just keep using the older packages without much of a problem.
The problem begins when you ship your code to production. When you do that, chances are you will just send your main script and not all the package dependencies. For example, if you have written a microservice to be shipped as AWS Lambda function, the first few lines might import request module like this:
The request package supplied by AWS lambda will be different from your older one and as a result the program might crash.
Conflicts
Conflicts might also come into the picture where different projects use different versions of the same package. Maybe some of your older projects need the older pip packages. But you might need the newer package for other projects. Running pip install -U <package_name> will upgrade the package across your OS causing issues when you go back to maintaining your older projects.
Python Virtual Environments
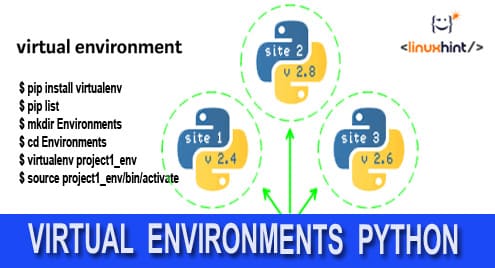
If you are using any version of Python above 3.5, you can use a built-in module called venv to create what are called Python Virtual Environments. What this module does is create an isolated folder or directory where all your pip packages and other dependencies can live. The folder also contains an ‘activate’ script in it. Whenever you want to use a particular virtual environment, you simply run this script after which only the packages contained within this folder can be accessed. If you run pip install, the packages will be installed inside this folder and nowhere else. After you are done using an environment, you can simply ‘deactivate’ it and then only the global pip packages will be available to you.
If you are using Ubuntu 18.04 and above, you don’t even need to install the pip package manager across your entire system. Pip can only exist inside your virtual environment if you prefer it that way.
Installing venv and Creating Virtual Environments
Ubuntu 18.04 LTS comes out of the box with Python 3.6.x, but the Python venv module is not installed, neither is pip. Let’s install just venv.
Next, we go to the directory inside which you want your Virtual Environment directory to be created. For me it is ~/project1
Create your venv with the following command, notice the my-env is just the name of that environment, you can name it whatever you want :
Note: Some Python3 installations, like the ones available on Windows, you call the Python interpreter using just python and not python3, but that changes from system to system. For the sake of consistency I will be using only python3.
After the command has finished execution, you will notice a new folder ~/project1/my-evn. To activate the my-env virtual environment, you will have to:
- Run,
$source ~/project1/my-env/bin/activateif you are using Bash.
There are alternative scripts called activate.fish and activate.csh for people who use fish and csh shells, respectively. - On Windows, the script can be invoked by running:
>.my-envScriptsactivate.batif you are using command prompt, or,
>.my-envScriptsactivate.ps1if you are using PowerShell.
Using Virtual Environments
Once you do run the script successfully, you will notice that the prompt changes to something like what’s shown below, you can now install packages using pip:
## We can list the installed packages using `pip freeze` command
(my-env) $ pip3 freeze
certifi==2018.10.15
chardet==3.0.4
idna==2.7
pkg-resources==0.0.0
requests==2.20.1
urllib3==1.24.1
As long as the virtual environment is active (as indicated by the prompt) all the packages will be saved only in the virtual environment directory (my-env), no matter where you are in the file system.
To get out of the virtual environment, you can type deactivate into the prompt and you will be back to using the system-wide installation of Python. You can notice that the new packages we just installed won’t be shown in the global pip installation.
To get rid of the virtual environment, simply delete the my-env folder that was created after running the module. You can create as many of these environments as you like.
Conclusion
With venv module, virtual environments are now available as a standard feature of Python, especially if you install from Python.org. Previously, we used to have many third party implementations called virtualenv,pyenv,etc.
This gave rise to more and more bloated software like Anaconda, especially popular among data scientists. It is good to finally have a simplistic tool for managing Python packages without having to install a lot of other unrelated junk. You can read more about venv here.


