You may ask, well if rebooting a production server is that much problematic, why reboot them?
Security is a must for production servers. On Ubuntu, security updates and kernel patches are released periodically as they are fixed. If any security updates and kernel patches are not applied, hackers may use one of the known security flaws to gain access to the production server. This is not what any company wants. So, they have to apply the security updates and kernel patches as soon as it is available. Many of the security updates may not require the production server to reboot, but this is not true for kernel patches. If any kernel patch is applied to a Linux server, then a restart is mandatory for the changes to be take effect. Otherwise, the production server may keep using the old kernel. Thus, it may be vulnerable to outside attacks.
To solve this problem, Canonical, the company behind Ubuntu developed Live Patch service. Canonical Live Patch service allows you to apply critical kernel security updates or kernel patches to your Ubuntu machines without ever needing to reboot them. Canonical Live Patch service is available for Ubuntu desktops and servers. It keeps your production server up and running 24/7. So you can achieve about 100% uptime. Good for business, right?
Canonical Live Patch service does not slow down your work or anything. It’s fast and it keeps your Ubuntu desktops and servers secure at the kernel level without any downtime.
In this article, I will show you how to enable Canonical Live Patch service on your Ubuntu Desktops and Servers. Let’s get started.
Signing Up for Canonical Live Patch Service and Getting the Token:
If you want to use Canonical Live Patch service, then you must sign up for it first. It is free to use for 3 personal Ubuntu desktops and servers. If you want to use Canonical Live Patch service on more than 3 Ubuntu machines, then you must pay for it.
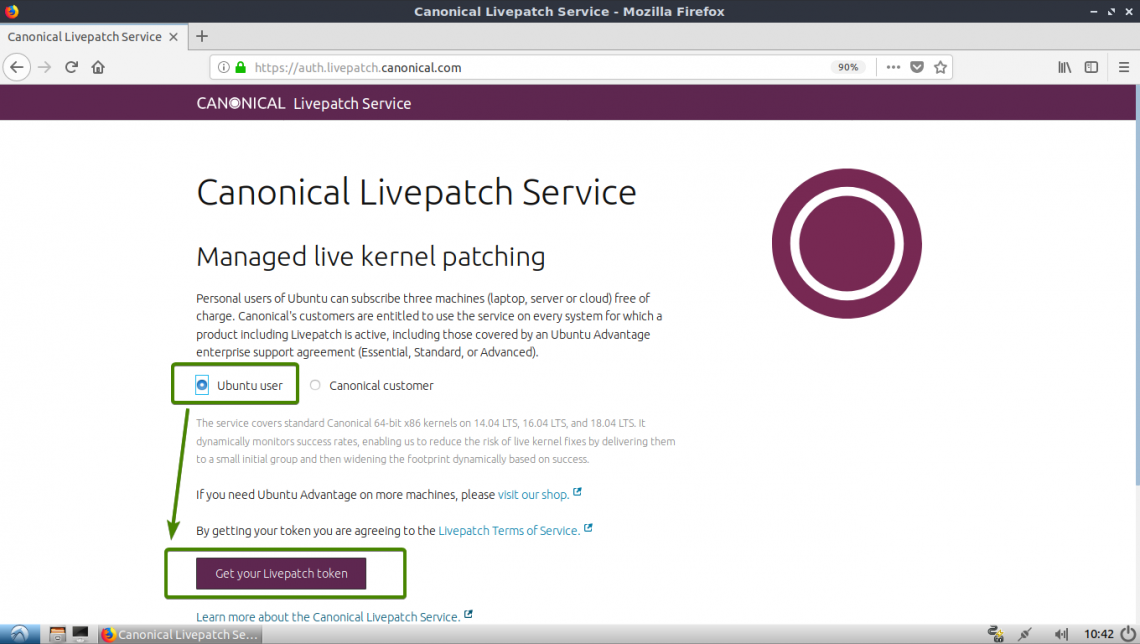
To sign up for Canonical Live Patch service, go to the official website of Ubuntu at https://www.ubuntu.com/server/livepatch and click on Sign up.

If you’re using Ubuntu on your personal laptop, desktop or server, then select Ubuntu user. If you’re using Ubuntu for commercial purpose, then select Canonical customer, in that case, you may have to pay for the Live Patch service. Now, click on Get your Livepatch token.
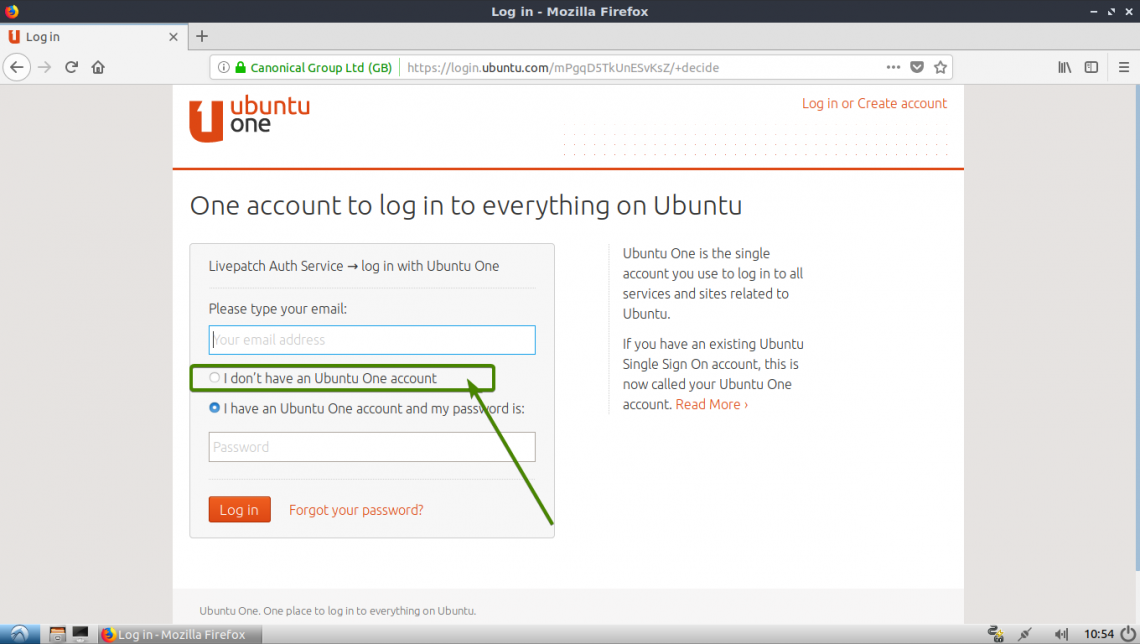
Now you have to login to your Ubuntu One account. Just type in your email and password and click on Log in. If you don’t have an Ubuntu One account, click on, I don’t have an Ubuntu One account to create one.
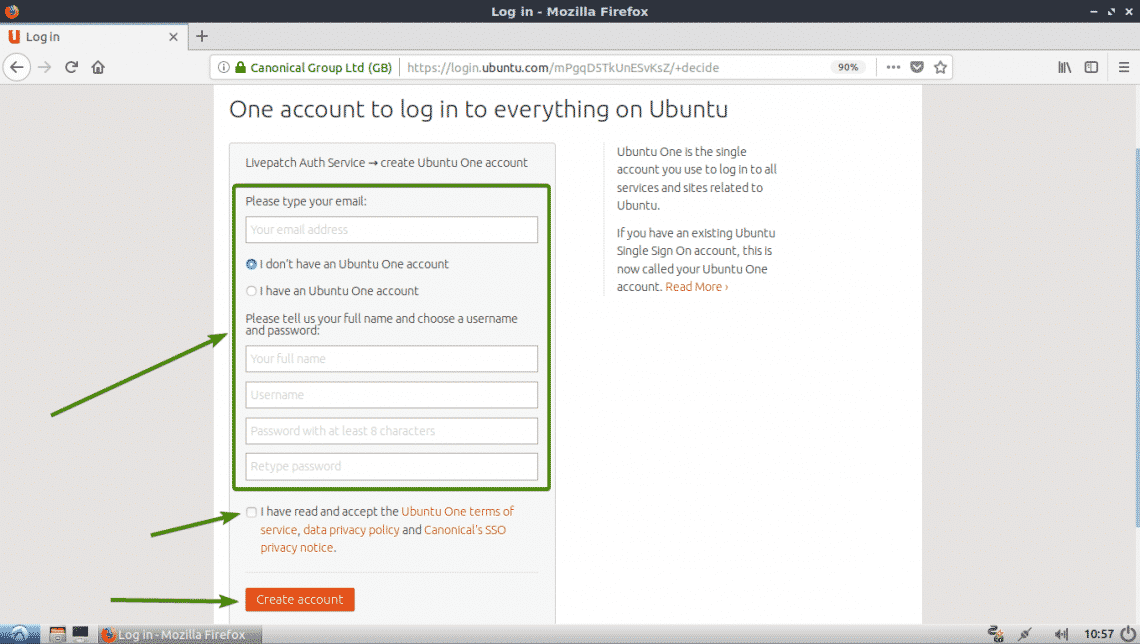
If you’ve clicked on I don’t have an Ubuntu One account earlier, you should see the signup form. Fill in the details, check “I have read and accept the Ubuntu One terms of service, data privacy policy and Canonical’s SSO privacy notice.” checkbox and click on Create account.
Once you sign up, verify your email and your Ubuntu One account should be ready.
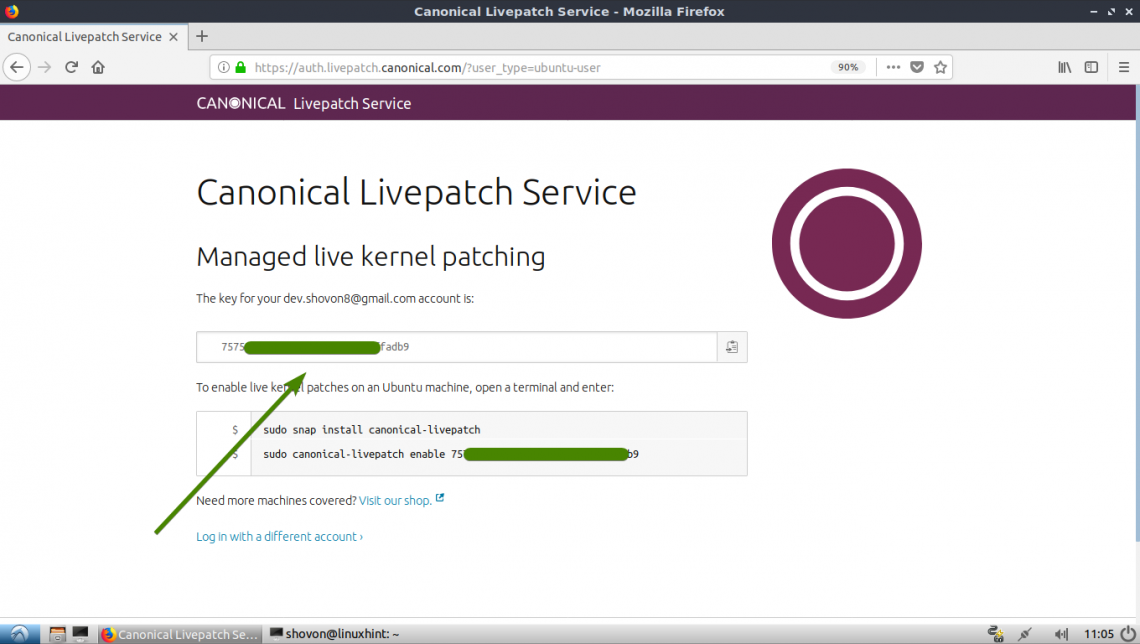
Now visit https://auth.livepatch.canonical.com/ and log in with your Ubuntu One account and you should see the following page. Here, you can find your Canonical Live Patch token. Copy your Canonical Live Patch token. You will need it later.
Setting Up Ubuntu Live Patch on Ubuntu Server:
If you’re trying to set up Canonical Live Patch on your Ubuntu Server machine, then this section is for you.
To set up Canonical Live Patch on your Ubuntu Server, you need the Canonical Live Patch service token. I showed you how to get the Live Patch service token in the earlier section of this article.
First, log in to your Ubuntu server and make sure you’re connected to the internet with the following command:

As you can see, I sent 3 packets and received 3 packets and there’s 0% loss. So I am connected to the internet and everything is working just fine.

Canonical Live Patch package canonical-livepatch is available as a snap package.
You can install canonical-livepatch snap package with the following command:

As you can see, canonical-livepatch snap package is being installed.

canonical-livepatch should be installed.

Now run the following command to enable Canonical Live Patch service on your Ubuntu machine.
NOTE: Change, YOUR_LIVE_PATCH_TOKEN with the Live Patch Token that you got in the earlier section of this article.

Canonical Live Patch service should be enabled on your Ubuntu Server machine.

Setting Up Canonical Live Patch on Ubuntu Desktop:
Canonical designed their Live Patch service for Ubuntu servers. But If you want to use Canonical Live Patch service on your Ubuntu desktop, you can. Ubuntu desktops has a built in method of enabling Canonical Live Patch service.
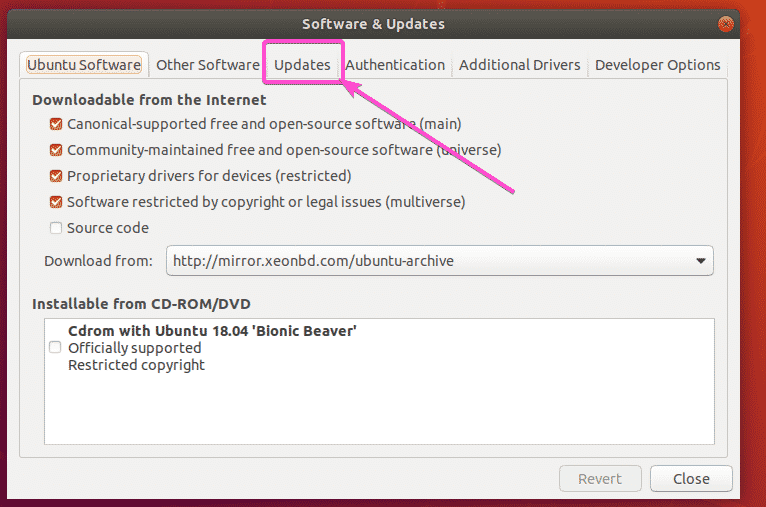
First, find and start Softwares & Updates app from the Application Menu of your Ubuntu Desktop.

Software & Updates app should start. Now go to the Updates tab.
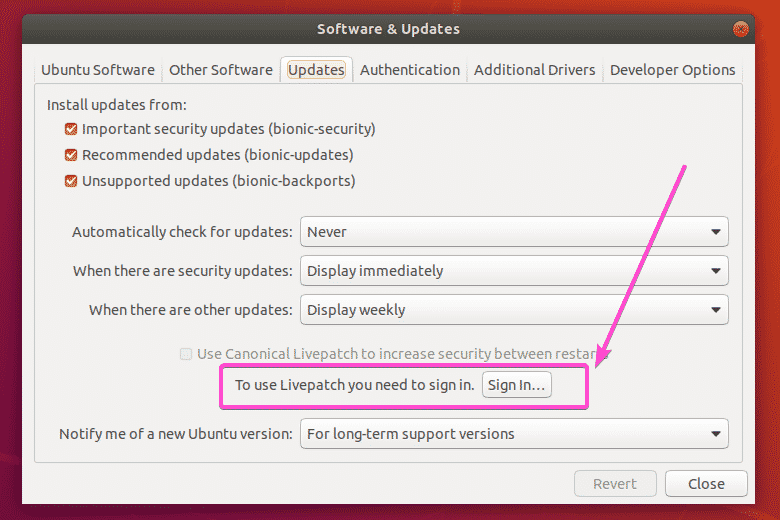
Now click on Sign In… as marked in the screenshot below.
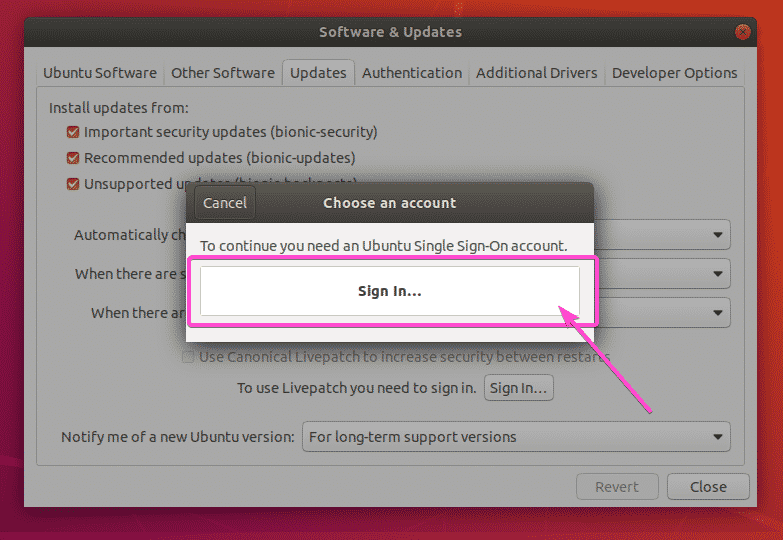
Now click on Sign In…
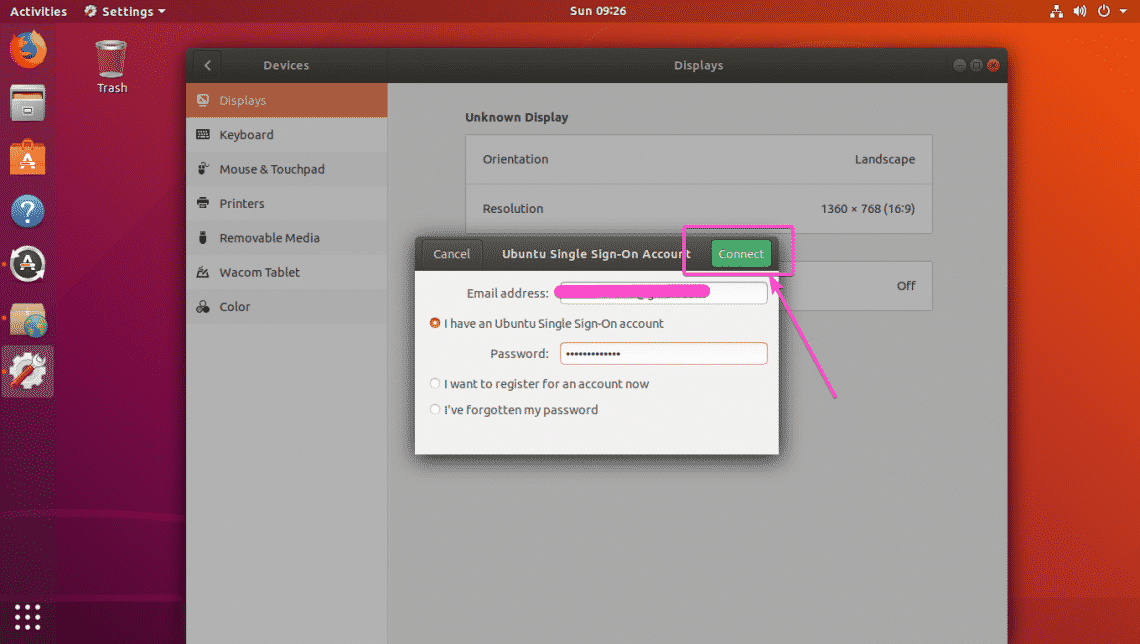
Now, type in your email and password and click on Connect to log in to your Ubuntu One account.
Now, type in your password and click on Authenticate.

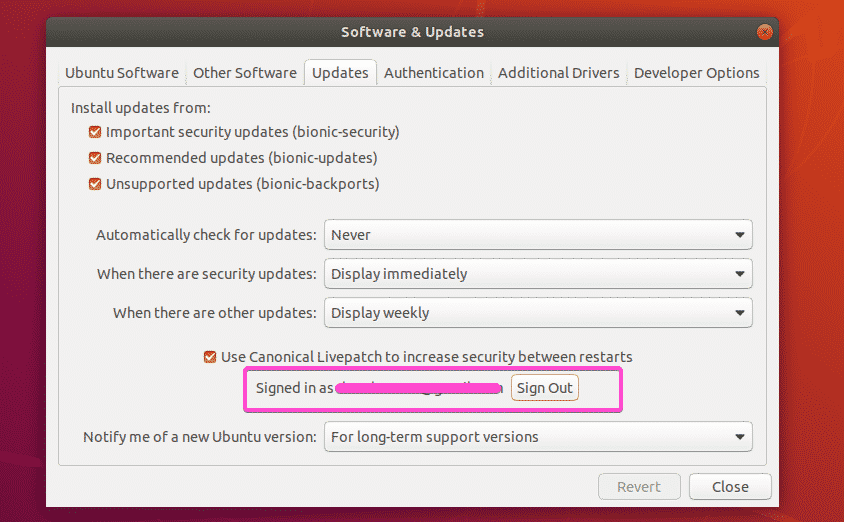
Once you’re logged in to your Ubuntu One account, it should show up in Software & Updates app. That’s it, Canonical Live Patch service should be enabled on your Ubuntu desktop.
Now that Canonical Live Patch service is enabled, you will automatically get all the critical kernel updates applied to your Ubuntu desktops and servers without needing to restart.
So that’s how you enable or use the Canonical Live Patch service on your Ubuntu desktops and servers. Thanks for reading this article.
