In this article we will be setting up a virtual penetration testing machine on the cloud, as well as setting up remote access to it to perform penetration testing on the go. If you want to learn how to set up a Pentesting Lab on AWS, you can check out Packt’s free learning library.
The Kali Linux AMI
AWS provides a fascinating feature that allows for the rapid deployment of Virtual Machines (VMs) on the Amazon Cloud—Amazon Machine Images (AMIs). These act as templates and allow one to quickly set up a new VM on AWS without going through the unnecessary hassle of manually configuring hardware and software like on traditional VMs. However, the most useful feature here is that AMIs allow you to bypass the OS installation process entirely. As a result, the total amount of time needed to decide what OS is required and to get a fully functioning VM on the cloud is reduced to a few minutes—and a few clicks.
The Kali Linux AMI was added to the AWS store pretty recently, and we shall leverage it to quickly set up our Kali VM on the Amazon Cloud. Setting up a Kali instance using the ready-made AMI is pretty simple—we start by accessing the Kali Linux AMI from the AWS Marketplace:
The previous screenshot shows the following information:
- The version of the AMI that we are using (2018.1)
- The Typical Total Price for running this in a default instance
- Overview and details of the AMI
It is useful to note that the default recommended instance size for Kali Linux is t2.medium, as we can see under pricing information:
Further down the page, we can see that the size of the t2.medium instance consists of two CPU virtual cores and 4GiB RAM, which is more than enough for our setup:
Once we have confirmed that we’re setting up the image according to our requirements, we can go ahead and click on the Continue to Subscribe option to proceed with our instance.
Configuring the Kali Linux instance
In the previous section, we confirmed the AMI we are going to use along with the specifications of the machine we will be using to launch our Kali machine. Once that has been selected it is time to launch our machine.
This brings us to the Launch on EC2 page. This contains some options that need to be set:
- The version of the AMI that we will use: It is usually recommended to use the latest version of the AMI that is available in the marketplace. Often, this isn’t the one that is selected by default for Kali Linux. At the time of writing, the latest version is 2018.1, and the build date is February 2018, as can be seen here:

Note
Since 2019.1 is released now you need to download the latest version of Kali linux
- The region where we will be deploying the instance: For setting Up a Pentesting Lab on AWS, we need to set the region to the data center that is geographically closest to the current location.
- The EC2 instance size:This was already verified in the previous step. We will be looking at various instance types and sizes in greater depth in later sections of this book.
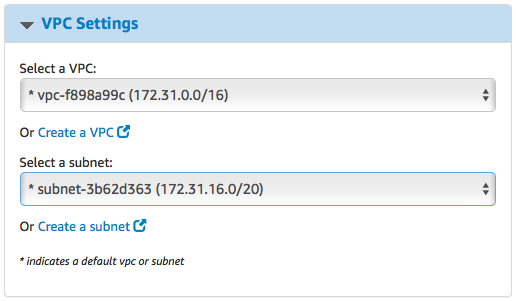
- VPC Settings:The VPC and subnet settings need to be set to use the same VPC that we used to set up the penetration testing. This will put our hacking box on the same network as the vulnerable machines that we set up earlier. The setting should match whatever was configured in the previous chapter:
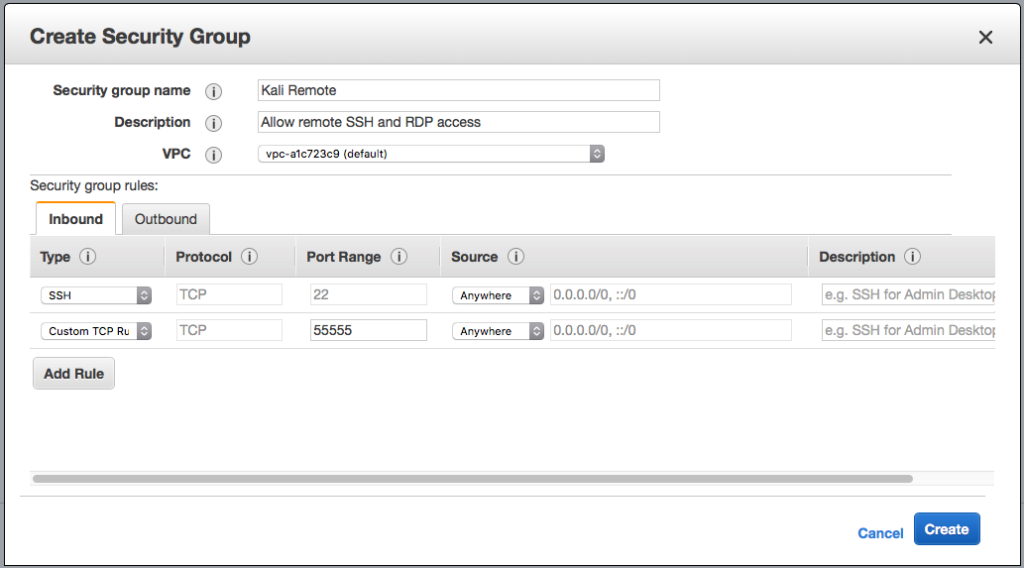
- Security group: Previously, we set up the Security Group in such a way that unauthorized outsiders would not have access to the instances. However, in this case, we need to allow remote access to our Kali instance. Hence, we need to forward the SSH and the Guacamole remote access port to a new Security Group:
- Key pair: We can use the same key pair that was created during the setup of the lab environment. With these settings in place, we are good to go and can spin up the instance by clicking on Launch with1-click:
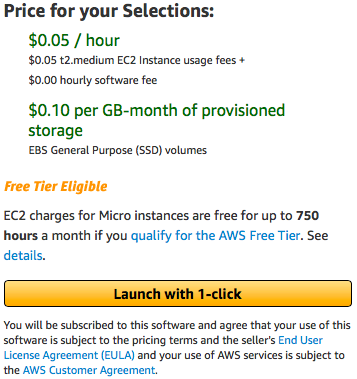 AWS will then launch the Kali machine and assign it a public IP. However, we need to be able to access this machine. Next, let us see how we can use OpenSSH for accessing a Kali Machine.
Configuring OpenSSH for remote SSH access
AWS already sets a default form of SSH access for their Kali AMI with an ec2-user account using a public key. However, this isn’t convenient for access via a mobile device. For users who want to conveniently SSH into their Kali instances from mobile applications directly with root privileges, the following section walks through the process. It should be noted, however, that using a limited user account with PKI authentication is the most secure way to connect over SSH, and using a root account with a password is not recommended if securing the instance is a priority.
Setting root and user passwords
The very first step of configuring root SSH on a Kali Linux instance is to set the root password. The root account usually doesn’t have a password set for ec2 instances that are using an ec2-user account that has sudo privileges. However, since we are setting up SSH access from mobile SSH applications, this needs to be set. It should be noted, however, that this comes with a reduction in the security stance of the Kali instance.
Changing the root password is as simple as running sudo passwd on the SSH terminal:
Similarly, the password of the current user can also be changed by running sudo passwd ec2-user over SSH:
This will be helpful in SSH-ing as ec2-user from an SSH client application that doesn’t support authentication keys. However, another step remains before we can SSH into the Kali instance as root.
Enabling root and password authentication on SSH
As an enhanced security measure, OpenSSH server comes with root login disabled by default. Enabling this is a straightforward process and involves editing a configuration file, /etc/ssh/sshd_config:
The critical parts of this are the two entries:
- PermitRootLogin: This can be set to yesif you want to log in as root
- PasswordAuthentication: This needs to be set to yesinstead of the default no to log in using passwords.
Once you are done performing the changes, you will need to restart the ssh service:
With that, our Kali Machine on the cloud is up and running and can be accessed over SSH using a password. However, SSH only gives you a command line interface.
To further know how to set up a remote desktop service to get GUI access to our Kali Machine, you can check out the book, Hands-On AWS Penetration Testing with Kali Linux.
To summarize, in this post, we learnt to set up a virtual penetration testing machine on the cloud. We also set up remote access to it to perform penetration testing on the go. To know more about how to efficiently perform penetration testing techniques on your public cloud instances, check out the book, Hands-On AWS Penetration Testing with Kali Linux by Packt Publishing.
