PyTorch has few big advantages as a computation package, such as:
- It is possible to build computation graphs as we go. This means that it is not necessary to know in advance about the memory requirements of the graph. We can freely create a neural network and evaluate it during runtime.
- Easy to Python API which is easily integratable
- Backed by Facebook, so the community support is very strong
- Provides multi-GPU support natively
PyTorch is mainly embraced by the Data Science community due to its capability to conveniently define neural networks. Let’s see this computational package in action in this lesson.
Installing PyTorch
Just a note before starting, you can use a virtual environment for this lesson which we can be made with the following command:
source pytorch/bin/activate
Once the virtual environment is active, you can install PyTorch library within the virtual env so that examples we create next can be executed:
We will make use of Anaconda and Jupyter in this lesson. If you want to install it on your machine, look at the lesson which describes “How to Install Anaconda Python on Ubuntu 18.04 LTS” and share your feedback if you face any issues. To install PyTorch with Anaconda, use the following command in the terminal from Anaconda:
We see something like this when we execute the above command:
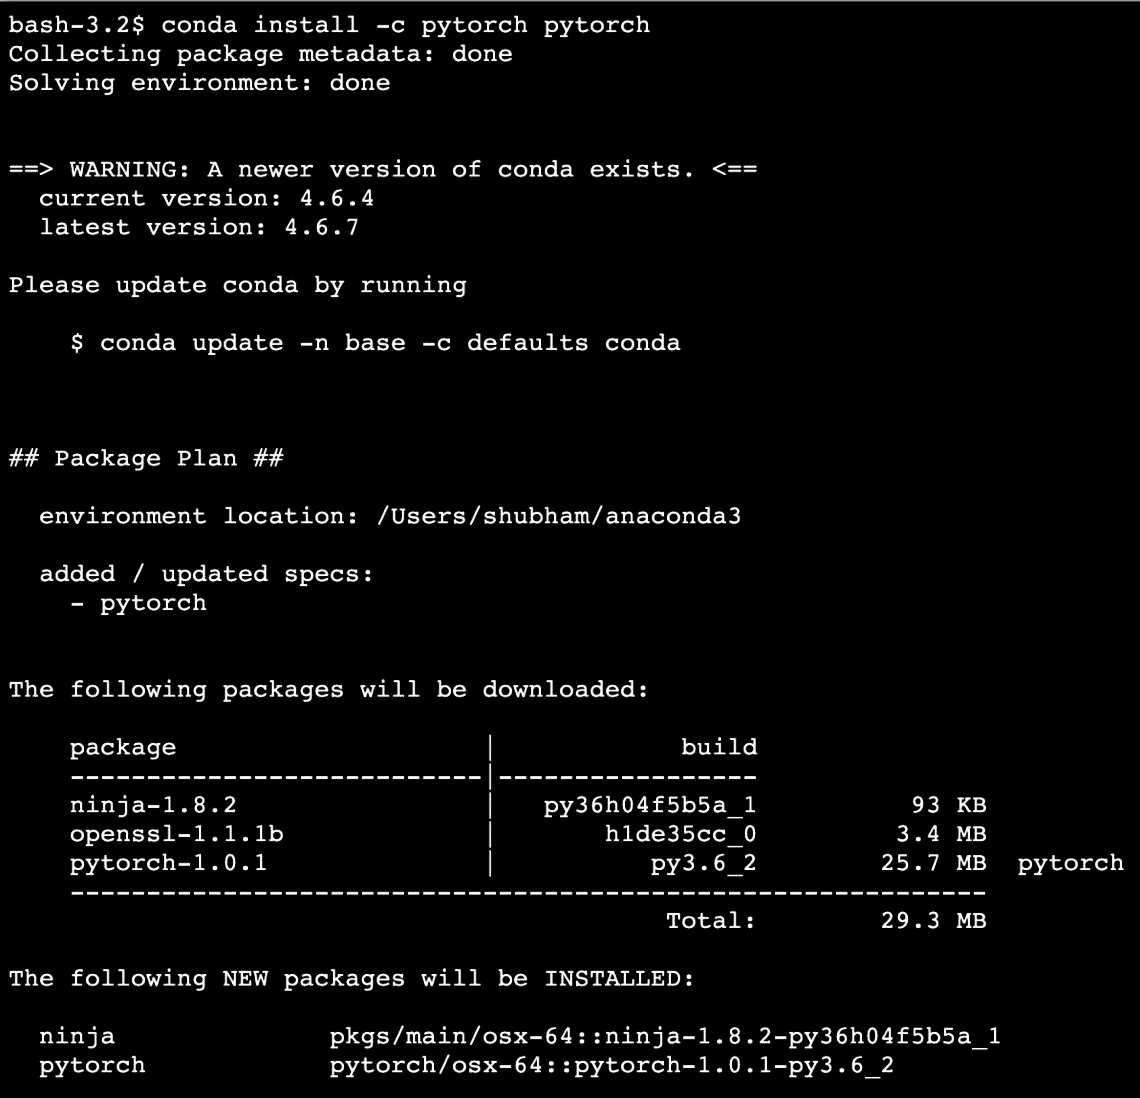
Once all of the packages needed are installed and done, we can get started with using the PyTorch library with the following import statement:
Let’s get started with basic PyTorch examples now that we have the prerequisites packages installed.
Getting Started with PyTorch
As we know that neural networks can be fundamentally structured as Tensors and PyTorch is built around tensors, there tends to be significant boost in performance. We will get started with PyTorch by first examining the type of Tensors it provides. To get started with this, import the required packages:
Next, we can define an uninitialized Tensor with a defined size:
print("Array Type: {}".format(x.type)) # type
print("Array Shape: {}".format(x.shape)) # shape
print(x)
We see something like this when we execute the above script:
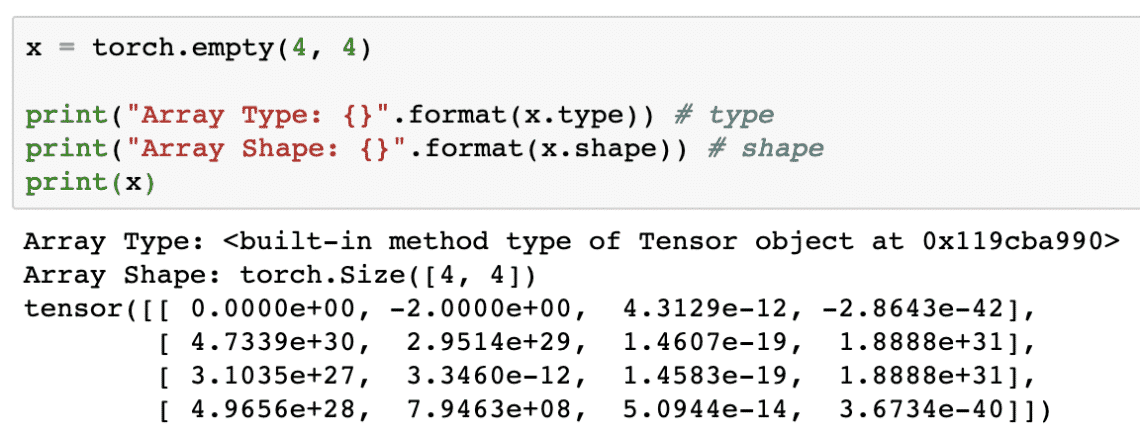
We just made an uninitialized Tensor with a defined size in the above script. To reiterate from our Tensorflow lesson, tensors can be termed as n-dimensional array which allows us to represent data in a complex dimensions.
Let’s run another example where we initialise a Torched tensor with random values:
print(random_tensor)
When we run the above code, we will see a random tensor object printed:
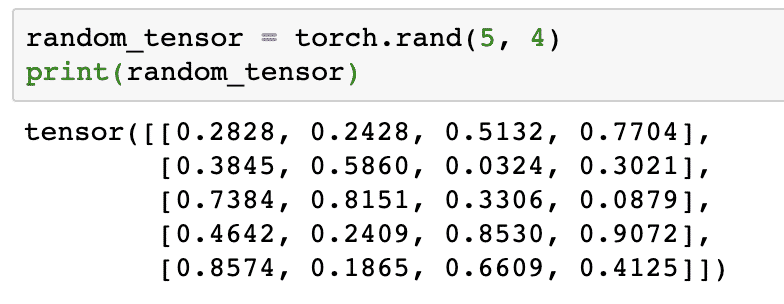
Please note that the output for above random Tensor can be different for you because, well, it is random !
Conversion between NumPy and PyTorch
NumPy and PyTorch are completely compatible with each other. That is why, it is easy to transform NumPy arrays into tensors and vice-versa. Apart from the ease API provides, it is probably easier to visualise the tensors in form of NumPy arrays instead of Tensors, or just call it my love for NumPy!
For an example, we will import NumPy into our script and define a simple random array:
array = np.random.rand(4, 3)
transformed_tensor = torch.from_numpy(array)
print("{}n".format(transformed_tensor))
When we run the above code, we will see the transformed tensor object printed:
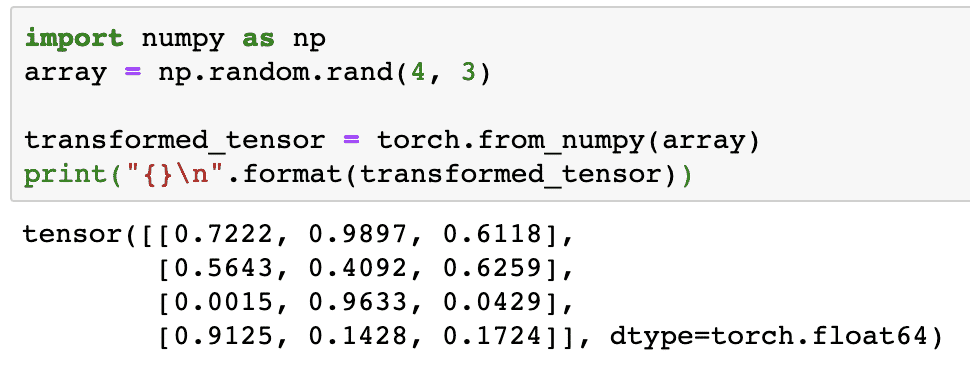
Now, let’s try to convert this tensor back to a NumPy array:
print("{} {}n".format(type(numpy_arr), numpy_arr))
When we run the above code, we will see the transformed NumPy array printed:

If we look closely, even the precision of conversion is maintained while converting the array to a tensor and then converting it back to a NumPy array.
Tensor Operations
Before we begin our discussion around neural networks, we should know the operations that can be performed on Tensors while training neural networks. We will make extensive use of NumPy module as well.
Slicing a Tensor
We have already looked how to make a new Tensor, let’s make one now and slice it:
print(vector[1:4])
Above code snippet will provide us with the following output:
We can ignore the last index:
And we will get back what is expected with a Python list as well:
Making a Floating Tensor
Let’s now make a floating Tensor:
print(float_vector)
Above code snippet will provide us with the following output:
Type of this Tensor will be:
Gives back:
Arithmetic Operations on Tensors
We can add two tensors just like any mathematical elements, like:
tensor_2 = torch.tensor([3, 4, 5])
tensor_1 + tensor_2
The above code snippet will give us:

We can multiply a tensor with a scalar:
This will give us:

We can perform a dot product between two tensors as well:
d_product
Above code snippet will provide us with the following output:

In next section, we will be looking at higher dimension of Tensors and matrices.
Matrix Multiplication
In this section, we will see how we can define metrics as tensors and multiply them, just like we used to do in high school mathematics.
We will define a matrix to start with:
In above code snippet, we defined a matrix with the tensor function and then specified with view function that it should be made as a 2 dimensional tensor with 2 rows and 3 columns. We can provide more arguments to the view function to specify more dimensions. Just note that:
When we visualise the above 2-dimensional tensor, we will see the following matrix:

We will define another identical matrix with a different shape:
We can finally perform the multiplication now:
Above code snippet will provide us with the following output:

Linear Regression with PyTorch
Linear regression is a machine learning algorithm based on supervised learning techniques to perform regression analysis on independent and a dependent variable. Confused already? Let us define Linear Regression in simple words.
Linear regression is a technique to find out relationship between two variables and predict how much change in the independent variable causes how much change in the dependent variable. For example, linear regression algorithm can be applied to find out how much price increases for a house when its area is increased by a certain value. Or, how much horsepower in a car is present based on its engine weight. The 2nd example might sound weird but you can always try weird things and who knows that you’re able to establish a relationship between these parameters with Linear Regression!
The Linear regression technique usually uses the equation of a line to represent relationship between the dependent variable (y) and the independent variable (x):
In the above equation:
- m = slope of curve
- c = bias (point that intersect y-axis)
Now that we have an equation representing the relationship of our use-case, we will try to set up some sample data along with a plot visualisation. Here is the sample data for house prices and their sizes:
house_price_np = np.array(house_prices_array, dtype=np.float32)
house_price_np = house_price_np.reshape(–1,1)
house_price_tensor = Variable(torch.from_numpy(house_price_np))
house_size = [ 7.5, 7, 6.5, 6.0, 5.5, 5.0, 4.5]
house_size_np = np.array(house_size, dtype=np.float32)
house_size_np = house_size_np.reshape(–1, 1)
house_size_tensor = Variable(torch.from_numpy(house_size_np))
# lets visualize our data
import matplotlib.pyplot as plt
plt.scatter(house_prices_array, house_size_np)
plt.xlabel("House Price $")
plt.ylabel("House Sizes")
plt.title("House Price $ VS House Size")
plt
Note that we made use of Matplotlib which is an excellent visualisation library. Read more about it in the Matplotlib Tutorial. We will see the following graph plot once we run the above code snippet:
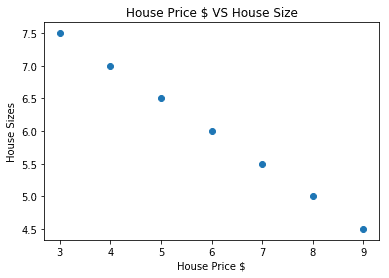
When we make a line through the points, it might not be perfect but it is still enough to the kind of relationship the variables have. Now that we have collected and visualised our data, we want to make a prediction that what will be the size of the house if it was sold for $650,000.
The aim of applying linear regression is to find a line which fits to our data with minimum error. Here are the steps we will perform to apply the linear regression algorithm to our data:
- Construct a class for Linear Regression
- Define the model from this Linear Regression class
- Calculate the MSE (Mean squared error)
- Perform Optimization to reduce the error (SGD i.e. stochastic gradient descent)
- Perform Backpropagation
- Finally, make the prediction
Let’s start applying above steps with correct imports:
from torch.autograd import Variable
import torch.nn as nn
Next, we can define our Linear Regression class which inherits from PyTorch neural network Module:
def __init__(self,input_size,output_size):
# super function inherits from nn.Module so that we can access everything from nn.Module
super(LinearRegression,self).__init__()
# Linear function
self.linear = nn.Linear(input_dim,output_dim)
def forward(self,x):
return self.linear(x)
Now that we are ready with the class, let’s define our model with input and output size of 1:
output_dim = 1
model = LinearRegression(input_dim, output_dim)
We can define the MSE as:
We are ready to define the optimization which can be performed on the model prediction for best performance:
learning_rate = 0.02
optimizer = torch.optim.SGD(model.parameters(), lr=learning_rate)
We can finally make a plot for the loss function on our model:
iteration_number = 1001
for iteration in range(iteration_number):
# perform optimization with zero gradient
optimizer.zero_grad()
results = model(house_price_tensor)
loss = mse(results, house_size_tensor)
# calculate derivative by stepping backward
loss.backward()
# Updating parameters
optimizer.step()
# store loss
loss_list.append(loss.data)
# print loss
if(iteration % 50 == 0):
print(‘epoch {}, loss {}’.format(iteration, loss.data))
plt.plot(range(iteration_number),loss_list)
plt.xlabel("Number of Iterations")
plt.ylabel("Loss")
plt
We performed optimizations multiple times on the loss function and try to visualise how much loss increased or decreased. Here is the plot which is the output:
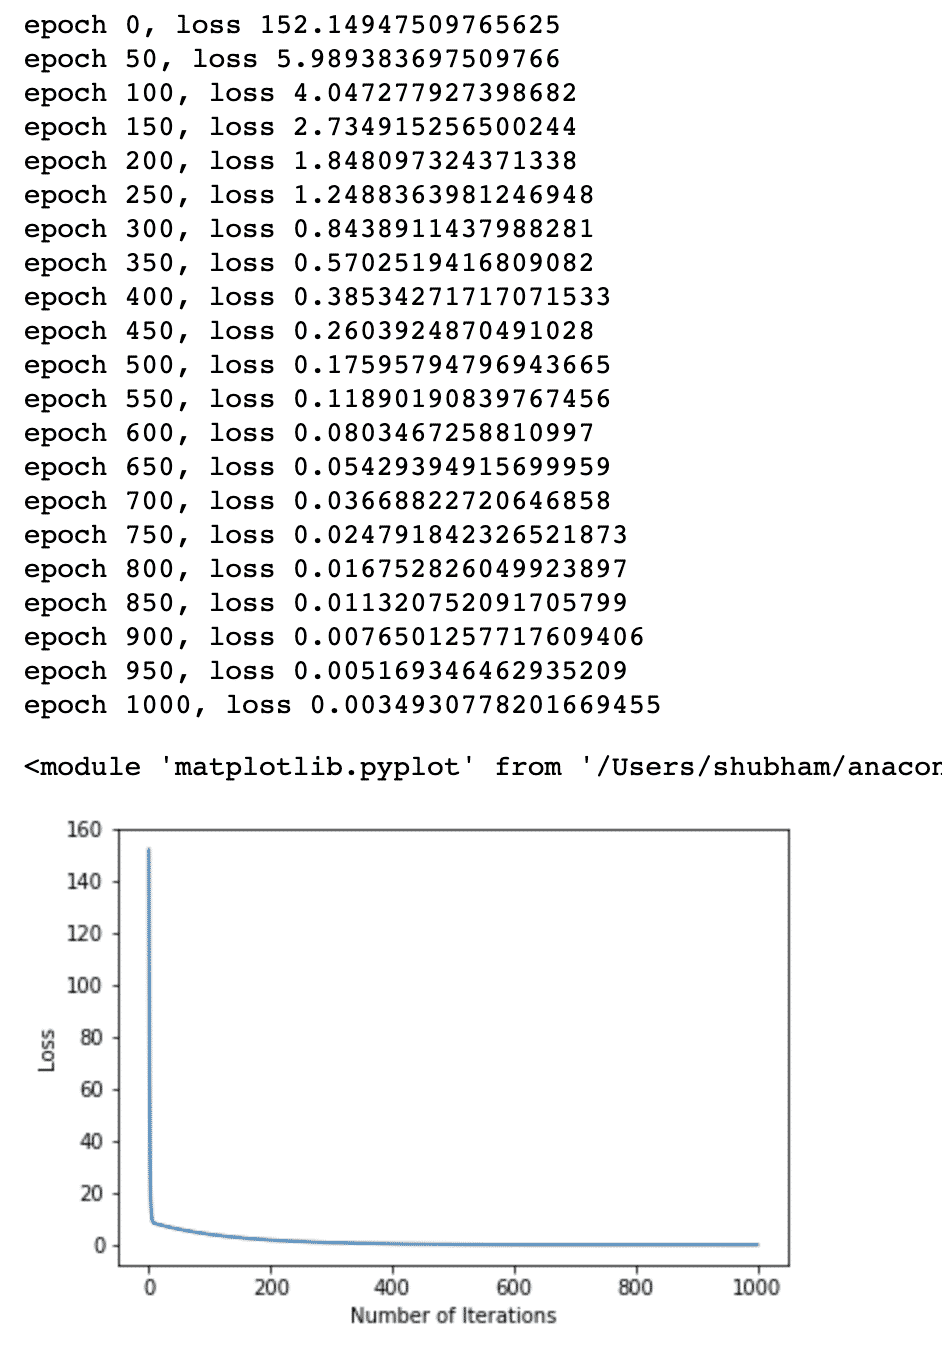
We see that as the number of iterations are higher, the loss tends to zero. This means that we are ready to make our prediction and plot it:
predicted = model(house_price_tensor).data.numpy()
plt.scatter(house_prices_array, house_size, label = "original data",color ="red")
plt.scatter(house_prices_array, predicted, label = "predicted data",color ="blue")
plt.legend()
plt.xlabel("House Price $")
plt.ylabel("House Size")
plt.title("Original vs Predicted values")
plt.show()
Here is the plot which will help us to make the prediction:

Conclusion
In this lesson, we looked at an excellent computation package which allows us to make faster and efficient predictions and much more. PyTorch is popular because of the way it allows us to manage Neural networks with a fundamental way with Tensors.


