Prerequisites:
You must have NextCloud server installed or have access to a NextCloud account in order to be able to access it from Linux.
I have a NextCloud server running on a virtual machine on my computer. Here are the details of the NextCloud account that I will be using in this article for all the demonstration.
NextCloud Account Username = test
NextCloud Account Password = <very secret password> 😛
NextCloud Directory Path = nextcloud/remote.php/dav/files/USERNAME/
In this article, USERNAME is test. So, the NextCloud directory path should be nextcloud/remote.php/dav/files/test/
Make sure to replace USERNAME in the NextCloud directory path with your own username.
Accessing NextCloud Files from Nautilus on GNOME 3 Desktop Environment:
At the time of this writing, GNOME 3 desktop environment has the best NextCloud integration.
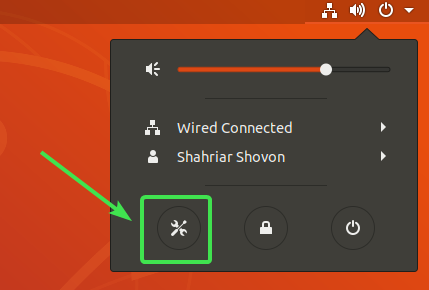
For GNOME 3 NextCloud integration, open the GNOME 3 Settings app.
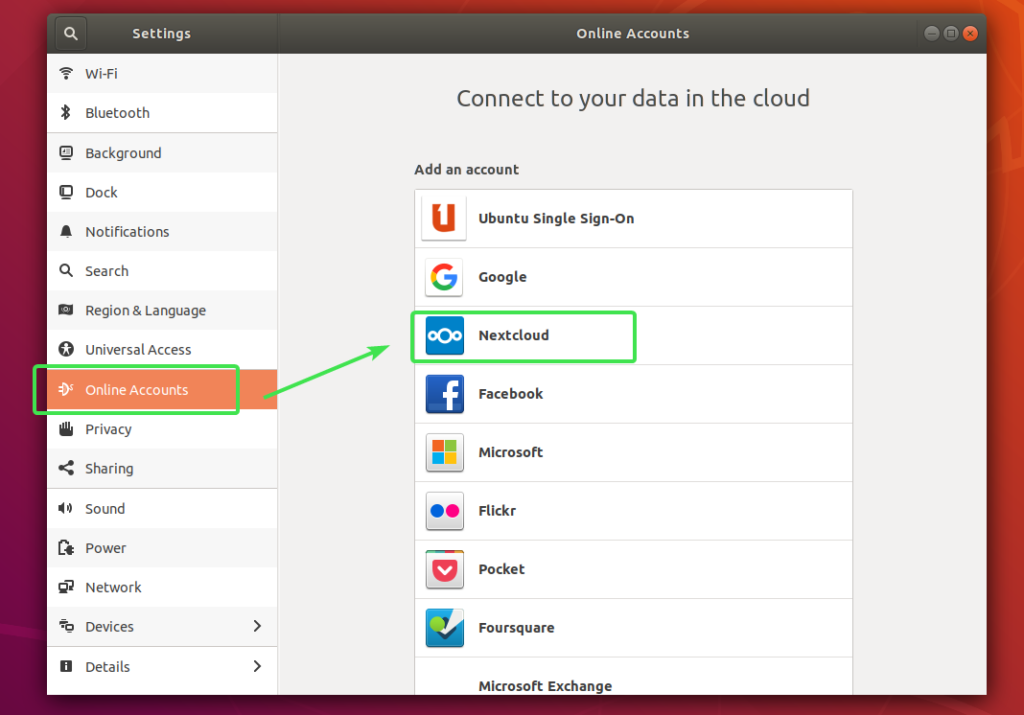
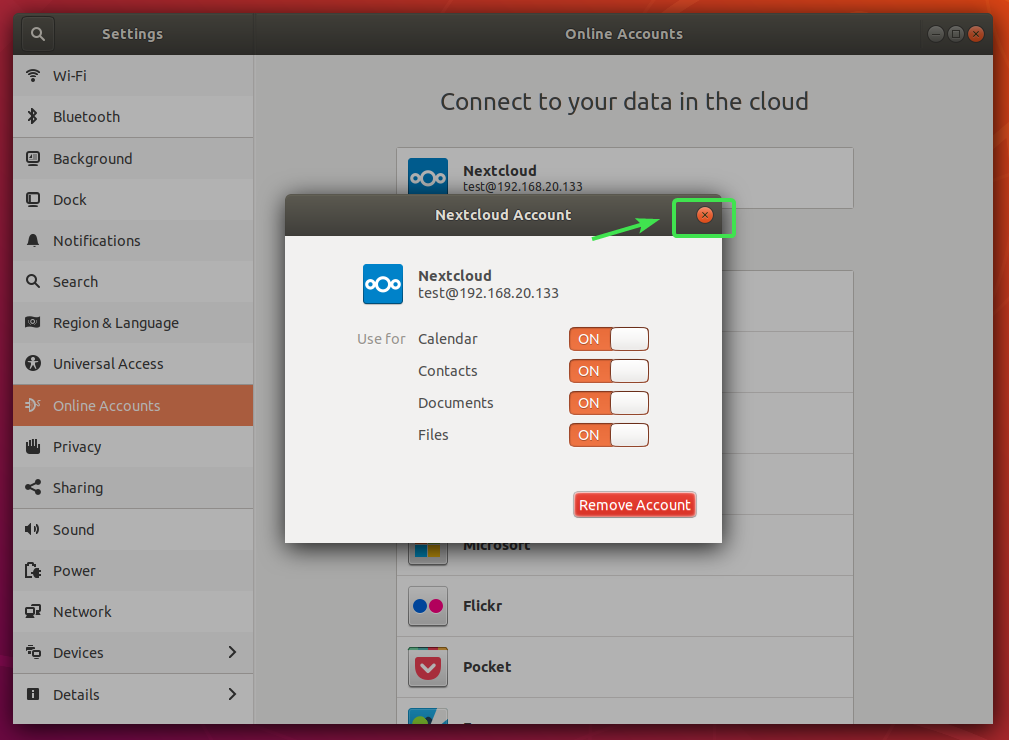
Then, go to Online Accounts and click on Nextcloud as shown in the screenshot below.
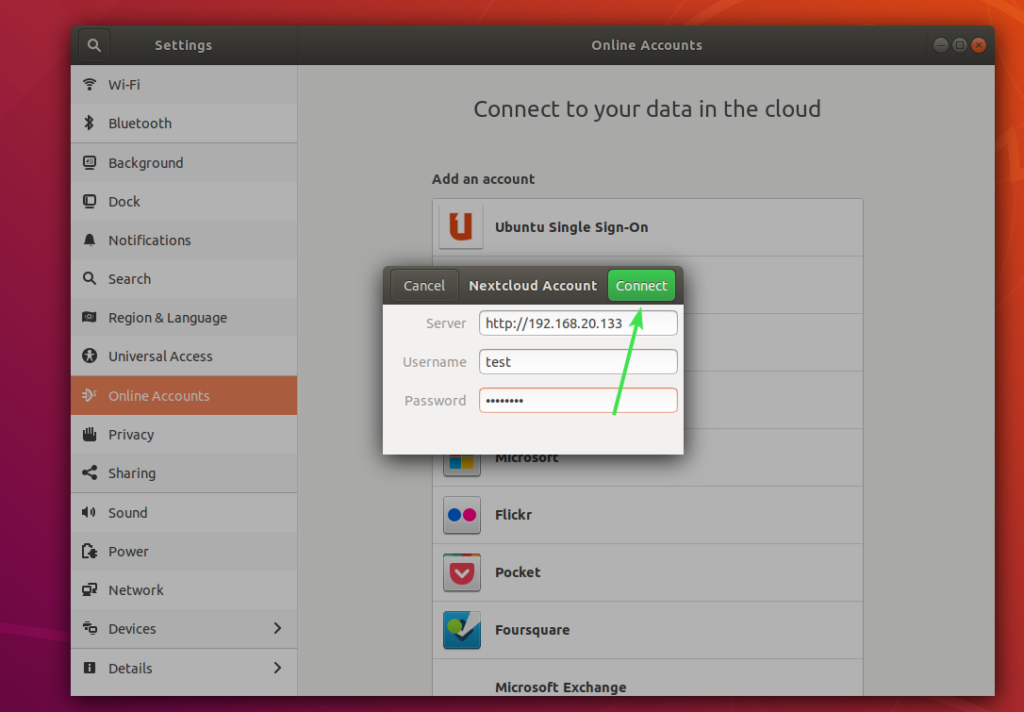
Now, type in your NextCloud account credentials and click on Connect.
You should be logged in. Now, close the Nextcloud Account window.
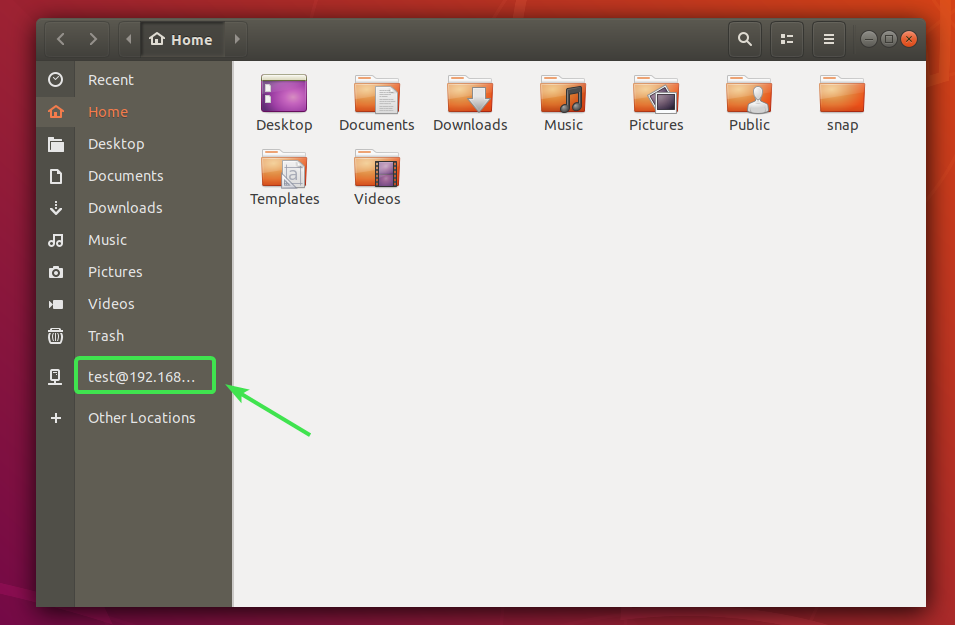
Now, open Nautilus file manager and you should see your NextCloud account in the side panel. Click on it.
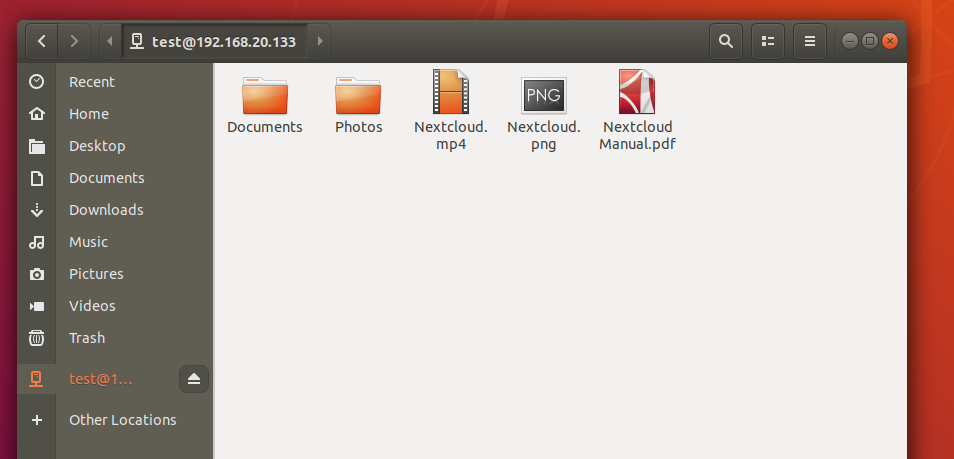
Your NextCloud files should be displayed.
Now, you can,
- copy your important files to and from your NextCloud account
- rename files from your NextCloud account
- delete files from your NextCloud account and many more.
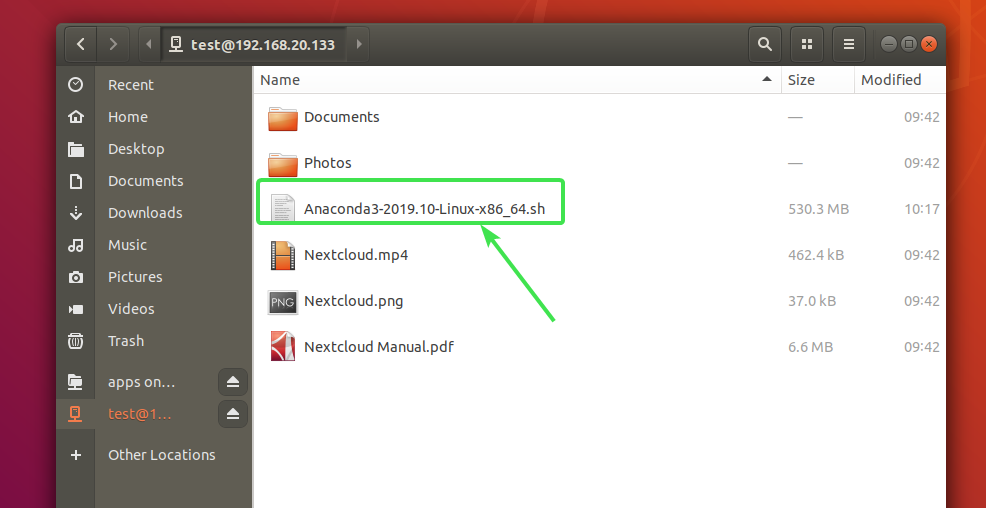
For testing purpose, I copied a big file to my NextCloud account and it worked just fine.
Accessing NextCloud Files from Nemo on Cinnamon Desktop Environment:
The Cinnamon Desktop Environment is based on GNOME 3. So, NextCloud integration on Cinnamon desktop environment is just as good as in GNOME 3 desktop environment.
For NextCloud integration, from the Cinnamon Menu, go to Preferences > Online Accounts.
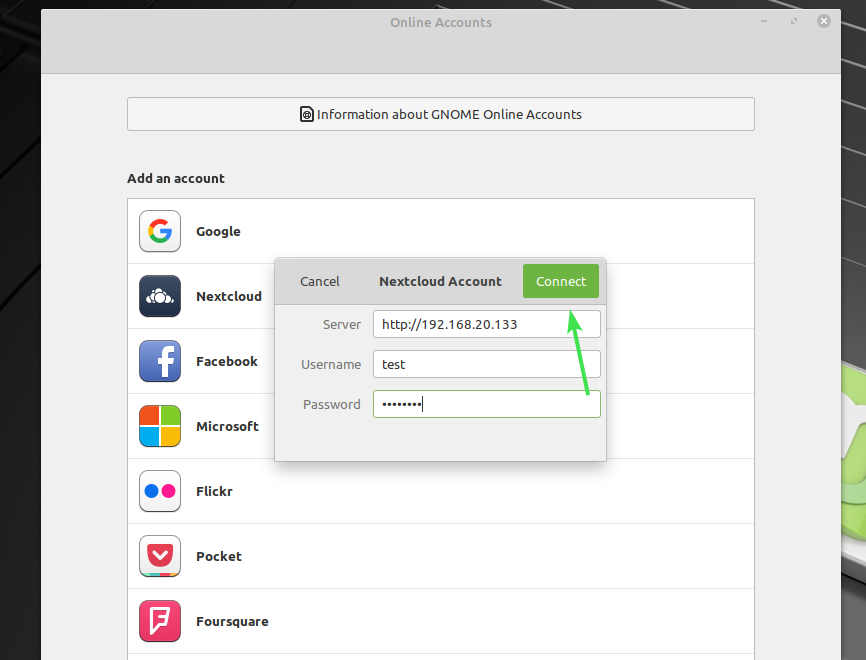
Now, click on Nextcloud.
Now, type in your NextCloud account details and click on Connect.
You should be logged in.
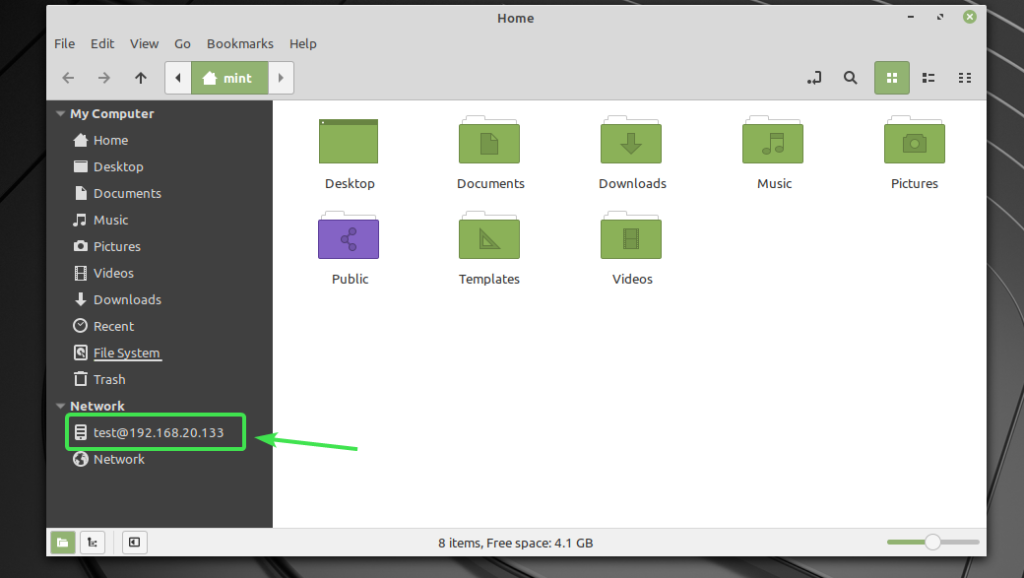
Now, your NextCloud account should be listed in the left side panel of Nemo file manager. Click on it.
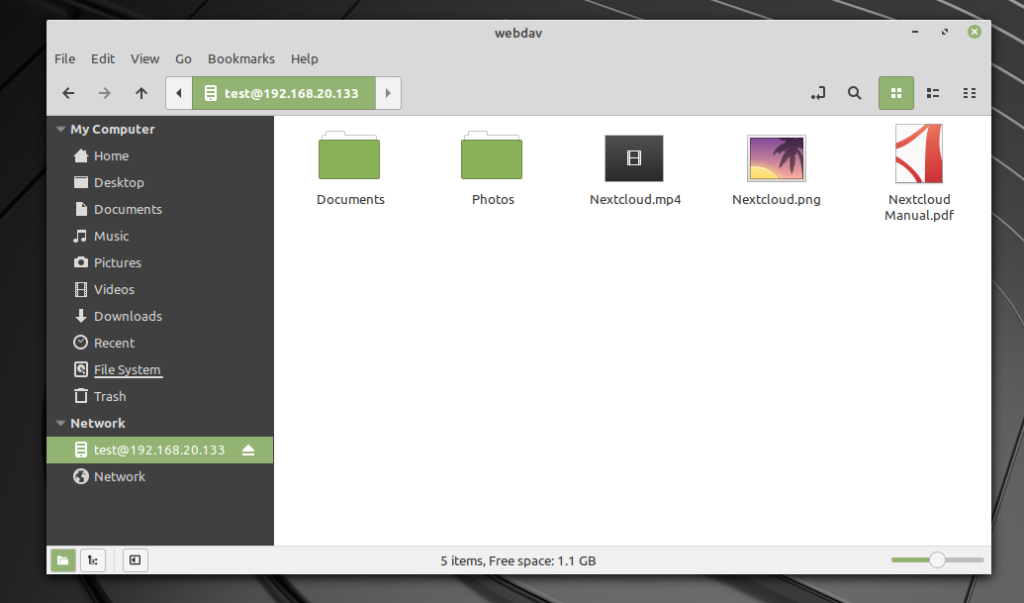
Your NextCloud account should be mounted and your files should be displayed. Now, you can use it any way you like.
Accessing NextCloud Files from Dolphin on KDE Plasma 5 Desktop Environment:
On KDE Plasma 5 Desktop Environment, you can access NextCloud using the default file manager Dolphin. But there is no native way to add NextCloud as an online account on KDE Plasma 5 desktop environment as in GNOME 3 and Cinnamon Desktop Environment.
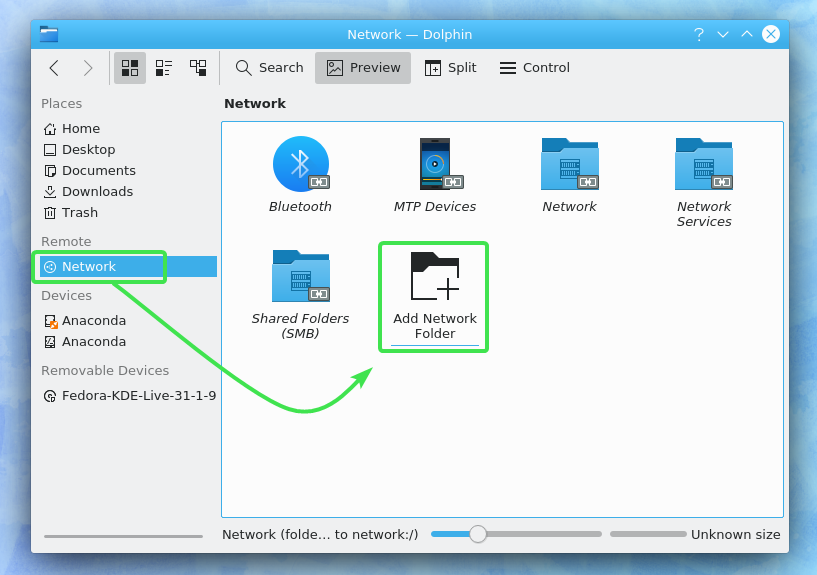
To access your NextCloud account files from Dolphin file manager, first open Dolphin file manager.
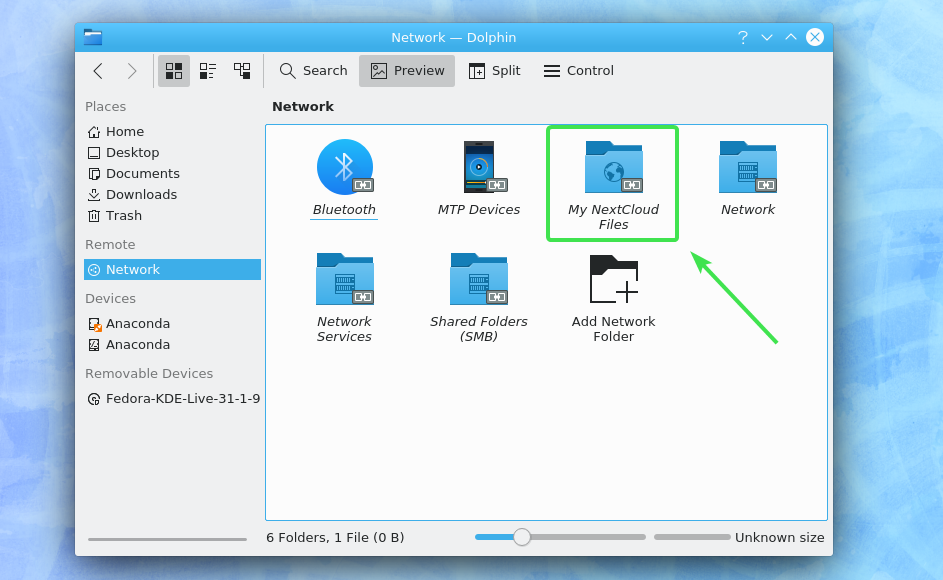
Then, from Network, double click on Add Network Folder icon.
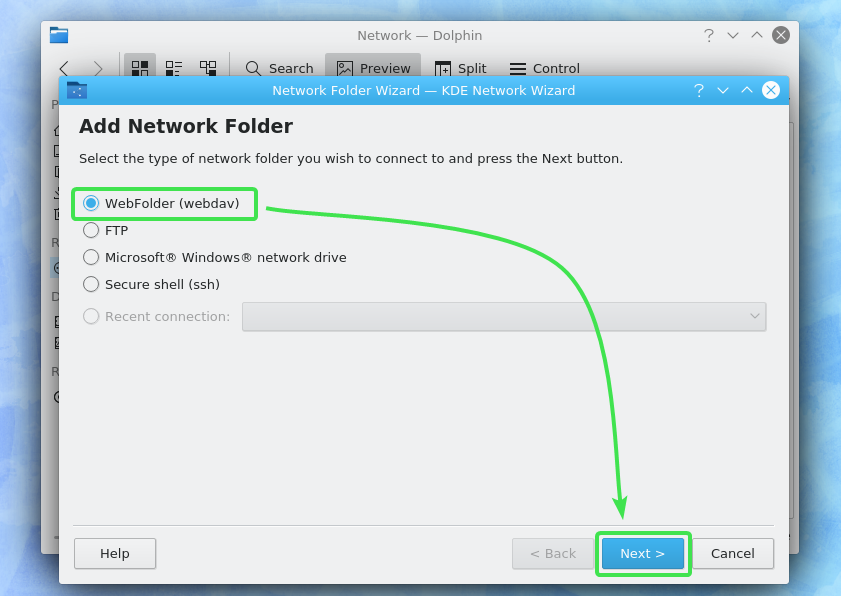
Now, select WebFolder (webdav) and click on Next.
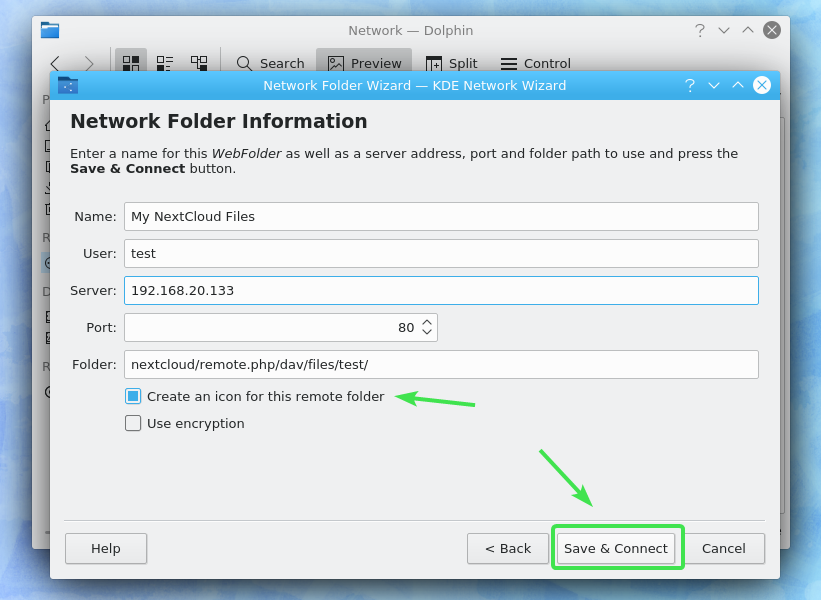
Now, type in a descriptive Name for the Network Folder, type in your NextCloud account details, check Create an icon for this remote folder checkbox and click on Save & Connect.
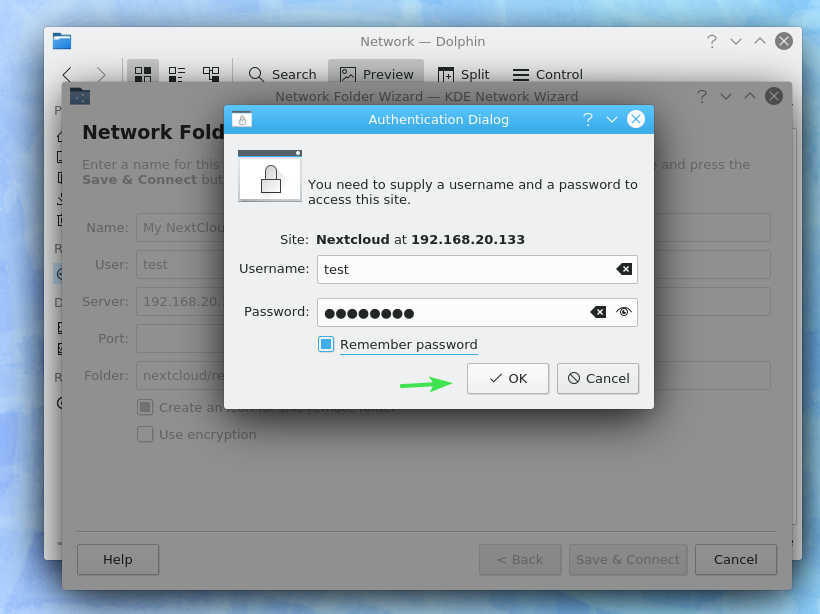
Now, type in your NextCloud account password and click on OK.
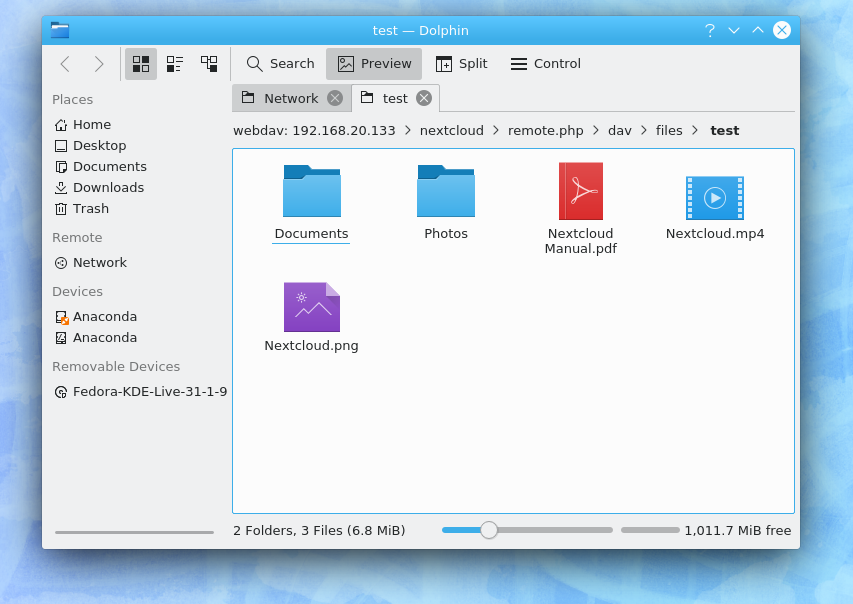
Dolphin should open your NextCloud account files. Now, you can use this Network folder any way you like.
From now on, you can find your NextCloud network folder from the Network section of the Dolphin file manager. Just double click on the network folder to access your NextCloud files anytime you want.
Mounting NextCloud Account from the Command Line:
To access NextCloud on Linux desktop environment (i.e Mate – uses Caja file manager, XFCE – uses Thunar file manager, LXDE – uses PacManFM file manager) where network mounting your NextCloud account is not possible natively as in GNOME 3, Cinnamon and KDE, you can mount your NextCloud account from the command line very easily and access your files from any file manager.
In order to mount and access your NextCloud account files, you must have davfs2 package installed on your computer. In this article, I will cover Ubuntu/Debian/Linux Mint distributions only.
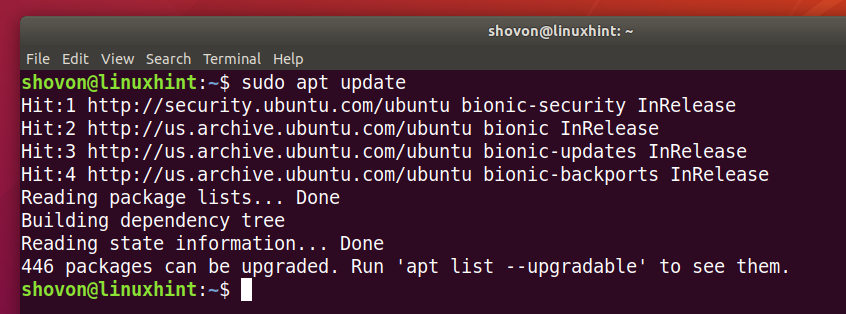
First, update the package repository cache with the following command:
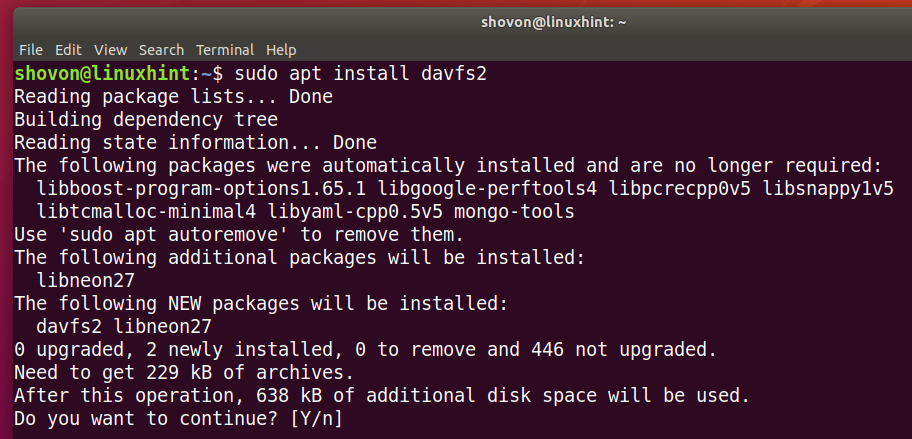
Now, install davfs2 with the following command:
Press Y and then press <Enter> to confirm the installation.
Select <Yes> and then press <Enter>.
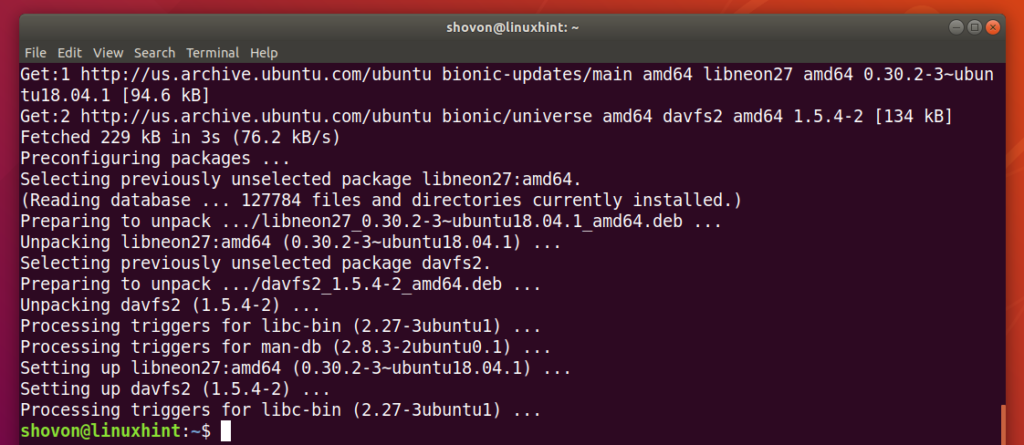
davfs2 should be installed.
Now, create 2 new directories ~/NextCloud and ~/.davfs2 in your HOME directory with the following command:
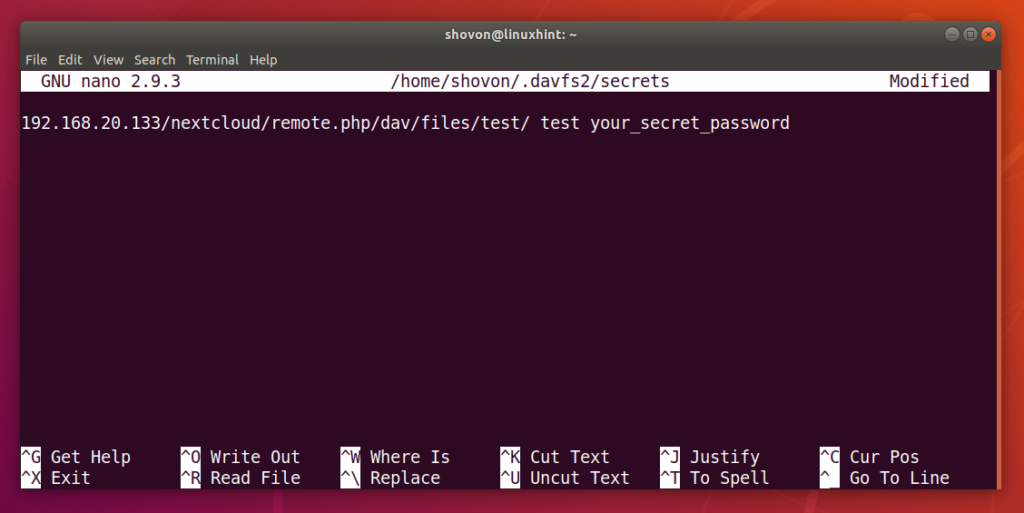
Now, create a new ~/.davfs2/secrets file as follows:
Now, type in the following line and save the ~/.davfs2/secrets file by pressing <Ctrl> + X followed by Y and <Enter>.
NEXTCLOUD_SERVER/nextcloud/remote.php/dav/files/USERNAME/ USERNAME PASSWORD
NOTE: Make necessary adjustments to the line above.
Now, allow only the file owner to read and write to the file ~/.davfs2/secrets as follows:
Now, reboot your computer for the changes to take effect.
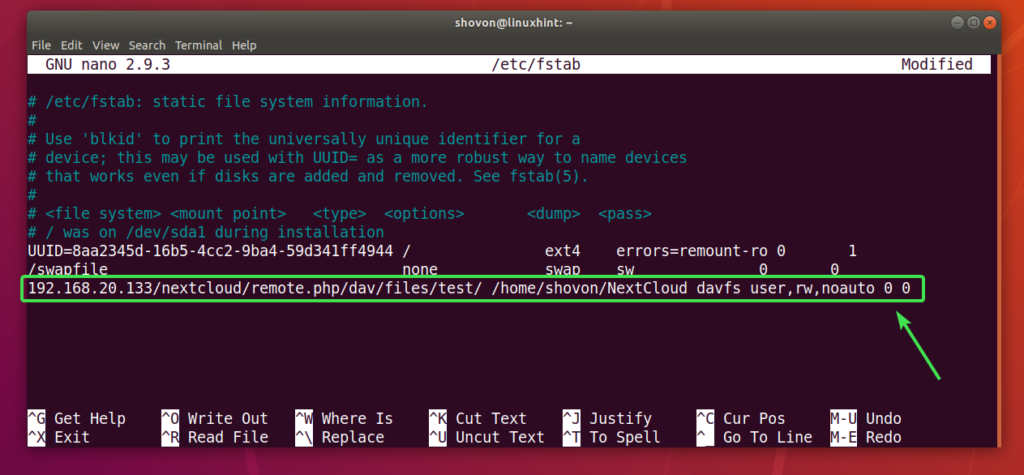
Once your computer boots, open /etc/fstab file with nano text editor as follows:
Now, type in the following line to the end of the /etc/fstab file and save the file.
NEXTCLOUD_SERVER/nextcloud/remote.php/dav/files/USERNAME/ /home/YOUR_LOGIN_USERNAME/NextCloud davfs user,rw,noauto 0 0
NOTE: Make necessary adjustments to the line above.
Now, you can mount your NextCloud account with the following command:
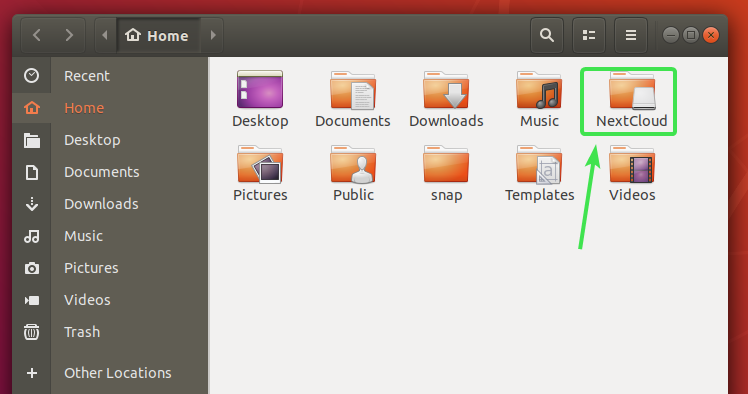
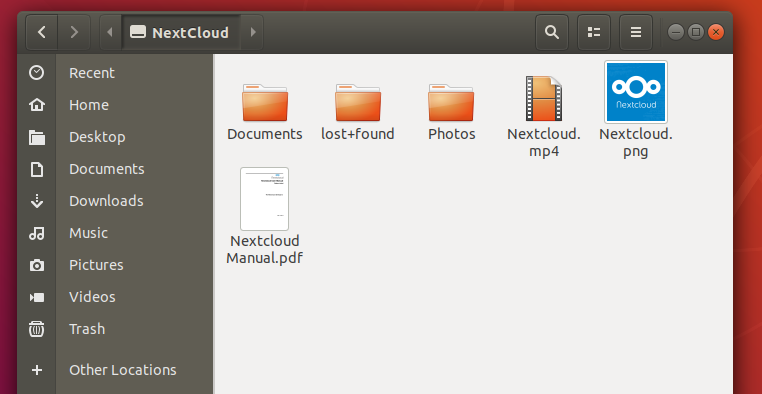
Now, you should be able to double click on the NextCloud directory in your HOME directory from any file manager and access your NextCloud account files.
As you can see, all my NextCloud files are there.
Once you’re done working with your NextCloud account, you can unmount it as follows:
So, that’s all for NextCloud integration on Linux. Thanks for reading this article.
