Installing OpenJDK:
OpenJDK (version 11) is available in the official package repository of Debian 10 Buster. So, you can install it very easily using the APT package manager.
First, update the APT package repository cache with the following command:

The APT package repository cache should be updated.

There are two OpenJDK packages in the official package repository of Debian 10. OpenJDK and OpenJDK headless.
OpenJDK comes with graphics programming libraries by default. But, OpenJDK headless is meant to run in the server where there is no graphical user interface, thus it does not come with any graphics programming libraries. It is lightweight as well.
To install OpenJDK, run the following command:

To install OpenJDK headless, run the following command:

Now, to confirm the installation, press Y and then press <Enter> to continue.
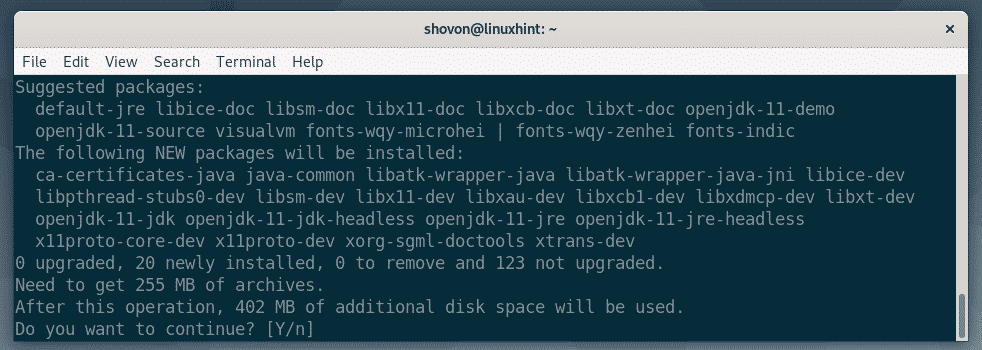
The APT package manager will download and install all the required packages. It will take a while to complete.
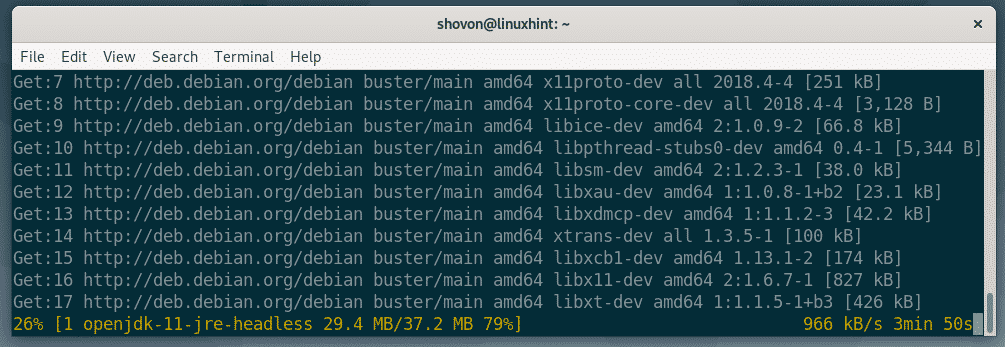
At this point, OpenJDK should be installed.

Now, check whether OpenJDK is working correctly with the following commands:
$ javac -version
As you can see, OpenJDK 11.0.4 is installed and it is working correctly.

Installing Oracle JDK:
If you want to install Oracle JDK, then all you have to do is download Oracle JDK and install it on Debian 10.
To download Oracle JDK, visit the official download page of Oracle JDK 12 (the latest version at the time of this writing). Once the page loads, click on Accept License Agreement to accept the Oracle Technology Network License Agreement.
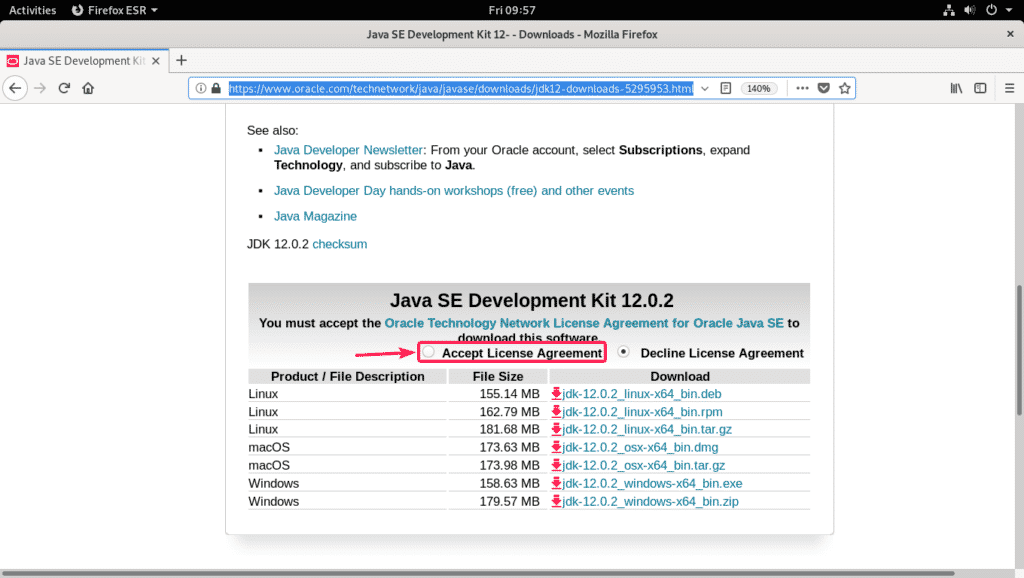
Now, click on the JDK deb download link as marked in the screenshot below.
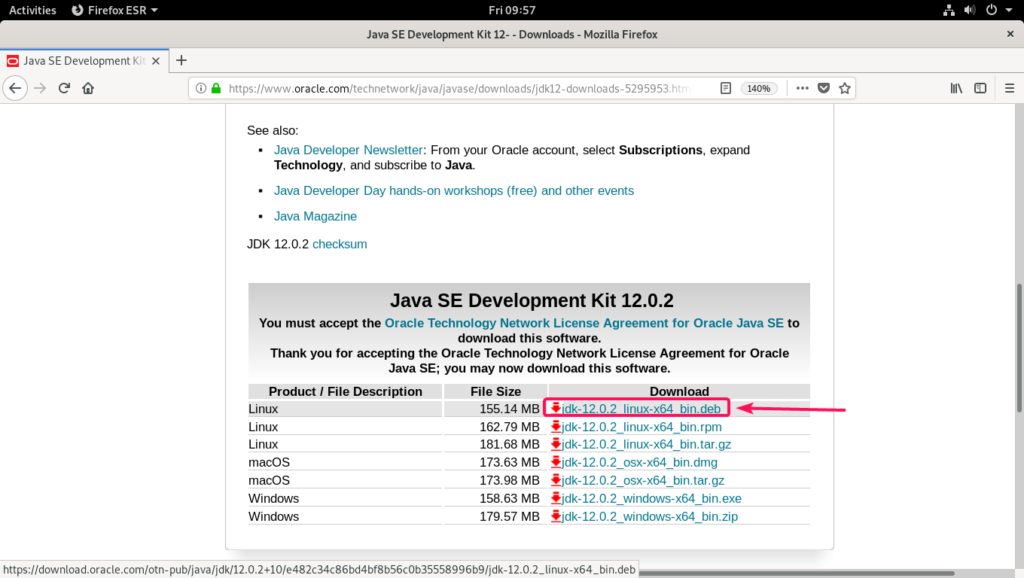
Your browser should prompt you to download the Oracle JDK deb file. Select Save File and click on OK.
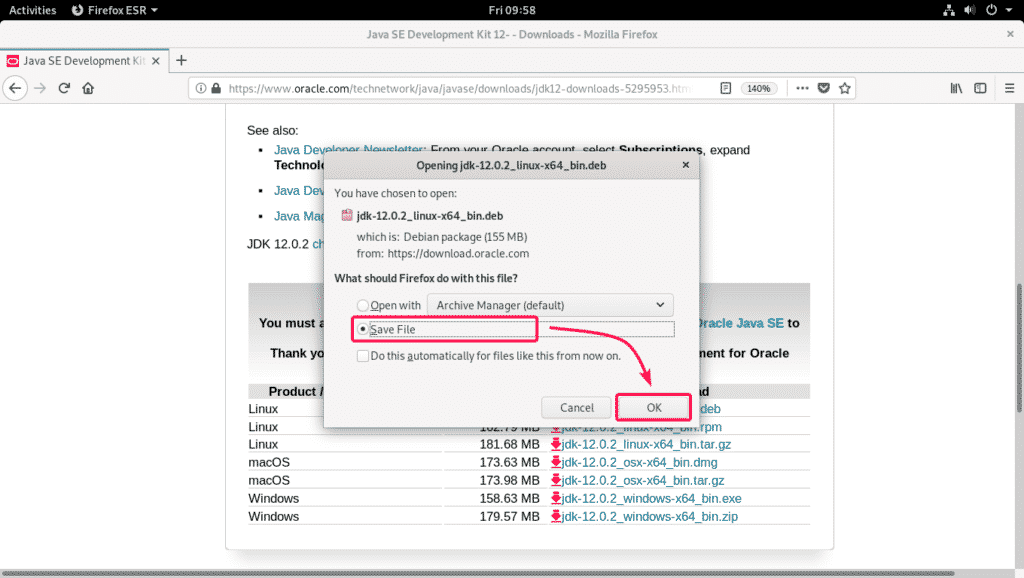
The download should start. It may take a while to complete.

Once the download is complete, navigate to the ~/Downloads directory as follows:

You should find the file (jdk-12.0.2_linux-x64_bin.deb) that you just downloaded.

Now, update the APT package repository cache as follows:

APT package repository cache should be updated.

Now, install the jdk-12.0.2_linux-x64_bin.deb package file with the following command:

The installation should start.

At this point, the installation should be complete.
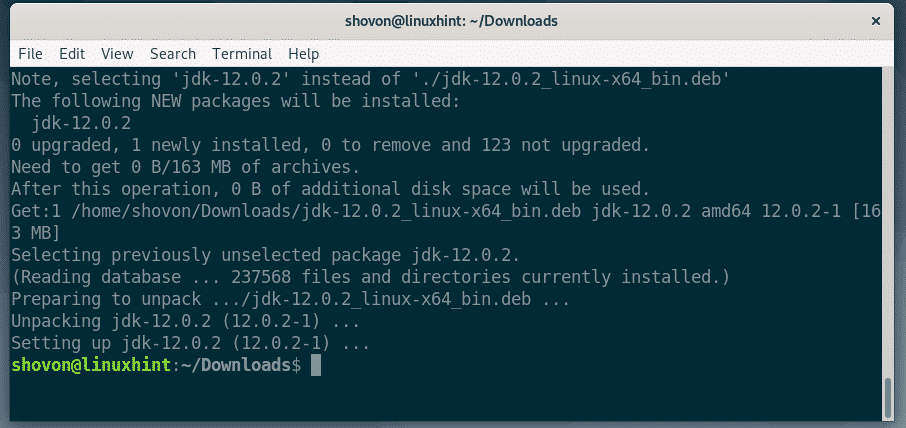
Now, we have to find the path where the javac binary is installed. The DEB package file (jdk-12.0.2_linux-x64_bin.deb) name started with jdk-12.0.2. So, this is the package name.
To find the location of the javac binary file, run the following command:
As you can see, the path is /usr/lib/jvm/jdk-12.0.2/bin/javac. So, the JAVA HOME directory is /usr/lib/jvm/jdk-12.0.2 (Remember that).

The Oracle JDK DEB package does not add the JDK binaries to the PATH. So, we have to manually update the PATH environment variable of Debian 10.
To do that, create a shell script jdk12.sh in /etc/profile.d directory with the following command:

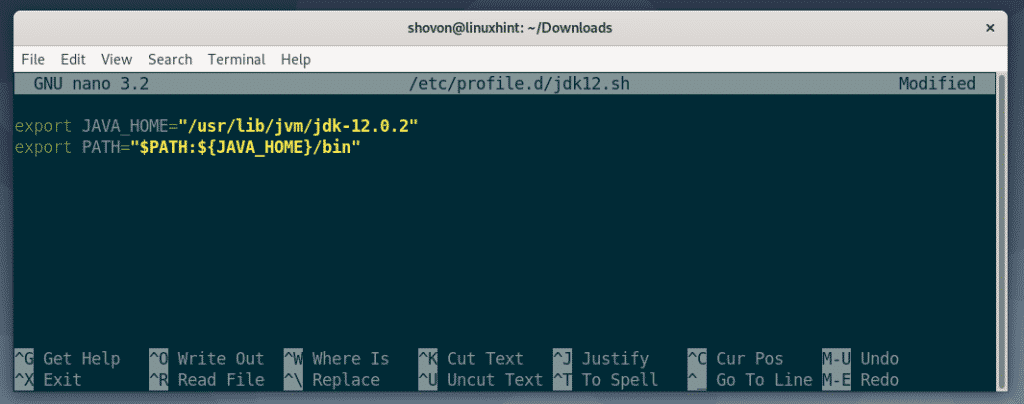
Now, add the following lines to the script:
export PATH="$PATH:${JAVA_HOME}/bin"
The final configuration file should look as shown in the screenshot below. Now, save the file by pressing <Ctrl> + X followed by Y and <Enter>.
Once the file is saved, restart your Debian 10 machine with the following command:

Once your computer starts, check whether everything is working with the following commands:
$ javac -version
As you can see Oracle JDK 12.0.2 is installed and it’s working correctly.

So, that’s how you install OpenJDK and Oracle JDK on Debian 10 Buster. Thanks for reading this article.
