Installing Tomcat on Ubuntu 18.04 LTS:
Tomcat 8.5.x is available in the universe section of the official package repository of Ubuntu 18.04 LTS. So, it is really easy to install. First, make sure that the universe section of the official Ubuntu 18.04 LTS package repository is enabled.
To do that, run the following command:

As you can see, I have the universe section of the official package repository enabled.

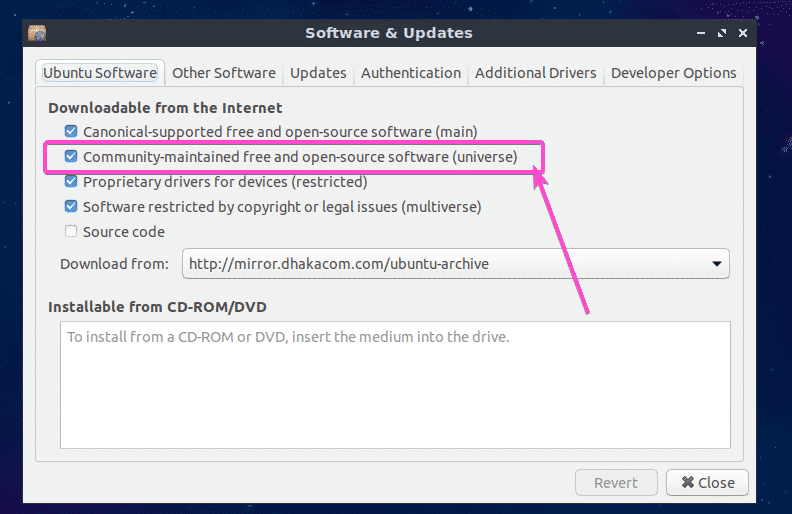
If it’s not enabled in your case, you can easily enable it. If you’re using a desktop environment on your Ubuntu 18.04 LTS machine, then open Software & Updates app and make sure the Community-maintained free and open-source software (universe) repository is checked on the Ubuntu Software tab as marked in the screenshot below. The universe section of the package repository should be enabled.
If you’re using Ubuntu 18.04 LTS server in headless mode, then run the following command to enable the universe section of the package repository:

Now, update the APT package repository cache with the following command:

The APT package repository cache should be updated.

Finally, install Tomcat 8.5.x with the following command:

Now, press y and then press <Enter> to continue.
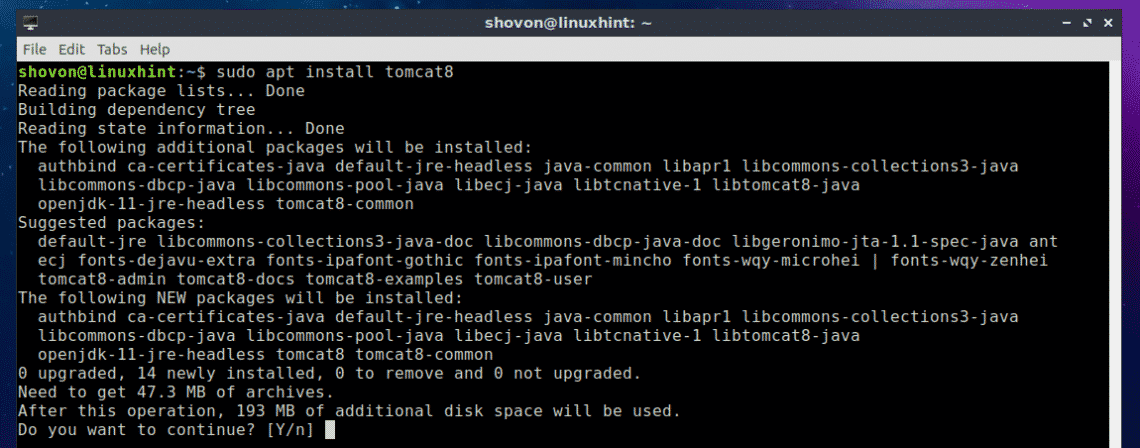
Tomcat 8.5.x should be installed.

Starting and Stopping Tomcat Service:
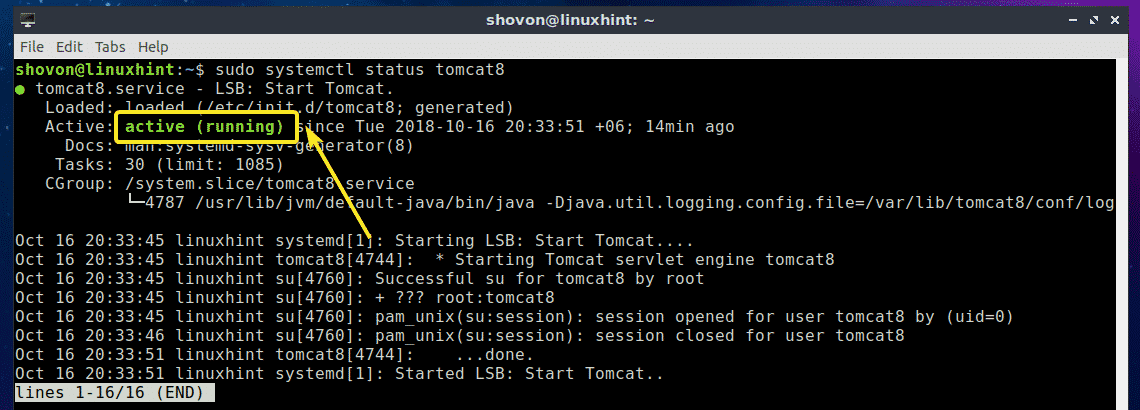
In this section, I am going to show you how to manage Tomcat service on Ubuntu 18.04 LTS. You can check whether the Tomcat service is running on your Ubuntu 18.04 LTS machine with the following command:

As you can see, Tomcat service is running.
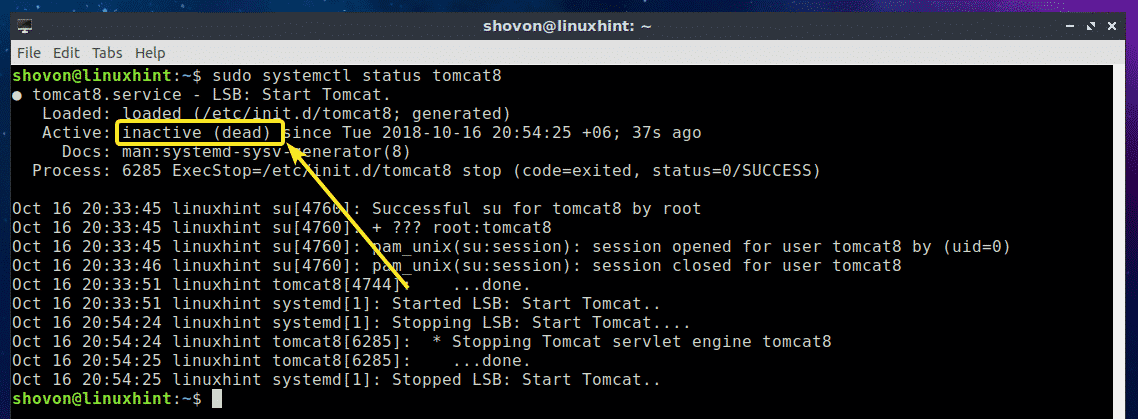
If you want to stop Tomcat service, then run the following command:

As you can see, Tomcat service is not running anymore.
If you want to start the Tomcat service again, then run the following command:

As you can see, the Tomcat service is running again.

Starting Tomcat at System Boot:
If you want Apache Tomcat server to start when your Ubuntu 18.04 LTS machine boot, then you have to add the Tomcat service to the system startup of your Ubuntu 18.04 LTS machine. To do that, run the following command:

Tomcat service should be added to system startup of your Ubuntu 18.04 LTS machine. The next time you boot, it should automatically start.

Removing Tomcat from System Startup:
If you don’t want to start Apache Tomcat web server when your Ubuntu 18.04 LTS machine boots anymore, all you have to do is remove the Tomcat service from the system startup of your Ubuntu 18.04 LTS machine.
To do that, run the following command:

Tomcat service should be removed from the system startup of your Ubuntu 18.04 LTS machine. Apache Tomcat web server won’t start when your Ubuntu machine boots anymore.

Accessing Tomcat Web Server:
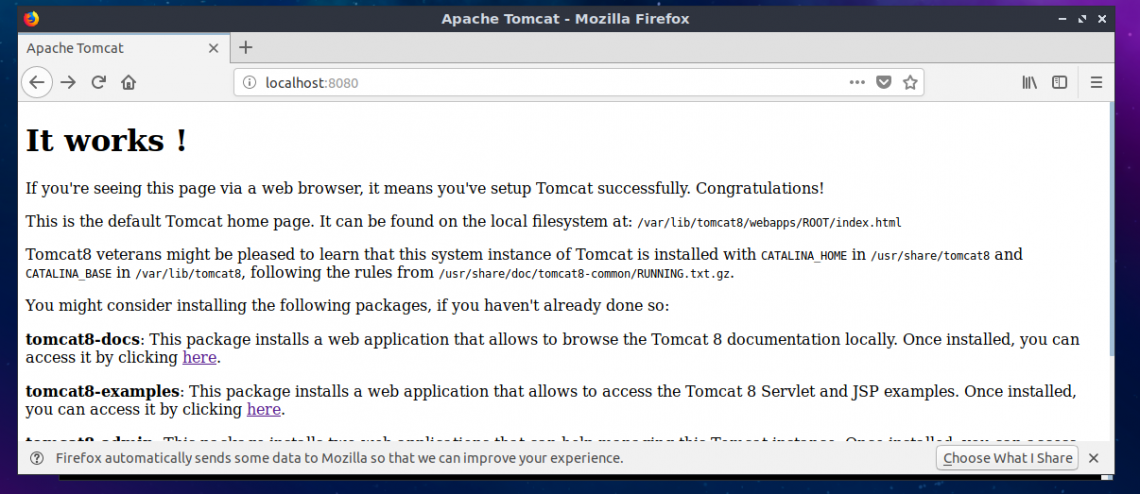
By default, Apache Tomcat web server runs on port 8080. If you’re using Ubuntu 18.04 LTS desktop, just open your web browser and visit http://localhost:8080
As you can see, the welcome screen of Apache Tomcat web server showed up.
If you’re using Ubuntu 18.04 LTS headless server, then run the following command to get the IP address of your Ubuntu machine which is running the Tomcat web server:
As you can see, the IP address is 192.168.163.134 in my case.

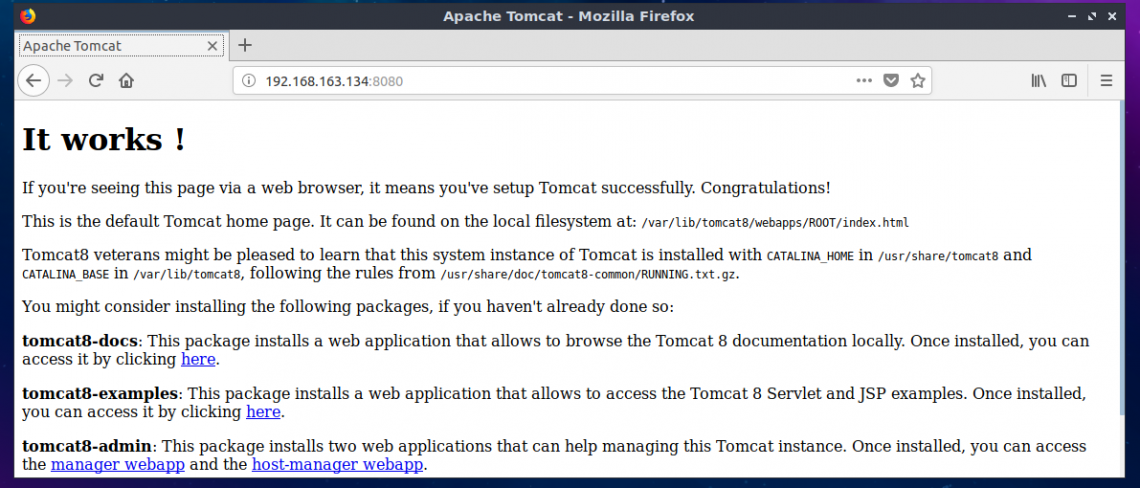
Now from the web browser of any computer connected to the same network as your Ubuntu server machine, visit http://IP_ADDR:8080, in my case http://192.168.163.134:8080
As you can see, I can still access the Tomcat web server running on my Ubuntu machine.
Managing Tomcat Web Server Using Web Based Management Interfaces:
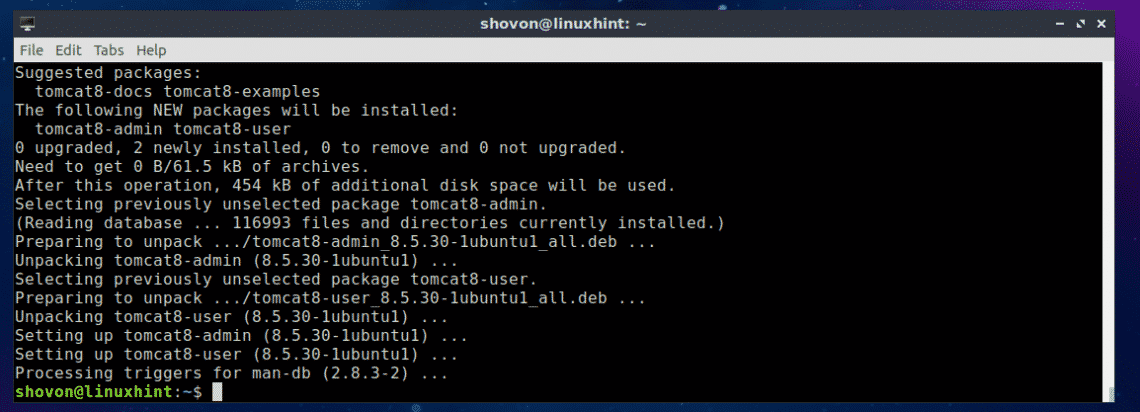
Apache Tomcat has graphical management interfaces which you can use to manage your Tomcat web server from the web browser. In this section, I will show you how to configure it. To get the Tomcat Management interfaces on Ubuntu 18.04 LTS, you have to install 2 additional software packages tomcat8-admin and tomcat8-user.
To do that, run the following command:

tomcat8-admin and tomcat8-user packages should be installed.
Now you have to configure a username and password that you want to use to log in to the Tomcat Web based management interfaces. To do that you have to edit the configuration file /etc/tomcat8/tomcat-users.xml and add the required roles and users there.
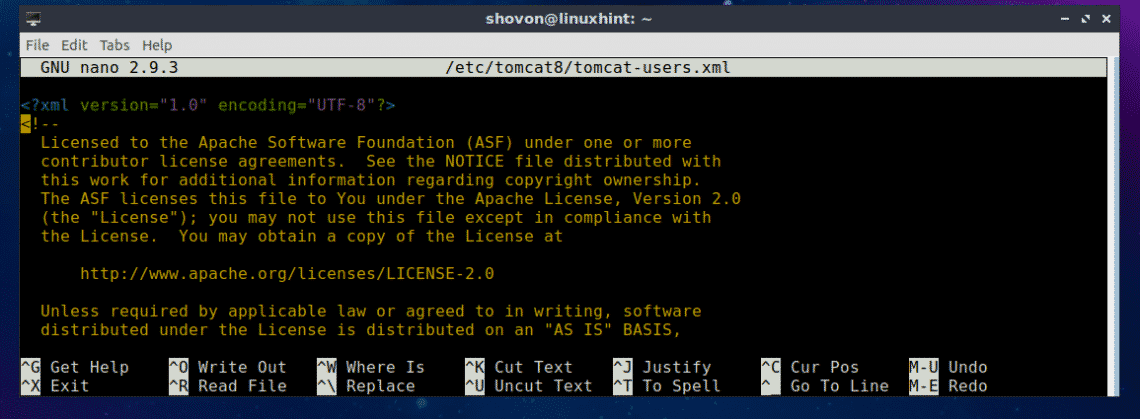
To edit the configuration file /etc/tomcat8/tomcat-users.xml, run the following command:

The configuration file should be opened.
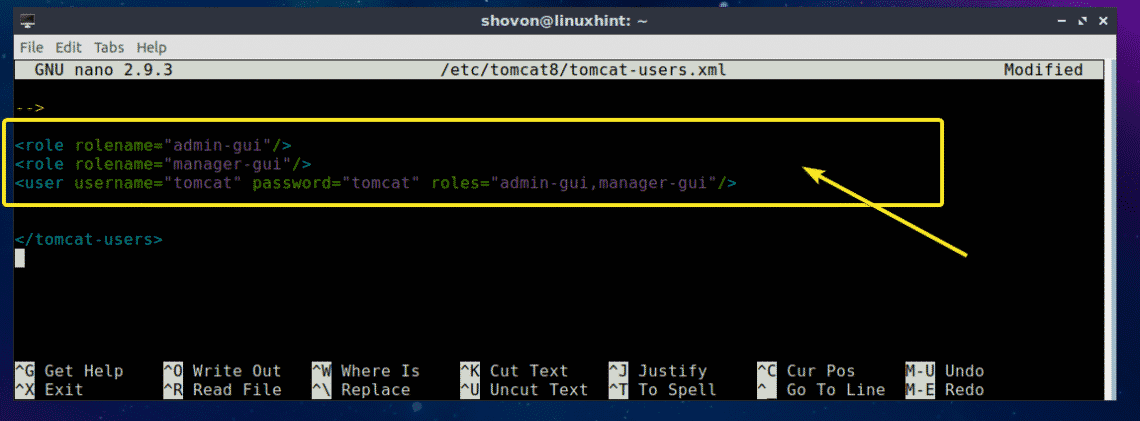
Now navigate to the end of the file and add the following lines just before the </tomcat-users> line.
<role rolename="manager-gui"/>
<user username="YOUR_USERNAME" password="YOUR_PASSWORD" roles="admin-gui,manager-gui"/>
Here, change YOUR_USERNAME and YOUR_PASSWORD to the username and password that you want to use to log in to the Tomcat web based management interfaces. I am going to set it to tomcat and tomcat for the demonstration.
Finally, it should look something like this. Now, press <Ctrl> + x and then press y and then press <Enter> to save the changes.
Now, restart Tomcat service with the following command:

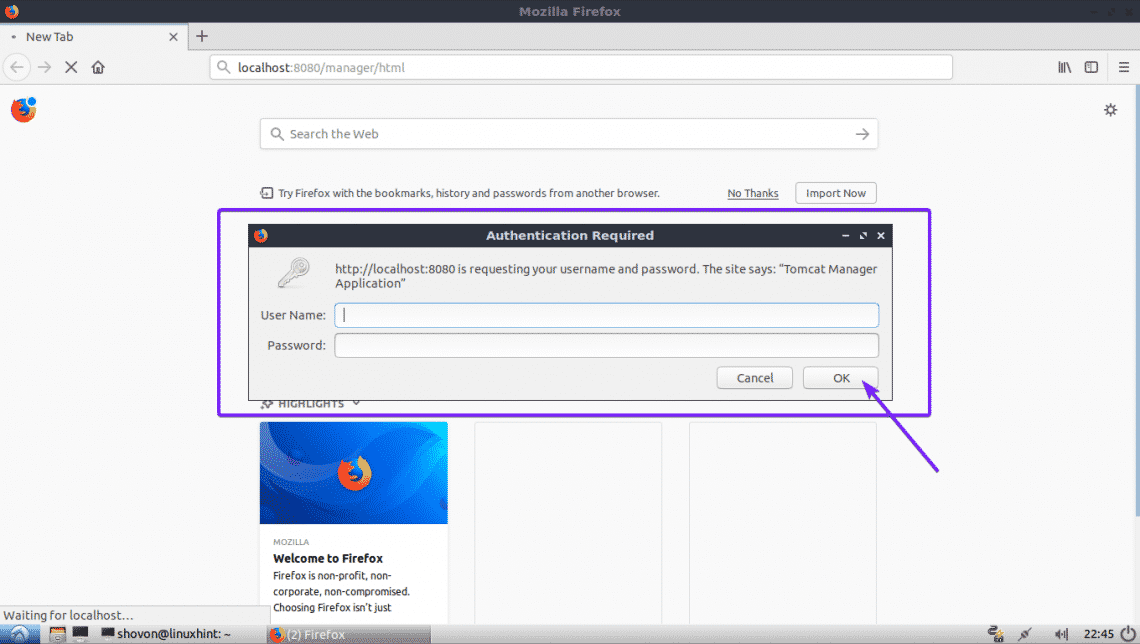
Now you can access the Tomcat Web Application Manager interface. Just visit http://localhost:8080/manager/html from your web browser and you should be prompted for the username and the password. Type in the username and password you just set and click on OK.
You should be logged in to the Tomcat Web Application Manager interface. From here, you can manage (start, stop and reload) the running web applications and many more.

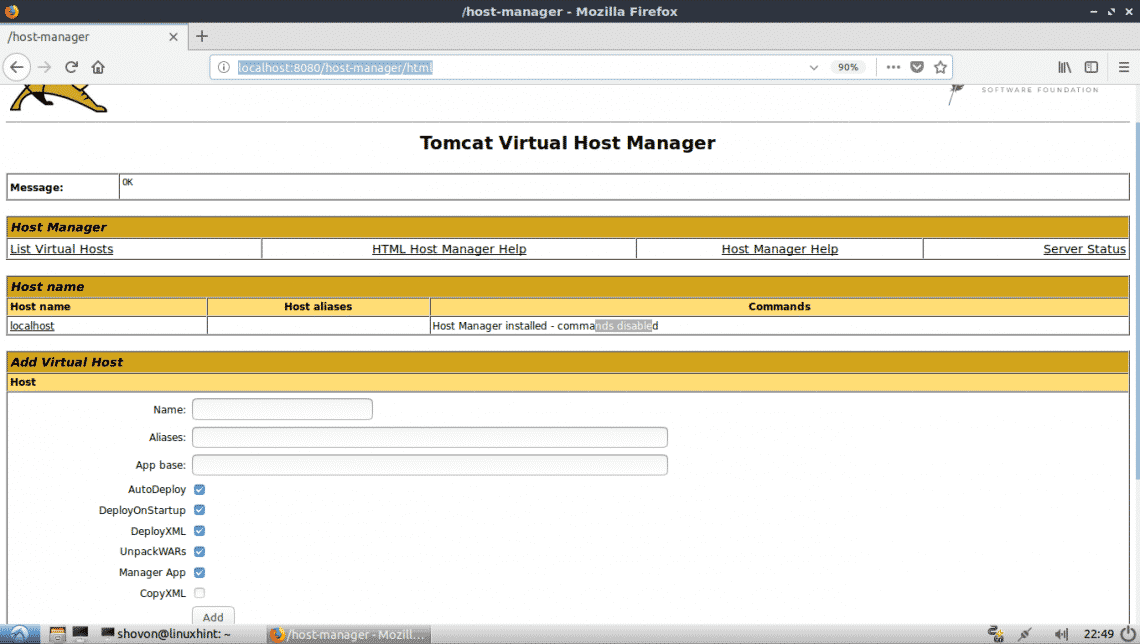
There is also another web app for managing Tomcat web server called Virtual Host Manager which you can access at http://localhost:8080/host-manager/html
As you can see, the Virtual Host Manager interface is displayed in my web browser.
So, that’s how you install and use Tomcat web server on Ubuntu 18.04 LTS. Thanks for reading this article.


