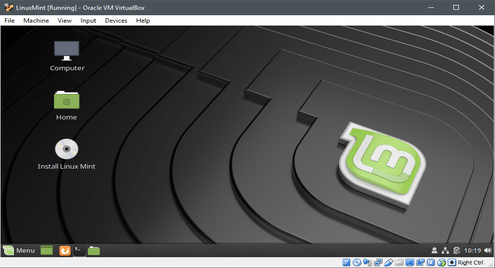
It comes in two variants one based on Ubuntu and the other based on Debian (latter one is also known as LMDE). Both the bases offer a robust package support and are the prototypical distros for cloud-native computing, embedded devices as well as a myriad of other applications. If your project involves any such use cases, using Linux Mint offers a similar environment for you to write and test your application as the platform where the app would eventually run.
In this tutorial, we will be installing Linux Mint 19 inside VirtualBox. The variant being used here comes with Cinnamon desktop environment which is actually one of the selling points of the OS. Other Desktop Environments like MATE and Xfce are also available. It is based on Ubuntu 18.04 LTS release.
Get the Linux Mint ISO here, and, if you don’t have it already, you can also install VirtualBox from this link. Done? Let’s get started then.
Creating the Virtual Machine
The recommended system requirements for Linux Mint 19 are:
- 2GB of Memory (1 GB is minimum)
- 20GB of disk space
Make sure you allocate at least the minimum quota, and if you can, try to allocate a bit more than that. Especially disk space is easy to allocate, since even a 100GB of virtual disk will only take 10GB of physical, or as little space as the operating system and all the data inside the VM would demand. This is true only if you use dynamic allocation of disks, which is the default. Go to VirtualBox manager window and click on New, and start with allocating the memory, as well as giving your VM a name. The type is Linux and the version is Ubuntu.
The next thing to do is Create a virtual hard disk. The default file type and storage on physical hard disk are fine. Allocate more than 20GB of disk.
Click on Create, and the Virtual Machine is now created. If you want you can further tweak it by going to the settings (right-click on the VM and select settings). In there Settings → System → Processor you can add a few extra compute cores if your hardware permits that.
Installing Linux Mint
Boot the system and since there is no startup disk, VirtualBox would insist that you provide it one. Use the Linux Mint ISO for this and start the VM.
Inside the live install media we can see the Install Linux Mint utility. Which would help us perform its namesake task. Double-click and start the utility.
Select the prefered language.
Then the keyboard layout.
While it’s not strictly necessary, especially inside a VM, it is safe to install the third party software which would improve the experience, overall.
Since we created a new virtual hard disk, it is also safe to Erase the disk and install Linux Mint on top of it. If you are trying to dual-boot on a physical disk or just change your Linux distro without losing your data, this option is not for you. Please have a backup of your data, if you are install Linux Mint on a physical disk.
Click on, Install Now, and then review the partitions that the installer wants to create, if you are satisfied with it you can click Continue. For example, the Erase disk option will end up creating these partitions.
Installation will begin and in the meantime we can set up our location and a user account and password. It might take a while to install, what with packages to update and files to copy. However, once that is done, we should be able to reboot the VM and get greeted by the newly installed OS.
Initial Impressions
A lot of details, especially with package managers and system internals are the exactly similar to Ubuntu 18.04 LTS. This makes troubleshooting easy and everything that works in Ubuntu would work with Linux Mint 19 as well.
Updating and upgrade is done by the same old commands
But the UI is similar to that of Windows 7 or Windows 10. Battery indicator and networking status near the right end of the task bar , a Start-Menu like launch bar and the file system is well-sorted out as well, with well-organized directories and easy to locate disk management utilities.
Conclusion
If you are in a situation where Linux is the only option as your primary OS, then Linux Mint can be a good starting point for you regardless of how much or how little you know about the system.


