How to Install Brackets Code Editor 1.11 on Ubuntu
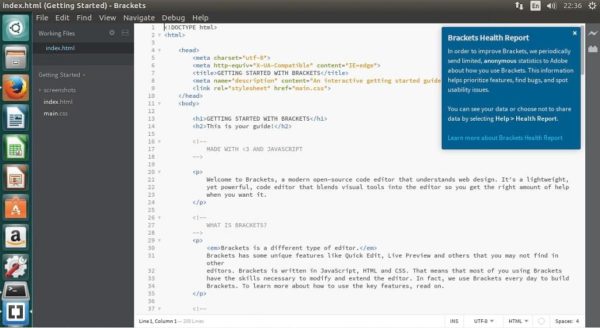
The Brackets Code Editor is a lightweight and versatile code editor that allows you to save up system resources while still using the full toolset that a programmer needs. Despite being super lightweight, this editor also uses visual features such as an inline editor and live preview for webpages. This makes your creative process flow easily and lets you focus on the more complicated tasks at hand while letting the editor do the rest for you.
What are the main features of the Brackets editor?
Let’s take a look at some of the things you will be happy to see once you get started with the code editor:
- It lets you fit more code on your screen – The Brackets interface is exceptionally minimalistic and instead of relying on cluttered toolbars, it relies on a set of hotkeys
- It lets you edit inline– Let’s say you’re fixing up a huge .html file – you would need to find an element, then scan through the entirety of the related .css file and change a single value. With Brackets you don’t need to do that – you can edit the corresponding CSS rules just by selecting the element!
- Live preview – Forget about the constant jumping between your browser and code and let your F5 key rest for a little while. Brackets pushes code changes to your browser automatically and lets you preview in real time.
- Open source and lightweight – Brackets is built on HTML, CSS and JavaScript – it won’t eat up all of your system’s resources like most big IDEs would. Instead, it will do its job without bothering the rest of the processes you are running.
What’s new in version 1.11?
By now you must be itching to try it and we’ll get to that soon. Before that, let’s take a look at what version 1.11 brings to the table:
- Support for ECMAScript 2015: Brackets now supports ECMAScript 2015. Quick-type listing now shows classes, methods, arrow functions, generator functions and much more. Brackets also supports linting of ECMAScript 2015 code, with ESLint defaulting as Javascript linter, as well.
- Brackets on Linux: Brackets now offers full support for the Linux platform. With an update to the shell with a new version of CEF, Brackets is now fully functional on Linux.
See the full changelog here.
How do you install Brackets on Linux?
To install version 1.11 on Ubuntu 17.04 or any other similar systems such as Linux Mint, you need to follow a very simple process. There are two ways to install the Bracket code editor – through its dedicated repository or by downloading and installing a .deb package:
1) Installing via the official repository:
sudo add-apt-repository ppa:webupd8team/brackets
sudo apt-get update
sudo apt-get install brackets
This should be enough to get you up and running but for future releases, the repository might not be up to date as fast as the latest build comes out. In this case, you can manually download and install the latest .deb package.
2)Installing brackets manually via DEB
sudo apt-get install gdebi
This downloads and installs the gdebi package manager which will help you install the downloaded packages later.
To get the 32-bit version, use:
wget https://github.com/adobe/brackets/releases/download/release-1.11/Brackets.Release.1.11.32-bit.deb
sudo gdebi Brackets.Release.1.10.32-bit.deb
Respectively, to get the 64-bit version, use:
wget https://github.com/adobe/brackets/releases/download/release-1.11/Brackets.Release.1.11.64-bit.deb
sudo gdebi Brackets.Release.1.10.64-bit.deb
If you should ever want to uninstall it (which you likely wouldn’t) – just use:
sudo apt-get remove brackets
And voila! You’re ready to get straight to work on whatever idea has been brewing in your mind.
Enjoy the sleek and minimalistic interface of the code editor and make sure to look up all of its features and how they can streamline your working process.

