Get started with NodeJS on Ubuntu
NodeJS is an open-source server side framework built on JavaScript under MIT (Massachusetts Institute of Technology) license. It is mainly used for asynchronous programming and it is a very light weight framework that makes it faster than other frameworks. It is also supported by most of the popular operating systems. Different types of applications like web application, command line application, RESTful API etc. can be developed with this framework. How you can easily install and use this framework on Ubuntu are shown in this article.
NodeJS Installation Steps
1. Press Ctrl+Alt+T to open the terminal and run the following command to install NodeJS
After completing the installation process, type the following command to check the version of the installed framework.
2. To install necessary modules and packages you will need to install NodeJS package manager called npm. Run the following commands to install the npm.
Check the version of npm.
Now, NodeJS is ready to use for developing any application. How you can apply NodeJS as a beginner is shown in the next part of this article.
Using NodeJS
You can use NodeJS for various types of application development. As a beginner, how you can create a simple console application and a web server are shown in this part.
Creating Console application
Run the following commands to create a directory named nodejsapp for keeping your code organized, go to the newly created directory and open the nano editor for creating a JavaScript file named firstapp.js.
$ cd nodejsapp
$ nano firstapp.js
Write the following code in the file to print a output in the console. Press Ctrl+x and then y to save the file and exit from the editor.
Run the following command to execute the code of the firstapp.js file.
if you get any permission problem to execute the script then you have to run the following command for setting execution permission of firstapp.js file and again run the above command.
Creating Local Web Server
JavaScript is a popular client side scripting language which doesn’t require any web server to run. Web server is required to run any server side scripting language like php, asp etc. and you need to install a particular web server to run server side scripts. Using NodeJS framework, you can easily implement a local web server which can be used to run server side script.
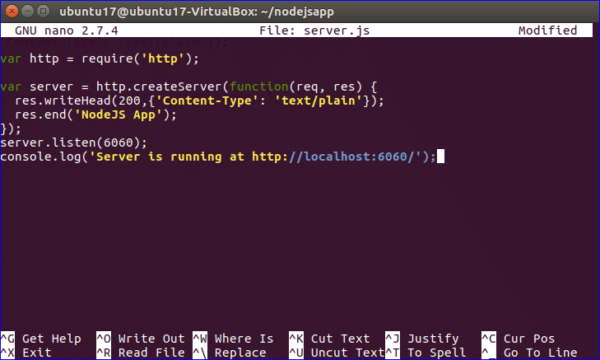
Open nano editor to create a new JavaScript file named server.js that will be used to create a local web server.
Add the following code in the file to create the server connection on port number 6060. According to this code, NodeJS will listen for server connection at localhost:6060 and if the connection can be established successfully then 200 code will be generated and ‘NodeJS App’ will be shown as output.
var server = http.createServer(function(request response) {
resquest.writeHead(200,{‘Content-Type’: ‘text/plain’});
response.end(‘NodeJS App’);
});
server.listen(6060);
console.log(‘Server is running at http://localhost:6060/’);
Save the file by pressing Ctrl+x and y. Now, execute the following command to run the web server. If the code executes properly then the message ‘Server is running at http://localhost:6060’ will be displayed in the console.
Open any browser to check the web server code is working properly or not. The script will return ‘NodeJS App’as content in the browser if the above code executes properly. Type the following URL in the address bar for checking.
In the above example, a simple static text is displayed in the browser which is added as the content with response. But generally, any index file displays when the base URL executes. So, how you can attach any html file in the server connection script is shown in the next part.
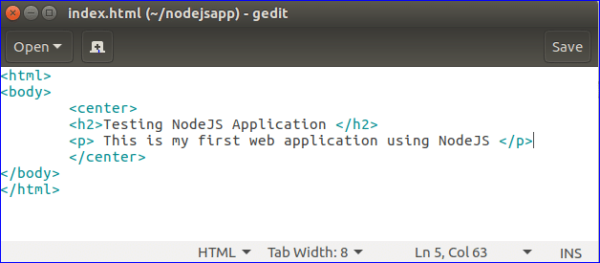
At first, create a very simple html file named index.html using Text Editor with the following code and save it in the nodejsapp directory which is created previously.
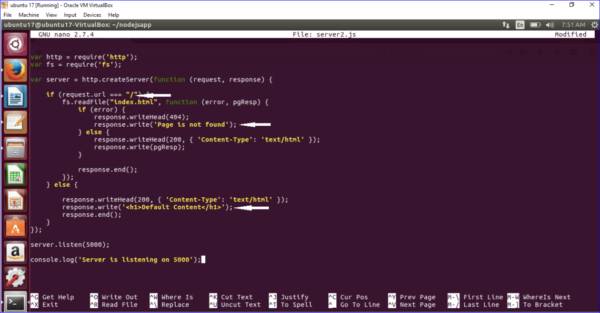
Now, create another JavaScript file named server2.js with the following code to view index.html file, after creating web server connection. Here, fs module is used to read the index.html file. Three types of outputs can be generated based on the code. If the connection establishes properly and index.html file exists then it will load the content of index.html file in the browser. If the connection establishes but index.html file does not exist on the current location then ‘Page is not found’ message will print. If the connection establishes and index.html file also exists but requested url is not correct then ‘Default content’ text will display as by default content. Port number 5000 is set as listening port here. So when web server connection establishes successfully then the message ‘Server is listening on 5000’ will show in the console.
var fs = require(‘fs’);
var server = http.createServer(function (request, response) {
if (request.url === "/") {
fs.readFile("index.html", function (error, pgResp) {
if (error) {
response.writeHead(404);
response.write(‘Page is not found’);
} else {
response.writeHead(200, { ‘Content-Type’: ‘text/html’ });
response.write(pgResp);
}
response.end();
});
} else {
response.writeHead(200, { ‘Content-Type’: ‘text/html’ });
response.write(‘<h1>Default Content</h1>’);
response.end();
}
});
server.listen(5000);
console.log(‘Server is listening on 5000’);
Save the file and exit from the editor. Run the server by executing the following command.

Type the following URL to view the content of index.html file in the browser.
Now, insert an invalid URL in the browser and check the output.
Now modify server2.js file and set the file name as index2.html that does not exit and restart the server. Type the base URL again to check the output.
NodeJS is a demanding framework and you can perform many tasks using it. As a beginner, you can follow the steps which are shown in this article to start application development using NodeJS.


