We shall be using VirtualBox version 5.2.6, if yours is older than that then you may want to update it. There are a few important details changed in the UI in this release and you may have difficulty in following them if your version is a bit older.
Logical Volume Manager, or LVM, makes the matter a little more intricate but that’s fine, we will handle that case as well in this tutorial.
Linux guest without using LVM
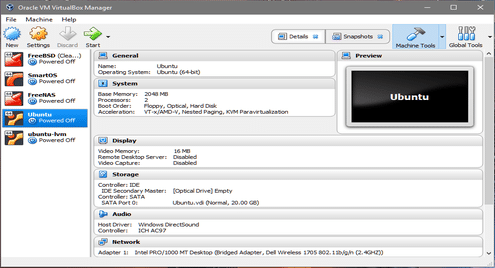
The first thing to do when resizing a disk is to get the correct disk name which you will be modifying. From the VirtualBox dashboard go to the VM that you wish to enlarge. Make sure that the machine is in Powered Off state.
- Select the machine from the left corner under its storage menu get the name of the virtual disk on which the operating system is installed. In our case the disk is named vdi (Normal 20.00GB).
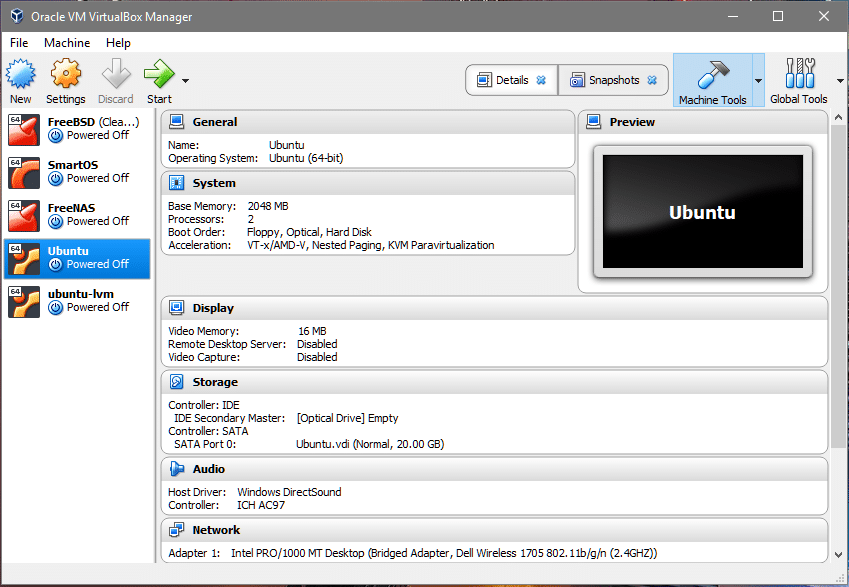
- Now click on the Global Tools button on the top-right corner of the dashboard.

- You can see a lot of virtual disks listed in the section. The one that interests us is Ubuntu.vdi as we learned in Step-1. Select the appropriate disk name that your VM uses and adjust its size to the value you desire. We will be increasing its size from 20GB to 40GB. Click apply before going back to Machine Tools.

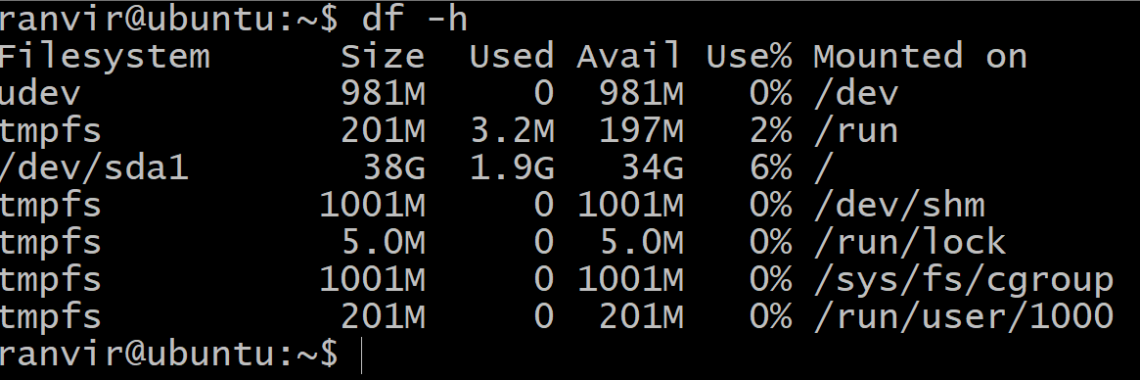
- Now we can start the VM and have a look at the guest operating system. Start the VM, login, open the terminal and enter: $df –h
 The available space for the root filesystem is not showing any increase in storage space. To understand why you can run the following command to list all the storage block devices attached to the VM:$lsblk
 There’s a block device sda, 40G in size which is of the type It has been partitioned into sda1, of size 20G (on top of which sits the root filesystem) and the rest is unallocated. The /(root) partition is the one that is supposed to grow in our case. There’s also the swap partition sda2. To resize the root partition it is safer for us to turn off the Virtual Machine.
 - To grow the root filesystem, we will be using gparted utility. Download the .iso file from the link. Next we need gparted to modify our virtual disk vdi.
- Go back to the VirtualBox dashboard, right-click on the VM, select Settings and select Storage from the Settings window’s left column.
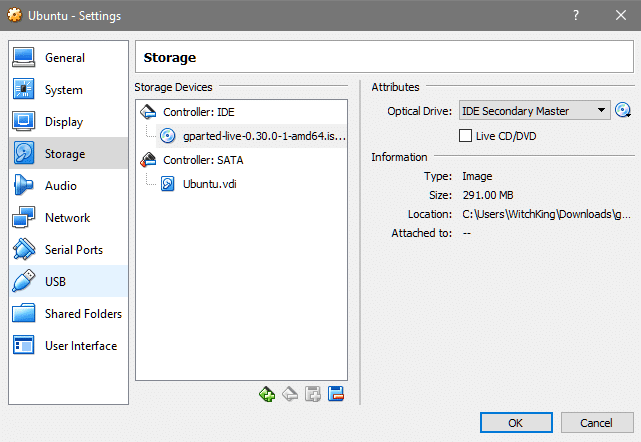
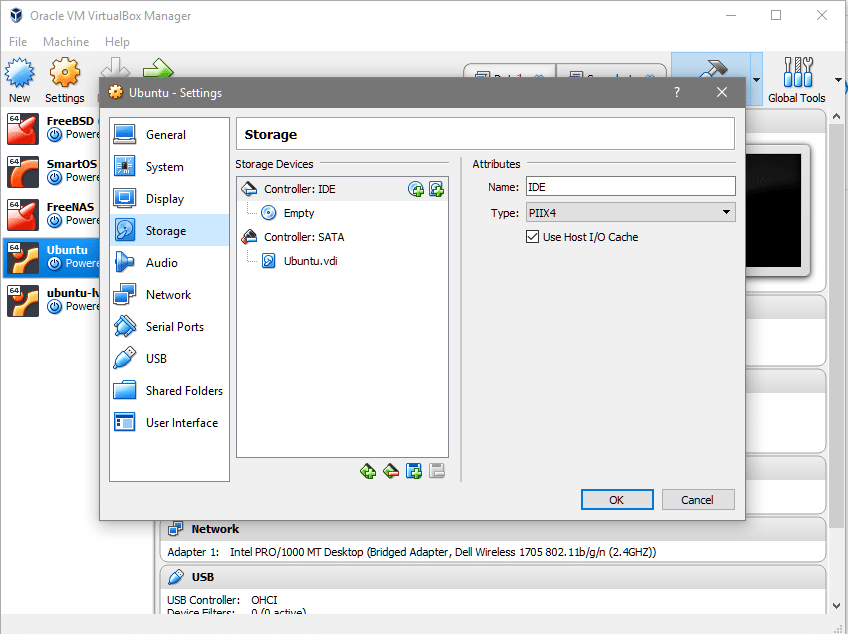 Under the IDE controller, you can see that there is no optical disk attached. You can click where it says Empty, click on CD icon on the extreme right (under Attributes section), select the gparted iso file and mount it under the Controller: IDE.
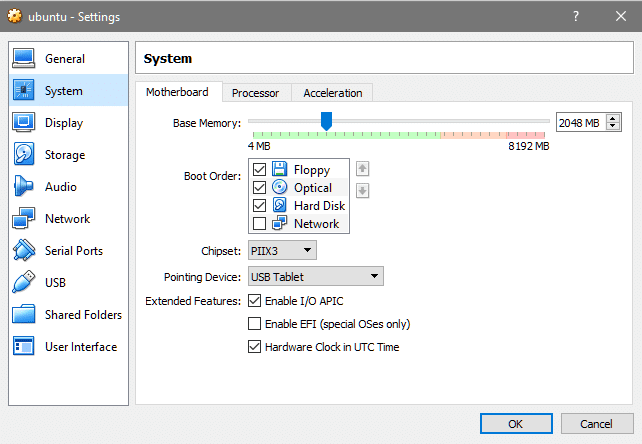
- In the Settings section for your VM go to System and check that the Optical Disk is on top of Hard Disk in boot order. This ensures that the gparted.iso boots instead of the de facto OS.
- Now start the VM again, and you will get into the gparted GUI after selecting your preferred language and keymapping. Click on gparted application presented on the desktop.
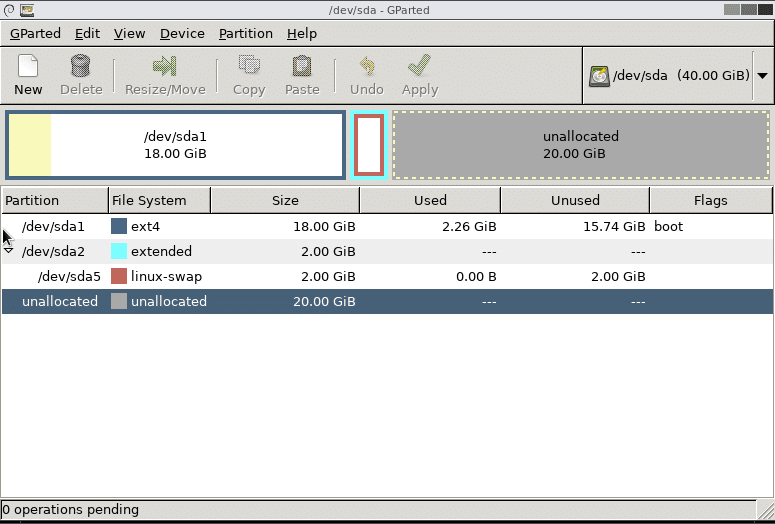 This is where a lot of things would differ for different people. In the above case, we have just one main partition for /(root) mounted on sda1. You may have a different filesystem to grow and you would have to increase the size of corresponding partition. The case above works for the default installation of Ubuntu 16.04 LTS.
 - The swap partition is between the main partition and the unallocated space and needs to be deleted. If there are any other filesystems like /home mounted in between, don’t delete it! You may end up losing important data. Consider creating a new partition for the unallocated space, if that’s the case. Here’s how it appears when we resized our root partition.
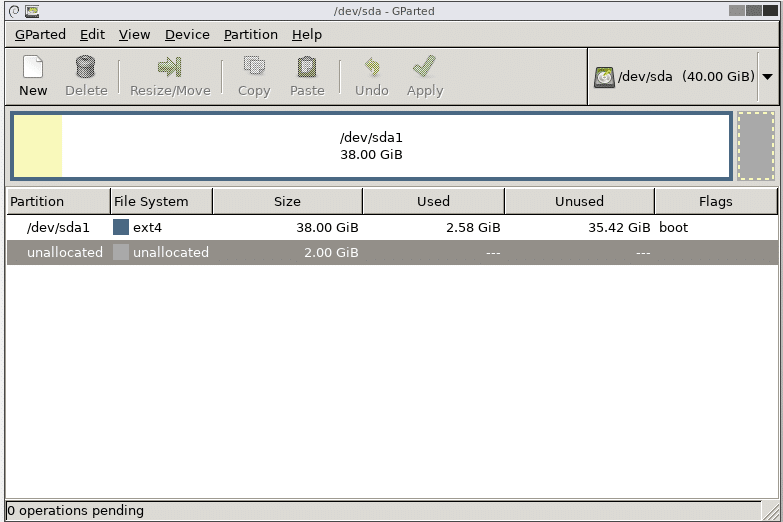
- Swap partition is deleted by deleting sda5 and then sda2 and then clicking on apply button. Now you are free to resize the root partition all the way to the end but do leave a few gigabytes in the end for swap partition. Click Apply once you are happy with the way the partitioning is done.
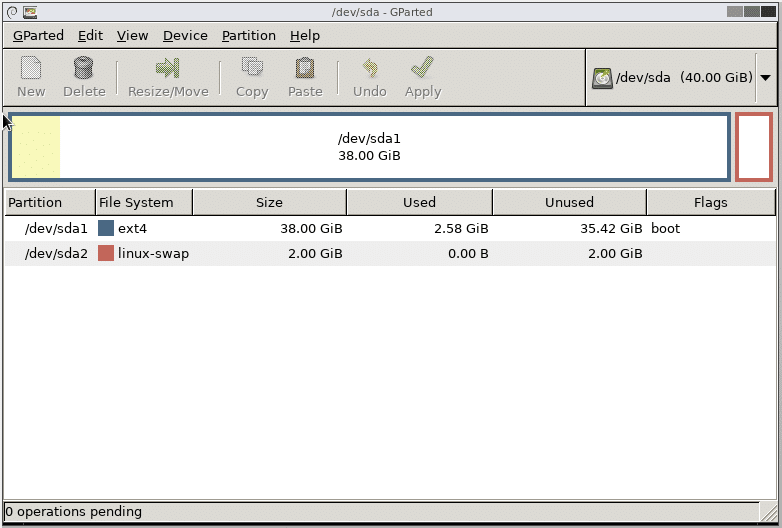 That’s it! Now, upon rebooting the system you will notice that the VM’s filesystem have more space available for you to work with.
Linux guests using LVM
If the guest operating system is using LVM then we need to modify a couple of steps. First of all, when you are in the gparted UI, you would notice that there’s a lock icon next to the LVM paritions. Right-click on those partitions and select the deactivate option to enable resizing them.
Reboot the system and open terminal once you have grown the desired partitions.
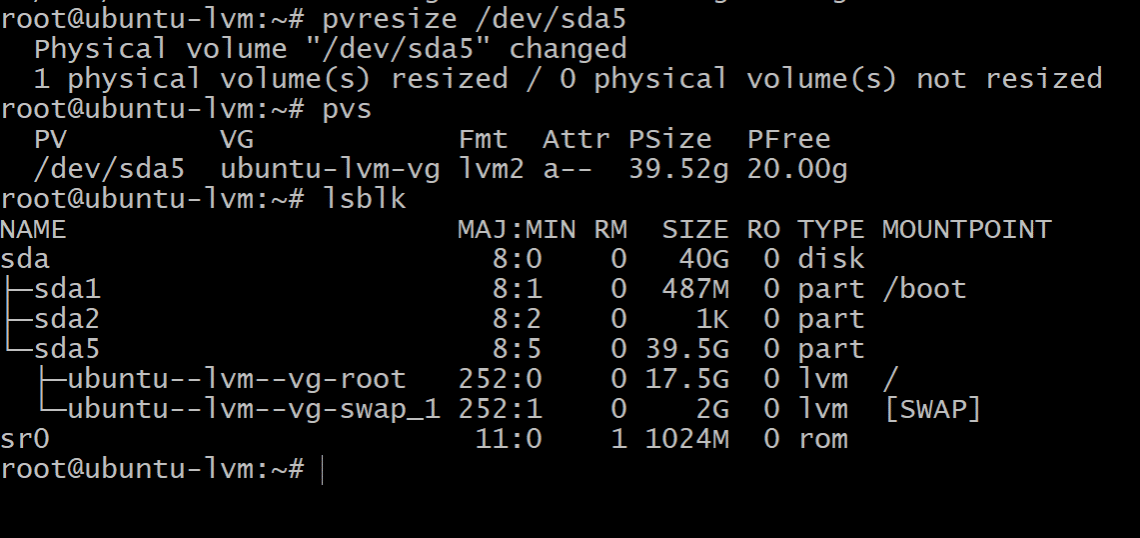
The next thing to do is to make the lvm partitioning scheme aware of the changes made. As the root user, run the command below to see the list of physical volumes available:
You can see that there’s 20G of space made newly available to the physical volume /dev/sda5 to grow the physical volume run:
Let’s have a look at the block devices now.
Running lsblk shows that the root partition is still occupying only 17.5G whereas there’s 39.5G on the partition sda5. This is because our physical partition has grown but the logical volume manager is not aware of this.
Also make note of the volume’s name which is mounted on /(root) directory. In the above output it is named as ubuntu--lvm--vg-swap_1
To make use of the entire available free space, run the command below, you may want to click on tab after /dev/ubuntu… to get to the appropriate device node:
Make these couple of changes if you are an LVM users and if you are installing a new guest OS, try to avoid LVM if you can.
amzn_assoc_placement = “adunit0”;
amzn_assoc_tracking_id = “linuxhint-20”;
amzn_assoc_ad_mode = “search”;
amzn_assoc_ad_type = “smart”;
amzn_assoc_marketplace = “amazon”;
amzn_assoc_region = “US”;
amzn_assoc_default_search_phrase = “1522769889”;
amzn_assoc_default_category = “Books”;
amzn_assoc_linkid = “45fd13a3da6275d6c4fe800e6e8f25a3”;
amzn_assoc_title = “VirtualBox Recommended Book”;
amzn_assoc_default_browse_node = “283155”;
amzn_assoc_rows = “1”;
amzn_assoc_design = “text_links”;
