Note: A network interface is a network device.
Displaying and understanding the output of ifconfig
If we run the command “ifconfig” without additional parameters it will show all available network interfaces, their ip addresses, netmasks, state and more, as root run “ifconfig“:
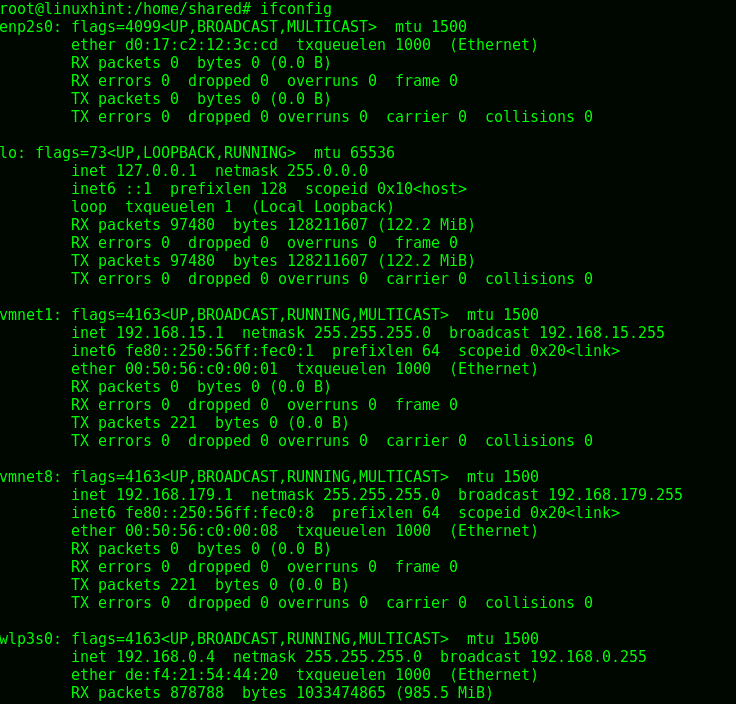
The first network interface (hardware device) is enp2s0 which is the ethernet interface.
Flags indicate the device’s state, network device states may include: UP, BROADCAST, MULTICAST, RUNNING, ALLMULTI and PROMISC or MONITOR for wireless interfaces.
Where:
UP: the device is up.
BROADCAST: device/interface can send traffic to another device crossing subnets.
MULTICAST: This flag allows to send data to multiple destinations simultaneously.
RUNNING: This flag informs the network interface is available and working.
ALLMULTI: It allows all packets from the network to be received.
PROMISC: This flag will listen and capture all traffic within the network, usually used for sniffing.
MONITOR (Wireless ONLY): Allows to capture traffic without being connected to the network, also used for sniffing to crack wireless networks or audit transmission. The syntax is “iwconfig <wireless-interface> mode monitor”.
Additionally to flags the ifconfig command will also show the following properties:
The MTU (Maximum Transference Unit): indicates biggest byte size can be processed by the communication protocol, we can increase or decrease it to affect performance.
ether: here we find the mac address, our interface hardware or physical address. (Check this tutorial for more information on the MAC address)
txqueuelen (Transmit Queue Length): indicates the limit for queued packets during the transference, editing this property is useful to optimize our network performance as explained later in this tutorial.
RX packets: Allows to see received packets in bytes and errors if exists.
TX packets & TX errors: Allows to see transferred packets in bytes and errors if exists.
Within RX PACKETS we find:
RX errors: Errors when receiving data.
Dropped: receiving packets were dropped.
Overruns: Notifies FIFO OVERRUNS (First in, First Out) means our device is full of capacity but keeps trying to process traffic.
Frame: broken and ignored frames.
Within TX Packets we find:
TX errors: Errors when transferring data.
Dropped: sent packets were dropped.
Overruns: Notifies FIFO OVERRUNS (First in, First Out) means our device is full of capacity but keeps trying to process traffic.
Carrier: reports a duplex mismatch, usually when two communicating devices have different settings like autonegotiation for a device while manual settings for other devices.
Collisions: happens when two devices within the network transfer data simultaneously, both devices detect the simultaneous transference, then Carrier allows packets to take turns to be transferred.
Note: Not long time ago we were used to see our ethernet devices as “eth0”, “eth1”,etc. Since systemd v197 predictable network interface names are assigned to network devices. The names are based on the device firmware, topology and location within the motherboard.

After the ethernet device, we’ll see the loopback. The loopback interface isn’t a real network device but a virtual one destined for local communication only. If we don’t have a network connection the Loopback interface (defined as “lo”) will allow us to ping ourselves to our localhost or to interact with applications which depend on networking.

The following interfaces are virtual too and they belong to virtualbox guest virtual devices, they don’t have uncommon characteristics to be explained.
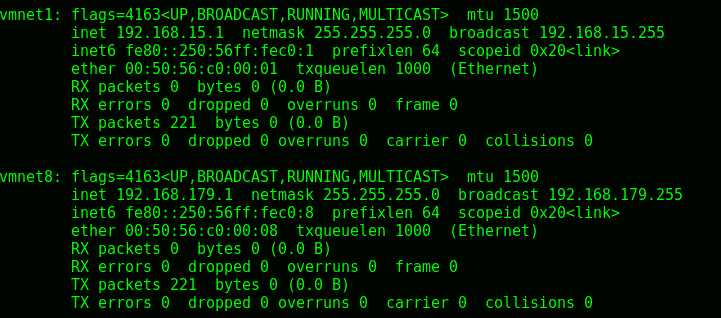
In my case the wlp3s0 is the wireless interface, which, was mentioned above and in contrast with wired devices, is capable to sniff networks without being part of them under it’s MONITOR MODE.

If we want Linux to return us only wireless network cards, instead of running “ifconfig” we can run “iwconfig“, run iwconfig:
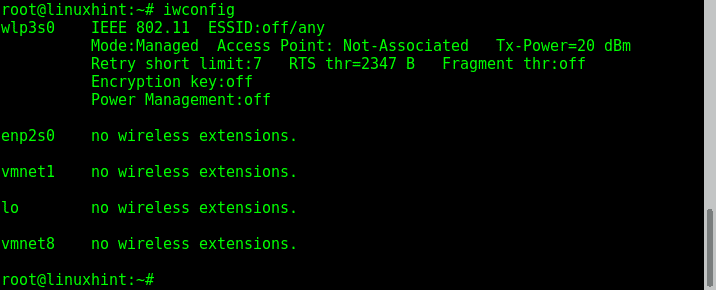
The output informs us wlp3s0 is the only wireless network device, being enp2s0, vmnet1, lo and vmnet8 physical or virtual devices without wireless functionality.
Ifconfig allows to display information on a specific network interface by specifying it’s name, in my case I type:
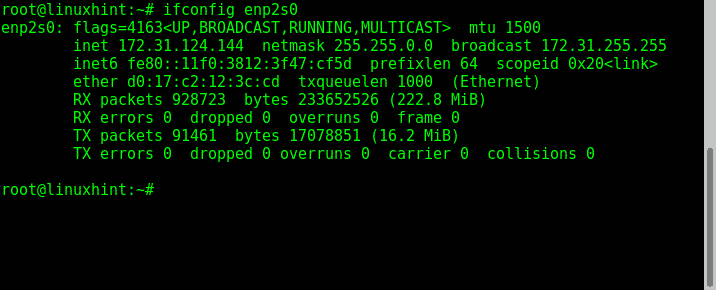
How to use ifconfig to disable and enable interfaces:
In some cases to make changes on our interface we’ll need to disable it first, apply the changes we want and enable it back. That’s the case for example when we want to edit the network physical MAC address or the card mode (e.g Monitor). Commands to disable and enable interfaces are intuitive:
In my case:

As you see after disabling the network card ping doesn’t work, if we want to restore our interface type:

Now ping works back after enabling our interface.
How to use ifconfig to change our IP and MAC addresses:
To update our IP address we need to invoke ifconfig, specify the network interface and set the ip address, the syntax is:
In my case:
Then to confirm we run again:

As you see the IP address changed from 172.31.124.144 to 172.32.124.145.
Now, if we want to change our MAC address to bypass any whitelist cloning a different one or to avoid leaving our real MAC in a log we can do it using ifconfig, first of all we need to set our interface down, set the new MAC address and enable the network card again:
ifconfig enp2s0 hw ether 00:00:00:00:00:01
ifconfig enp2s0 up
ifconfig enp2s0

As you see the network card has a new MAC address (00:00:00:00:00:01).
How to use ifconfig to change the netmask:
The netmask, used to divide subnets can be also edited using ifconfig.
To change an interface’s netmask the syntax is:
To change it in my case would be:

As you see the netmask was successfully edited.
Ifconfig allows to use a chain of parameters to set all properties we want within a single command, pay attention not to include commands which need the interface down to work. A practical example would be:

As you see, despite being limited when compared to ip, ifconfig remains very useful command to edit our network interfaces settings. Honestly I personally use ifconfig because I’m used but in a next tutorial I’ll show ip usage.
Thank you for following LinuxHint, keep following us for updates and new tips on Linux. Should you have any questions about this tutorial or other Linux issue please reach us through https://support.linuxhint.com.
