In this article, I am going to show you how to install and configure ProFTPd FTP server on CentOS 7. So, let’s get started.
Installing ProFTPd Server:
ProFTPd is available in the EPEL package repository which is not enabled by default. Once you enable EPEL package repository, you can easily install ProFTPd using the YUM package manager.
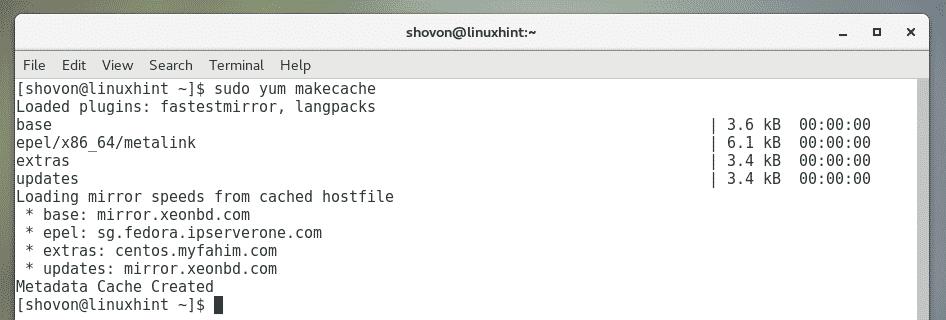
First, update the YUM package repository cache with the following command:

Now, enable the EPEL repository with the following command:

Now, press y and then press <Enter> to continue.

YUM may ask you to accept the GPG key of the CentOS repository. To do that, press y and then press <Enter>.

EPEL repository should be enabled.

Now, update the YUM package repository cache again with the following command:
Now, install ProFTPd with the following command:

Now, press y and press <Enter> to confirm.
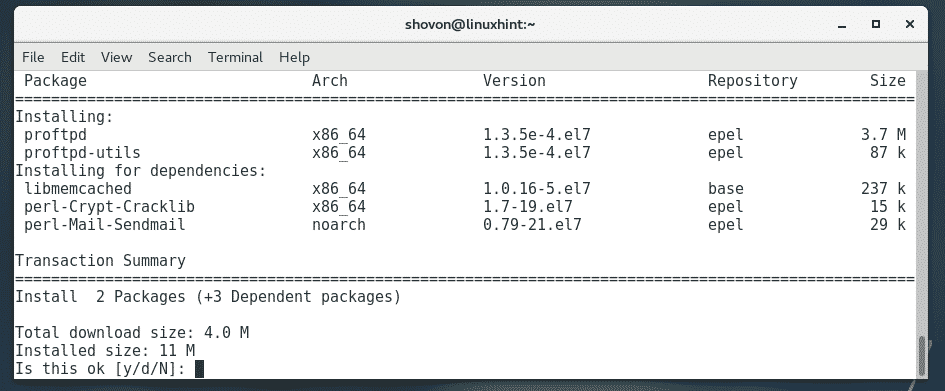
YUM may ask you to accept the GPG key of the EPEL repository. Just, press y and then press <Enter> to accept it.

ProFTPd should be installed.

Now, check whether the proftpd service is running with the following command:
As you can see, the proftpd service is not active. So, it’s not running.

To start the proftpd service, run the following command:

As you can, see proftpd service is now running.

Now, open FTP ports in firewalld firewall with the following command:

Now, reload firewalld with the following command for the changes to take effect.

Accessing The FTP Server:
Now, to test whether the FTP server is working, let’s try to connect to it from an FTP client program such as FileZilla.
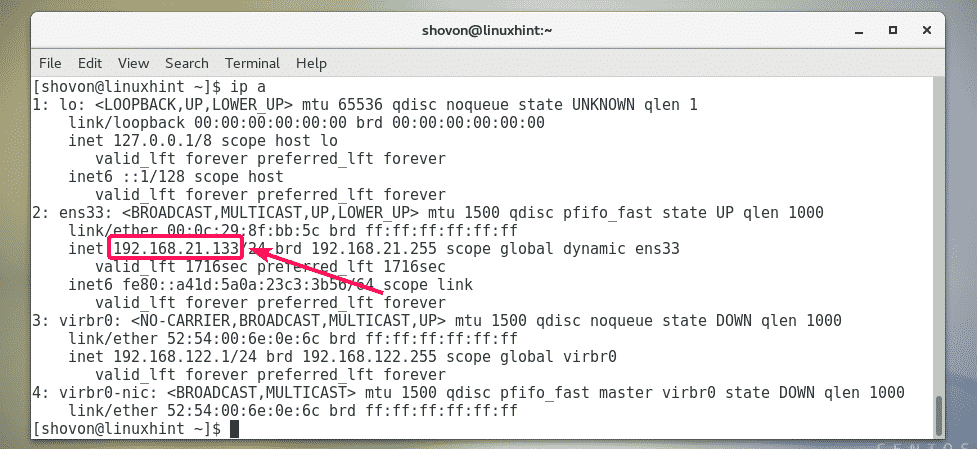
First, you have to know the IP address of the FTP server. For that, run the following command on the FTP server.
As you can see, the IP address of my FTP server is 192.168.21.133. It will be different for you. So, make sure to replace it with yours from now on.
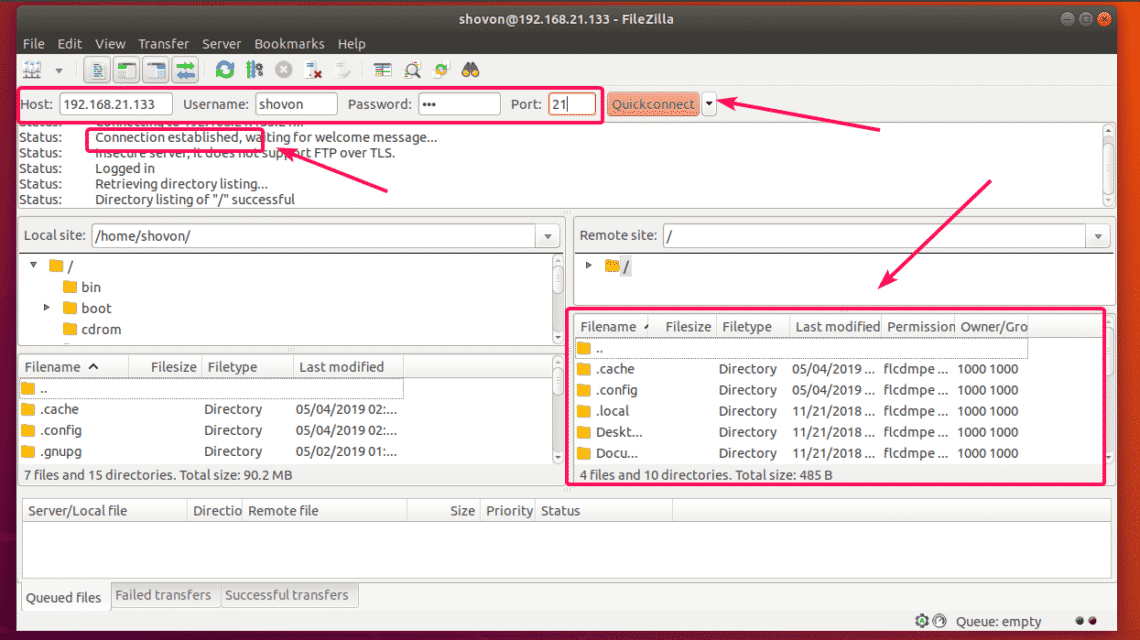
Now, open FileZilla or your preferred FTP client and type in the IP address of your FTP server, your login username and password and the port 21. Once you’re done, click on Connect (Quickconnect in FileZilla). You should be connected to the FTP server as you can see in the screenshot below.
Automatically Start ProFTPd on System Boot:
Now that ProFTPd FTP server is working just fine, it’s a good idea to add the proftpd service to the system startup so that it will start automatically on system boot.
To add the proftpd service to the system startup, run the following command:

As you can see, the proftpd service is added to the system startup.

Configuration Files of ProFTPd:
On CentOS 7, the default configuration file of ProFTPd is /etc/proftpd.conf.
The configuration file is well documented. So, you can just use it as a manual as well.
As it contains a lot of comments, it’s hard to see which lines are active and which are not (commented out). So, It’s best to make a backup copy of the original configuration file and remove the comments from the original configuration file. So, whenever you need any help, you can always look at the backup copy.
To make a backup of the /etc/proftpd.conf file, run the following command:

Now, remove all the comments from the original configuration file /etc/proftpd.conf with the following command:


This is the original configuration file before all the comments were removed.
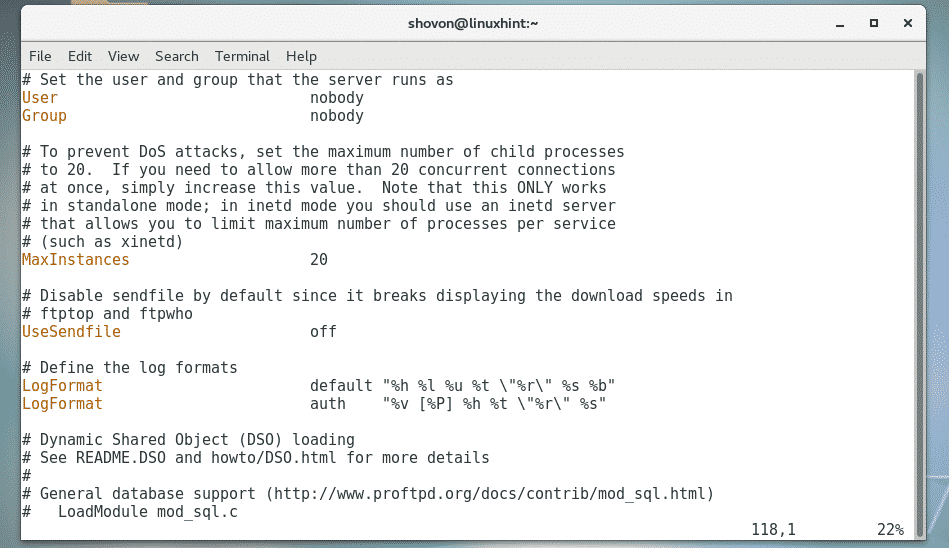
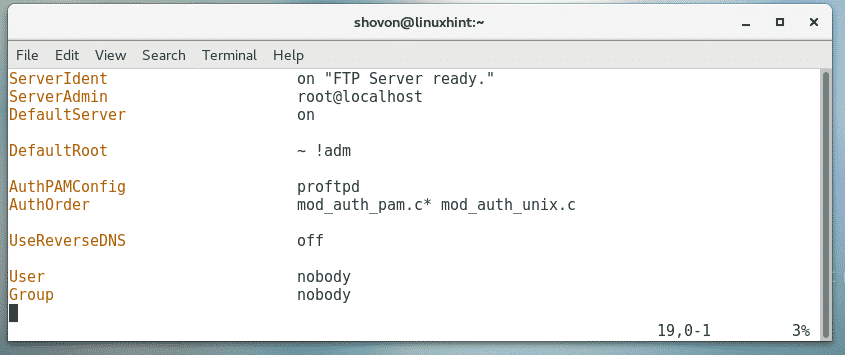
This is the original configuration file after all the comments are removed. Looks neat!
Add New Users:
The default configuration of CentOS lets the local system login users to log into the FTP server and upload files to their home directories. So, in order to add a new FTP user, all you have to do is to create a new user on the CentOS 7 server where ProFTPd is installed.
To add a new user linda (let’s say), run the following command:

Now, set a password for the newly created user linda with the following command:


Now, re-type the password and press <Enter>.

The password should be set.

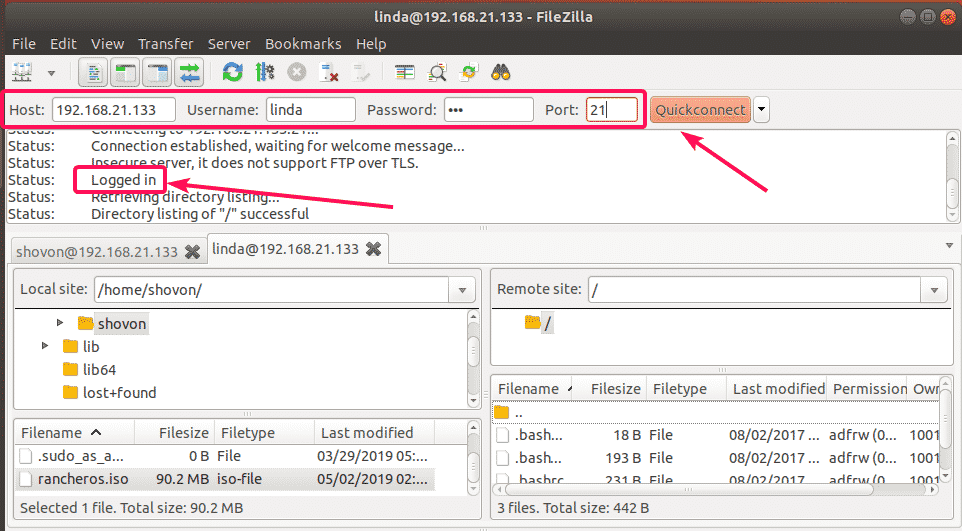
As you can see, the user linda can connect to the FTP server. No extra configuration required.
Chroot Users into Their Home Directories:
By default, the FTP users can navigate to the root directory as well. Even though they can’t make any changes to files and directories they don’t have permissions to. But, it’s still a bad idea to let them explore the root directory freely.
To lock users to their own home directory, you can simple enable Chroot jail feature of ProFTPd. By default, the CentOS 7 version of ProFTPd has Chroot jail enabled. But, if it is not enabled for you in some case, you can enable it as follows.
To enable chroot jail, first, open the ProFTPd configuration file /etc/proftpd.conf with the following command:

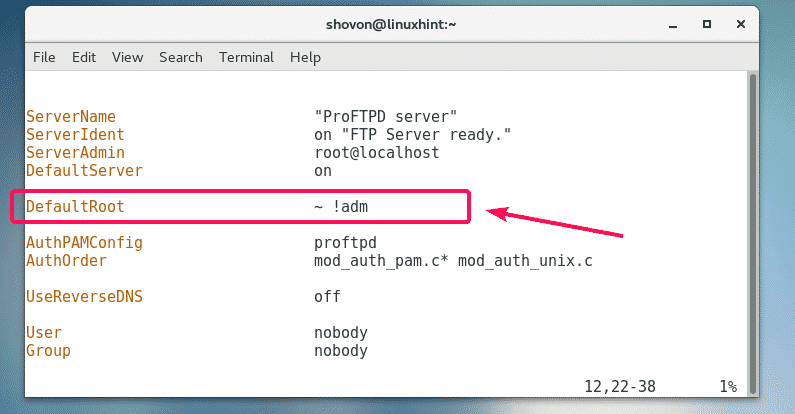
Now, type in the line as marked in the screenshot below and save the file.
Now, restart the proftpd service with the following command:

Now, the FTP users will only be able to explore their own home directories
So, that’s how you install and configure ProFTPd FTP server on CentOS 7. Thanks for reading this article.


