Installation
If you have a Linux or Windows server (EC2) in Cloud (AWS or Google cloud), OpenVPN can be easily installed and setup there with a few commands. If you don’t have it, then you can sign up for AWS Cloud free tier account for as cheap as $1 per year and you’ll get to try most of the Amazon Cloud Services.
Benefits of doing it in clouds are that we get a Public IP Address and a server with incredible internet speed, and that’ll make our VPN faster.
After registering an account on Amazon Cloud, go to its AWS console and launch a fresh EC2 instance
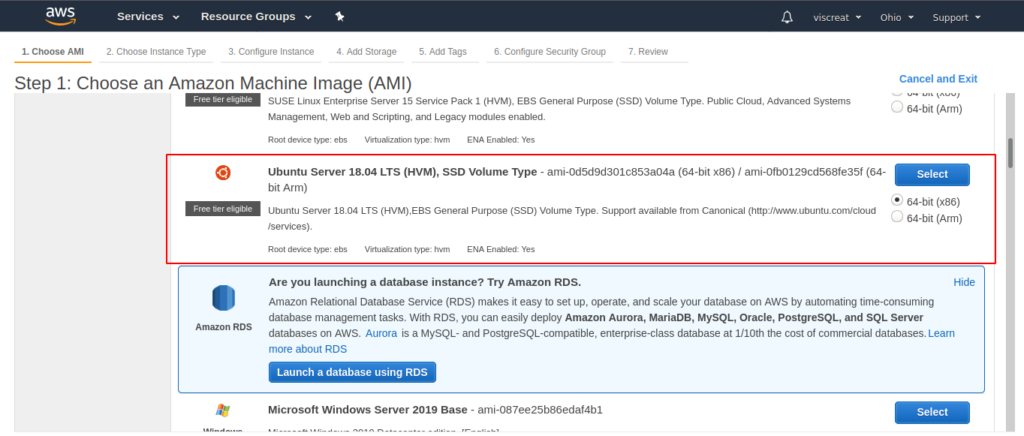
You’ll see a lot of server images including Linux and Windows. Select the Ubuntu 18 AMI (Amazon Machine Image) as your Linux server. We’ll use Ubuntu because that’s easy to configure and its scripts are easily available
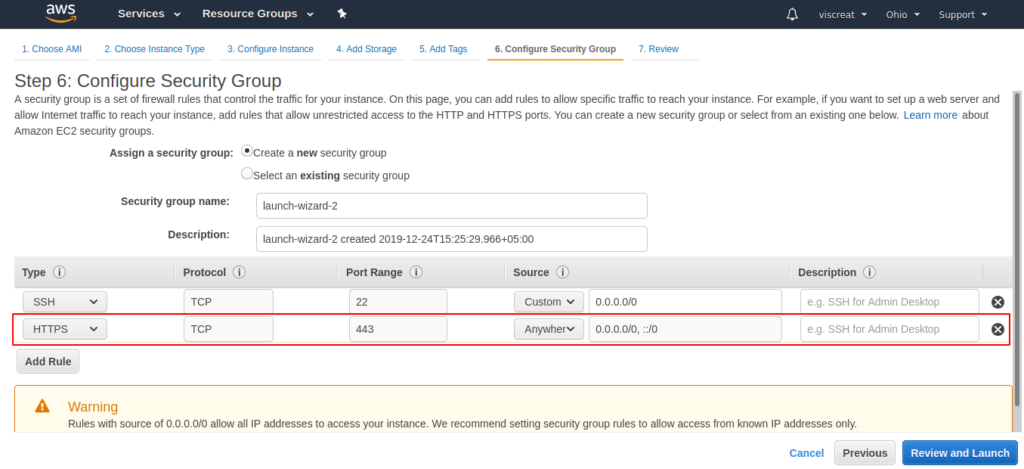
Then hit next and configure the security group for your instance. In security group, add a Rule for HTTPs/TCP/UDP traffic at port where you want your VPN server to listen on, e.g, HTTPS:443 or UDP:1194
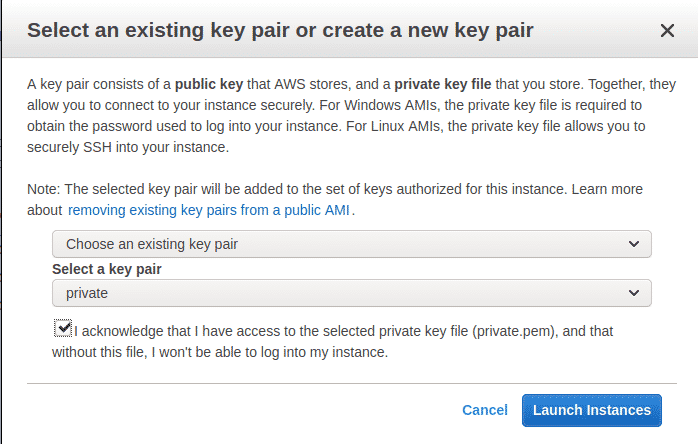
Then create a keypair or choose from existing keypairs. That keypair will be used to connect to this EC2 server via SSH.
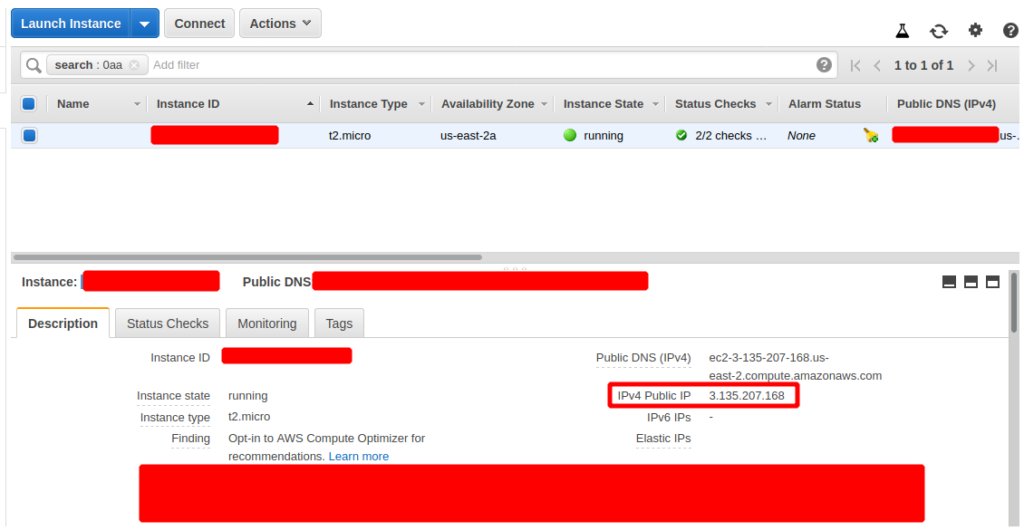
This will start a new EC2 instance for us, you can copy its IP Address from the bottom
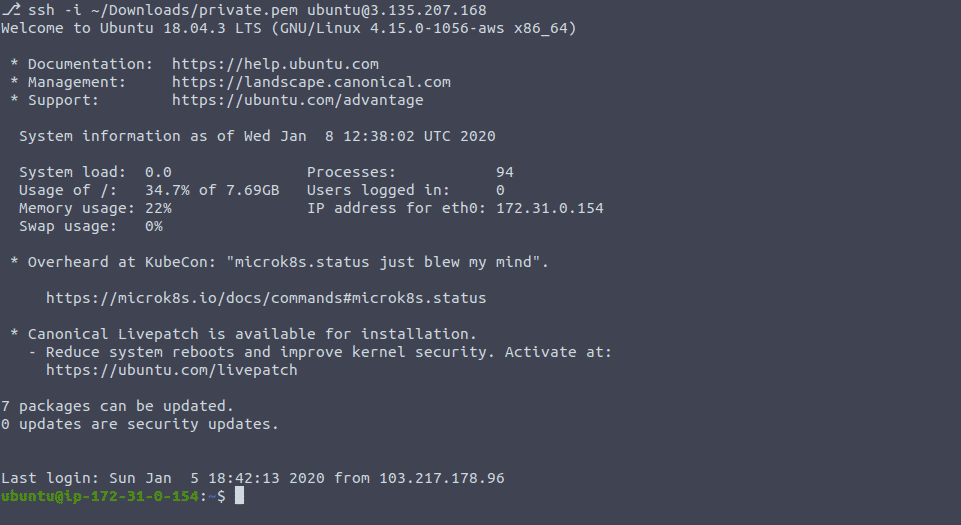
Now we have got both IP Address and keypair for SSH and we can connect to our EC2 instance using this keypair, copy the IP Address of EC2 instance and type this in your terminal.
ubuntu@ubuntu:~$ chmod 0600 private.pem
// Confirm the permissions of SSH key-pair file
ubuntu@ubuntu:~$ ls -la private.pem
-rw——- 1 azad azad 1692 دسمبر 21 19:41 private.pem
// Login to your server using SSH with your private key
ubuntu@ubuntu:~$ ssh -i private.pem ubuntu@3.135.207.168
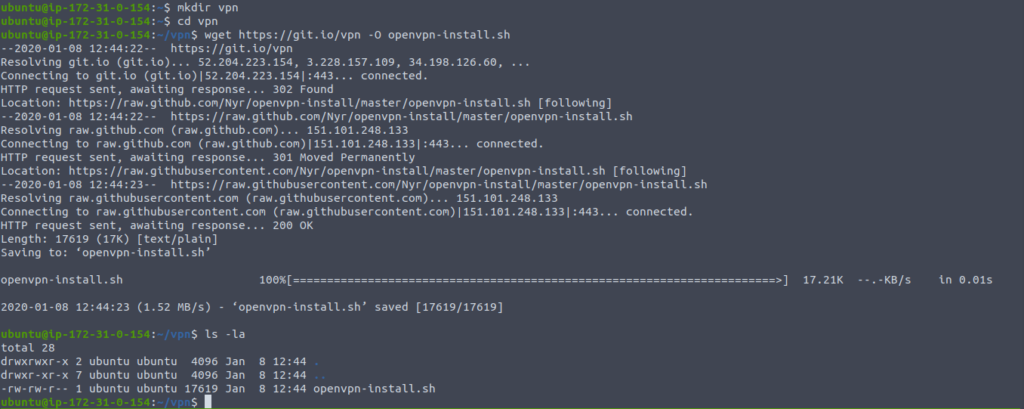
To install and configure OpenVPN, we’ll use a script from github that’ll automatically download and configure OpenVPN on our EC2 server.
ubuntu@ubuntu:~$ sudo apt upgrade -y
ubuntu@ubuntu:~$ mkdir vpn
ubuntu@ubuntu:~$ cd vpn/
ubuntu@ubuntu:~$ wget https://git.io/vpn -O openvpn-install.sh
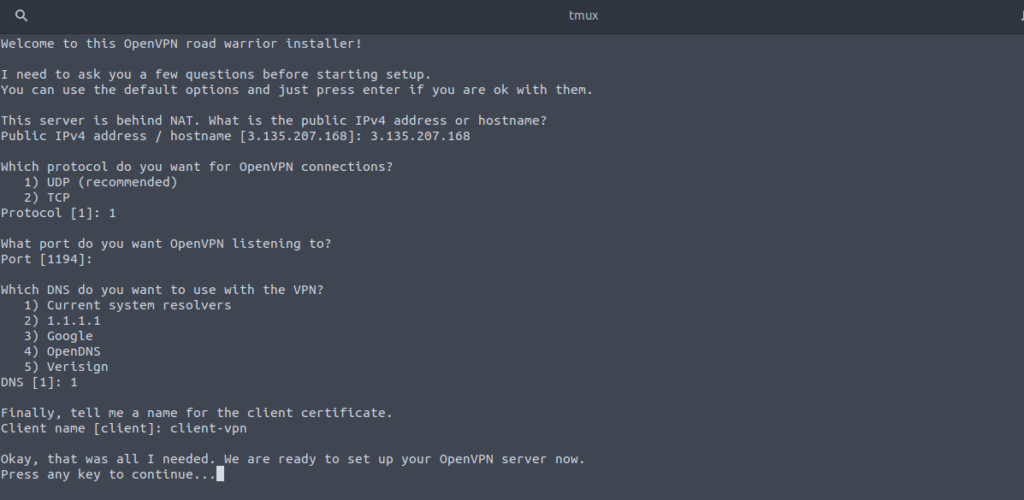
Now we just need to run the script and fill in the prompts. Type
ubuntu@ubuntu:~$ sudo ./openvpn-install.sh
In above prompts, give your server’s public IP Address. Choose your protocol, UDP is a bit faster that’s why it is recommended while TCP is stable & reliable. After filling in the details, HIT enter. The script will take some time to download and configure OpenVPN and after installation, you’ll see a client file of OpenVPN in your home directory “/home/ubuntu” that we’ll use to connect.
-rw-r–r– 1 root root 4997 Jan 8 12:55 /home/ubuntu/client-vpn.ovpn
Now you can download this VPN client file and you can run this file on any system you want including Linux, Windows, Android, iOS and MacOS.
Running OpenVPN on Linux
You can download the client file on your system using any client such as nc or scp. We’ll download it using scp and see how it works.
client-vpn.ovpn 100% 4997 20.2KB/s 00:00
ubuntu@ubuntu:~$ ls -la client-vpn.ovpn
-rw-r–r– 1 azad azad 4997 جنوری 8 18:00 client-vpn.ovpn
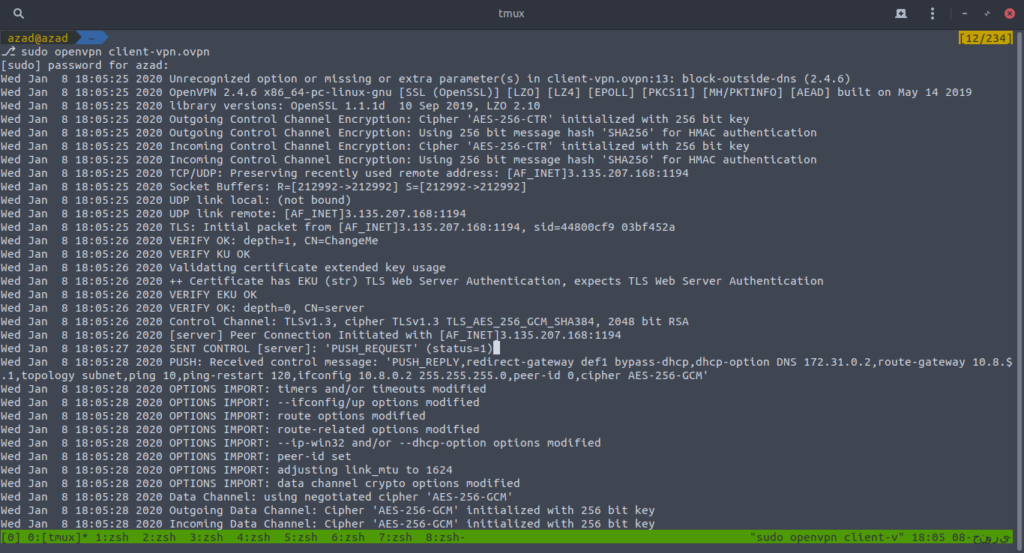
You also need to install OpenVPN client on your system then run the openvpn using the VPN client file “client-vpn.ovpn”
ubuntu@ubuntu:~$ sudo openvpn client-vpn.ovpn
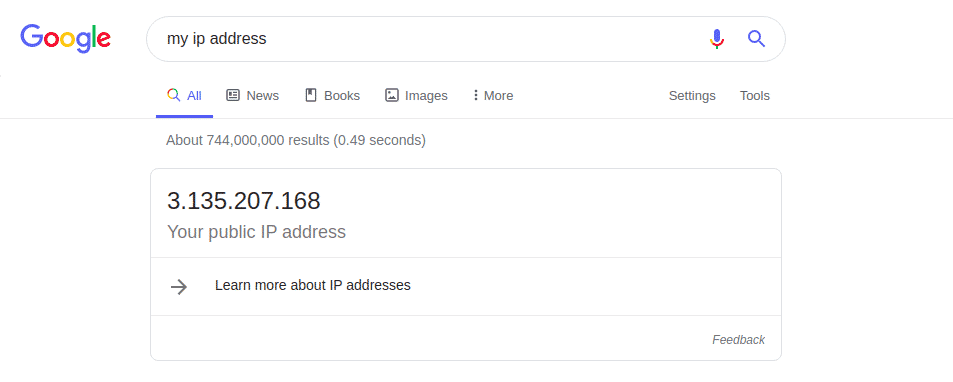
After the connection is established, open your web browser and verify your public IP Address. If it’s changed, then it is working perfectly,
If you want to use it on Android, you can download OpenVPN client from play store https://play.google.com/store/apps/details?id=net.openvpn.openvpn&hl=en
If you want to OpenVPN on Windows, MacOS or some other operating system, you can get it from here https://openvpn.net/community-downloads/
Conclusion
OpenVPN is secure, free and easy to use VPN solution that can be used to secure internet communication. The method we just used to configure it was easy but there are some other methods as well. Also, you can allocate a permanent IP Address to your OpenVPN server so if your VPN server shuts down, then it’ll not lose its public IP Address.
