What is Jenkins? Jenkins is a free and open source automation tool that can be used to automate repetitive technical tasks with the help of continuous integration and continuous delivery.
In this tutorial, we will explain how to install Jenkins with Docker on Ubuntu 18.04 server. We will also explain how to run Jenkins with Docker in a way to keep Jenkins data and configurations persistent.
Requirements
- A server running Ubuntu 18.04 with minimum 2 GB of RAM.
- A root password is set up on your server.
Getting Started
Let’s start to update your server’s repository with the latest version. You can update it with the following command:
apt-get upgrade -y
Once the repository has been updated, restart your server to apply all these changes.
Install Docker
Next, you will need to install Docker in your server.
First, download and add Docker CE GPG key with the following command:
apt-key add gpg
Next, add the Docker CE repository to APT with the following command:
Add the following line:
Save and close the file, when you are finished. Then, update the repository with the following command:
Once the repository is updated, install Docker CE with the following command:
After installing Docker CE, verify the Docker installation with the following command:
Create Docker Volume for Data and Log
Docker volume is a method for persisting data and configuration in Docker containers. When you remove any container, the data and configurations are still available in the Docker volume. So you will need to create a data and log volumes to backup Jenkins data and configurations including, logs, plugins, plugin configuration and job config.
Let’s start with creating volume for data and log with the following command:
docker volume create jenkins-log
Once the volumes are created, you can list them with the following command:
You should see the following output:
local jenkins-data
local jenkins-log
Install Jenkins with Docker
Next, you will need to create a docker file to pull and build Jenkins image with required settings.
You can create docker file with the following command:
nano docker/dockerfile
Add the following lines:
LABEL maintainer="[email protected]"
USER root
RUN mkdir /var/log/jenkins
RUN mkdir /var/cache/jenkins
RUN chown -R jenkins:jenkins /var/log/jenkins
RUN chown -R jenkins:jenkins /var/cache/jenkins
USER jenkins
ENV JAVA_OPTS="-Xmx8192m"
ENV JENKINS_OPTS="–handlerCountMax=300 –logfile=/var/log/jenkins/jenkins.log
–webroot=/var/cache/jenkins/war"
Save and close the file, when you are finished. Then, build the Jenkins image with the following command:
docker build -t myjenkins .
You should see the following output:
Step 1/10 : FROM jenkins/jenkins
—> ae831925b271
Step 2/10 : LABEL maintainer="[email protected]"
—> Running in 673bf1ecc3ea
Removing intermediate container 673bf1ecc3ea
—> cad1bee88092
Step 3/10 : USER root
—> Running in 36909c427d44
Removing intermediate container 36909c427d44
—> 2c381cc3a773
Step 4/10 : RUN mkdir /var/log/jenkins
—> Running in 337c0310db99
Removing intermediate container 337c0310db99
—> 5aa93b90c67e
Step 5/10 : RUN mkdir /var/cache/jenkins
—> Running in 2c77577ae28b
Removing intermediate container 2c77577ae28b
—> 5016430c07eb
Step 6/10 : RUN chown -R jenkins:jenkins /var/log/jenkins
—> Running in e4c820f66103
Removing intermediate container e4c820f66103
—> c8d2830a84c5
Step 7/10 : RUN chown -R jenkins:jenkins /var/cache/jenkins
—> Running in d024606146d5
Removing intermediate container d024606146d5
—> a11d613cff18
Step 8/10 : USER jenkins
—> Running in 478f3c067131
Removing intermediate container 478f3c067131
—> edea568d5564
Step 9/10 : ENV JAVA_OPTS="-Xmx8192m"
—> Running in 5ae52922f52b
Removing intermediate container 5ae52922f52b
—> cb1285b1bc72
Step 10/10 : ENV JENKINS_OPTS="–handlerCountMax=300 –logfile=/var/log/jenkins/jenkins.log
–webroot=/var/cache/jenkins/war"
—> Running in 973fb9257c29
Removing intermediate container 973fb9257c29
—> b131c5adf03e
Successfully built b131c5adf03e
Successfully tagged myjenkins:latest
The new Jenkins image with name myjenkins has been built successfully.
Run Jenkins Container with Data and Log Volume
Jenkins image is now built with required settings. Next, you will need to run Jenkins container by specifying data and log volumes as a mount point.
You can run the Jenkins container with the following command:
target=/var/log/jenkins –mount source=jenkins-data,target=/var/jenkins_home -d myjenkins
Once the Jenkins container is started, you can verify the running container with the following command:
You should see the following output:
3dec02a7077c myjenkins "/sbin/tini — /usr/…" 6 minutes ago Up 6 minutes
PORTS NAMES
0.0.0.0:8080–>8080/tcp, 0.0.0.0:50000–>50000/tcp jenkins-master
Next, you will need to check the jenkins log file whether everything is working fine or not:
You should see the following output:
Please use the following password to proceed to installation:
This may also be found at: /var/jenkins_home/secrets/initialAdminPassword
*************************************************************
*************************************************************
*************************************************************
Please note the above password, you will need it during the Jenkins web set up wizard.
Access Jenkins Web Interface
Now, open your web browser and type the URL http://your-server-ip:8080. You will be redirected to the Jenkins setup screen as shown below:

Provide your administrator password and click on the Continue button. You should see the following page:
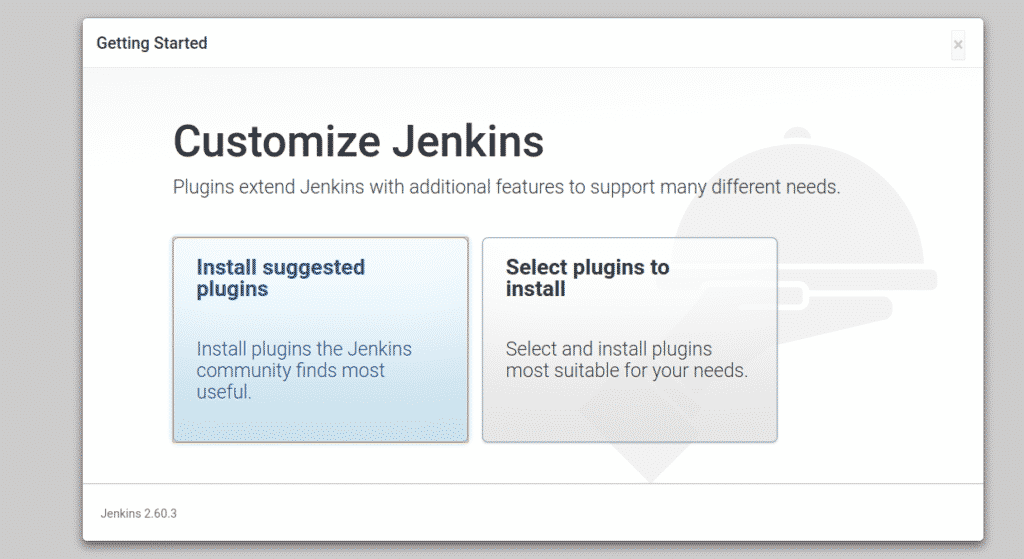
Now, click on the “Install suggested plugins” to install the required plugins. Once the installation has been finished. You should see the following page:
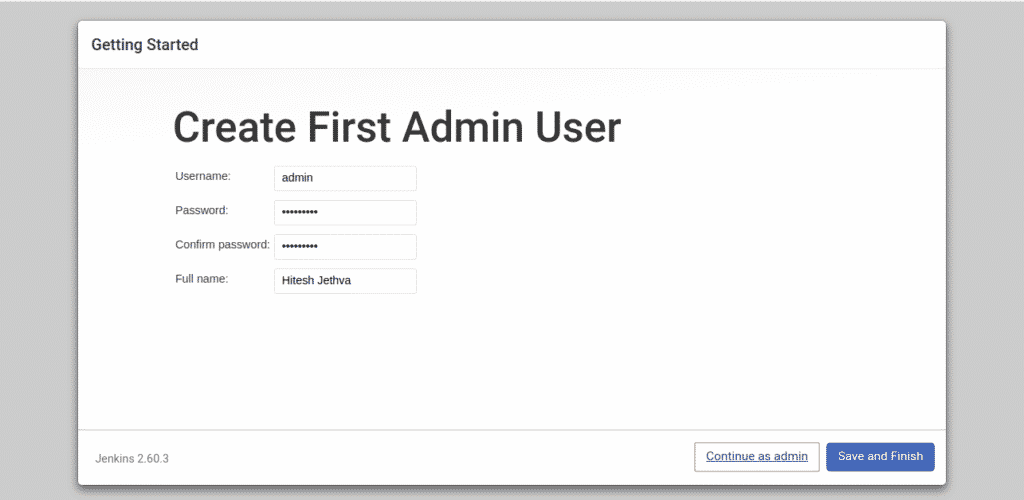
Now, provide your admin username, password and full name then click on the Save and Finish button. You should see the following page:
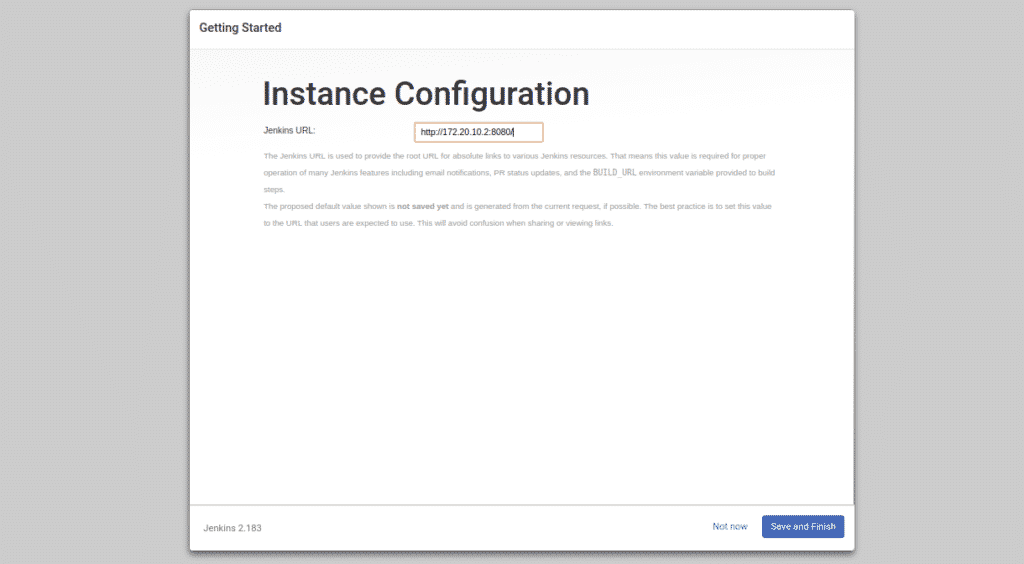
Now, just click on the Save and Finish button. Once the setup completed successfully, you should see the following page:

Now, click on the “Start using Jenkins“. You will be redirected to the Jenkins dashboard as shown in the following page:
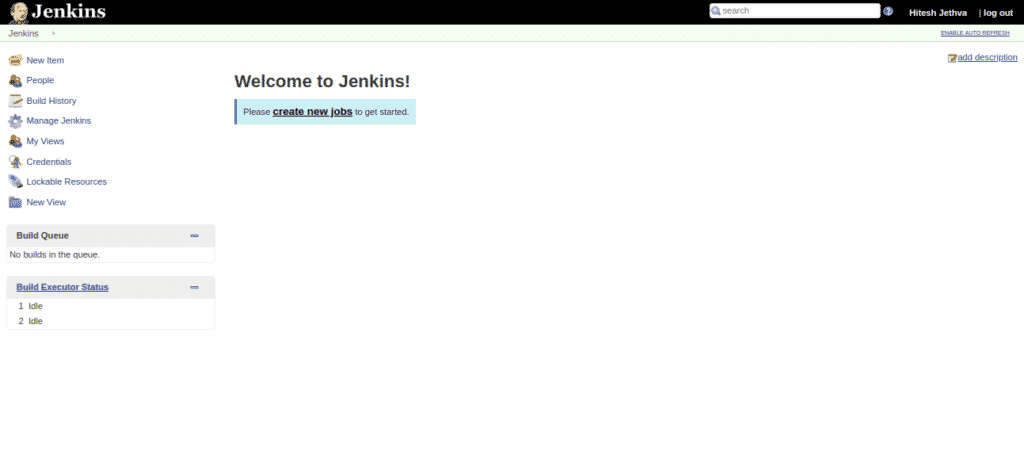
Now, click on the “create new jobs” button. You should see the following page:
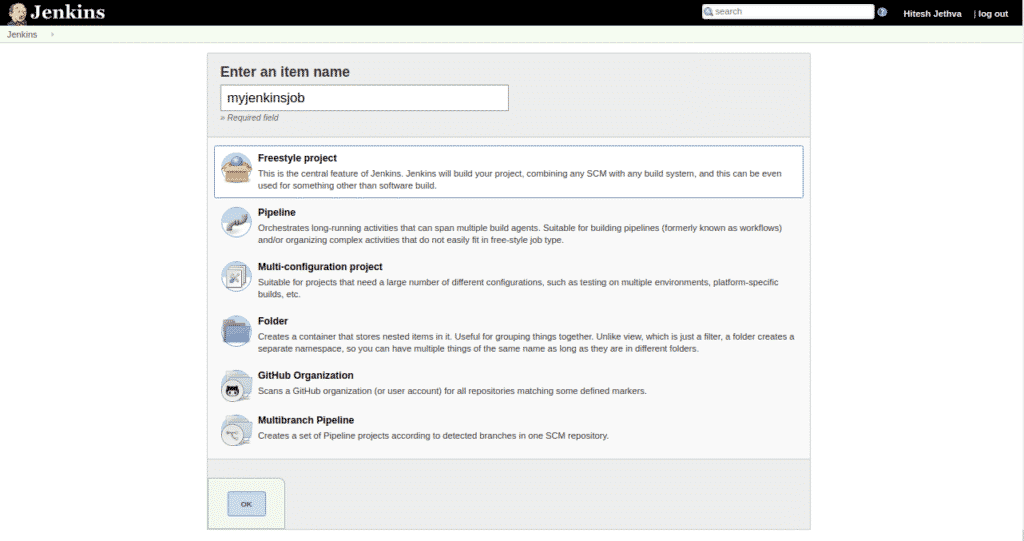
Now, provide your job name and click on the OK button. You should see the following page:

Now, click on the Save button to save all the settings. You should see your newly created jobs in the following page:
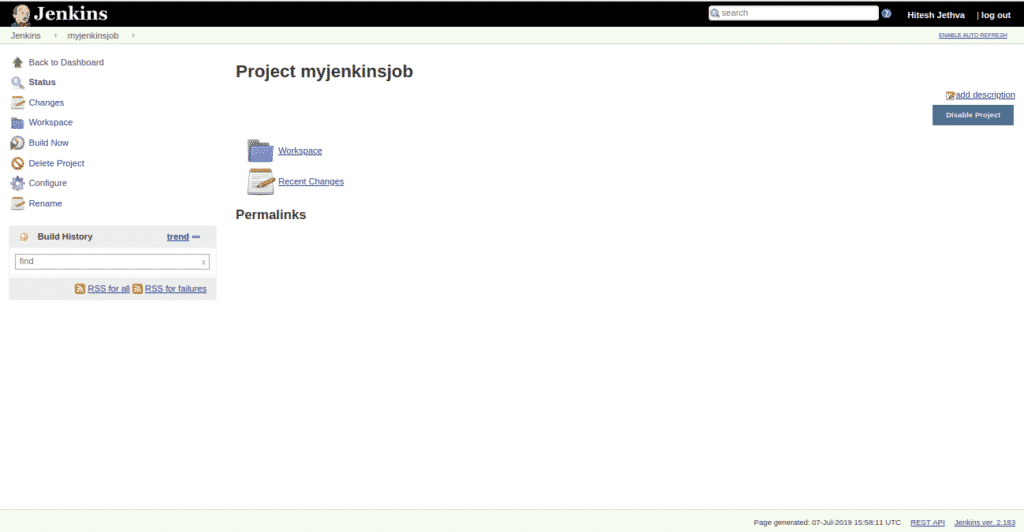
Test Jenkins Persistent Data
Jenkins is now installed and configured. Next, you will need to test whether Jenkins data and log are still persisting after removing the Jenkins container.
To do so, first stop and delete the Jenkins container with the following command:
docker rm jenkins-master
Now, start the Jenkins container again with the following command:
target=/var/log/jenkins –mount source=jenkins-data,target=/var/jenkins_home -d myjenkins
Once the Jenkins container has been started, open your web browser and type the URL http://your-server-ip:8080. You will be redirected to the following page:
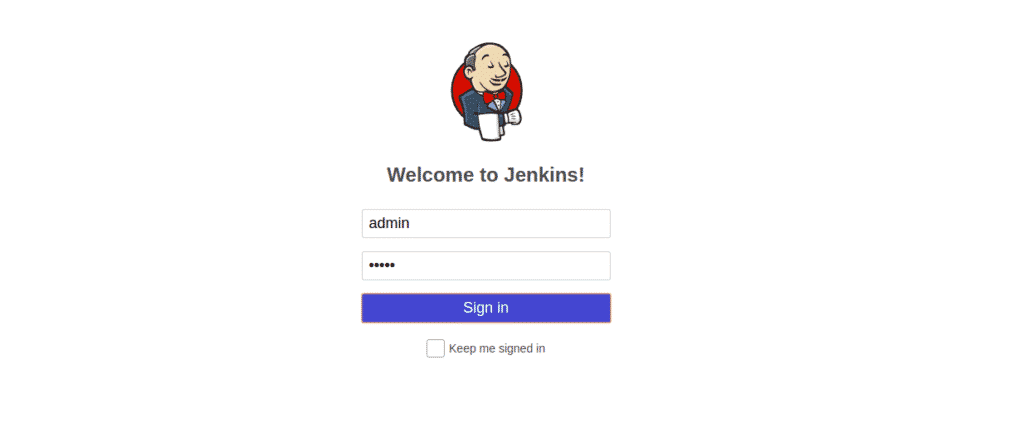
Now, provide your admin user name and password then click on the Sign in button. You should see the Jenkins dashboard in the following page:

That means you have preserved all the data, logs, setup configuration and plugin installs. You should also see that your myjenkinsjob is still there.
CONCLUSION
Now you can containerize your devop process with Jenkins and Docker, enjoy.
