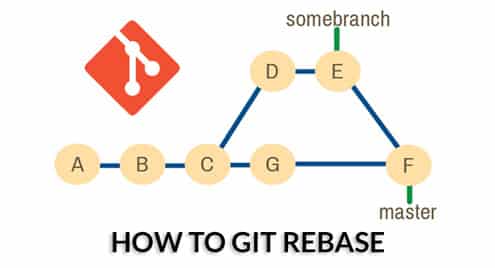
In this article, I will talk about how Git rebase works, the differences between Git rebase and Git merge, and how to work with Git rebase. So, let’s get started.
Git Rebase:
Let’s say, you have a Git repository with the commits A, B, C in the master branch. Then, you created a new branch somebranch and added 2 new commits D and E to the somebranch branch.
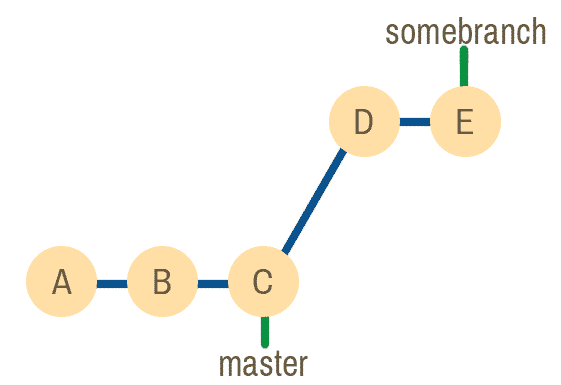
Fig 1: initial commit history.
Now, let’s say, you forgot to add something in the master branch. So, you go back to the master branch and add a new commit G to the master branch. Your git history should look as follows.
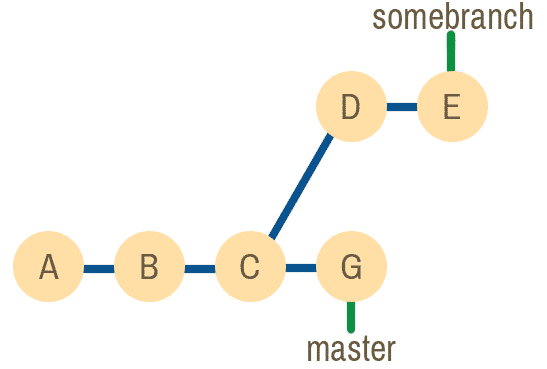
Fig 2: commit history after adding commit G in the master branch.
Everything looks good. Now, if you wanted every changes you’ve made to the somebranch branch to be in the master branch, you can merge the somebranch branch to the master branch. This is what git merge do.
What if you want the commit G to be available in the somebranch branch? Well, you can use git rebase for that.
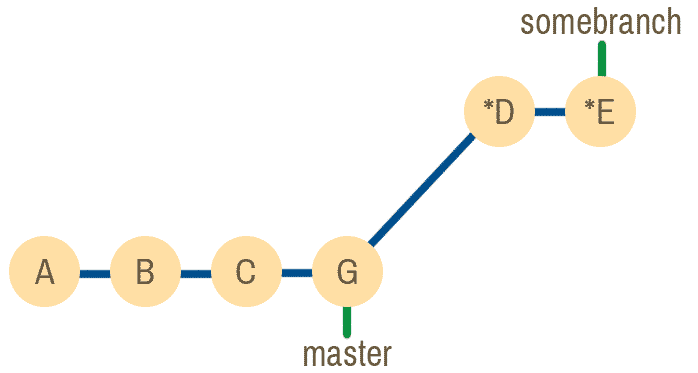
From the commit history in fig 2, you can see that the branch somebranch starts from the commit C. If you do a git rebase on somebranch, then it would start from the commit G as shown in fig 3 below. Note that, the contents of the commit D and E will change as well after the rebase operation. The commits D and E will include the changes in commit G. This is why I added * symbol before the commits D and E.
If you want to know how the commit history would look like if I merged it, then take a look at fig 4. I’ve included it just so you will be able to compare it with git rebase.
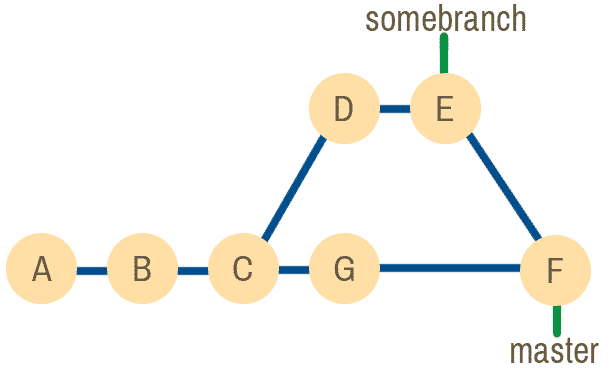
Fig 4: commit history if git merge was used.
Now that you know what is git rebase, the difference between git rebase and git merge and why git rebase it used, I will show you how to use it in the next section of this article below.
Git Rebase Workflow:
In this section, I will create a new git repository on my local computer and show you how git rebase works. I recommend you have a good understanding of git rebase before applying it on your project.
First, create a new Git repository rebase-demo/ on your computer as follows:

Now, navigate to the rebase-demo/ directory as follows:

Now, create a new file test.txt as follows:

The test.txt file contains only one-line A. Let’s say, this is your initial project code.
Now, commit the changes as follows:
$ git commit -m ‘A’

Now, add another line B to the test.txt file as shown in the screenshot below.

Now, commit the changes as follows:
$ git commit -m ‘B’

Now, let’s add another line C to the test.txt file.

Also, commit the changes as follows:
$ git commit -m ‘C’

Now, the commit history of the master branch should look as follows:

Now, let’s say, you have some new ideas that you want to try out. So, let’s create and checkout to a new branch new-feature as follows:

Now, add your new idea (the line D let’s say) to the test.txt file.

Now, commit the changes as follows:
$ git commit -m ‘D’

Now, add the line E to the test.txt file.

Commit the changes as follows:
$ git commit -m ‘E’

Now, the commit history of the new-feature branch should look as follows:
See how the commits are in order A < B < C < D < E?

Now, you remember that you forgot to add something to the master branch that you also wanted to be in the new-feature branch! So, checkout to the master branch.

I added a new line at the end of the test.txt file as you can see.

Now, commit the changes as follows:
$ git commit -m ‘G’

Now, the commit history of the master branch should look like this.

Now, to rebase the commits from the master branch to the new-feature branch, first checkout to the new-feature branch.

Now, do a git rebase of the master branch as follows:

Some merge conflict! Let’s fix that.
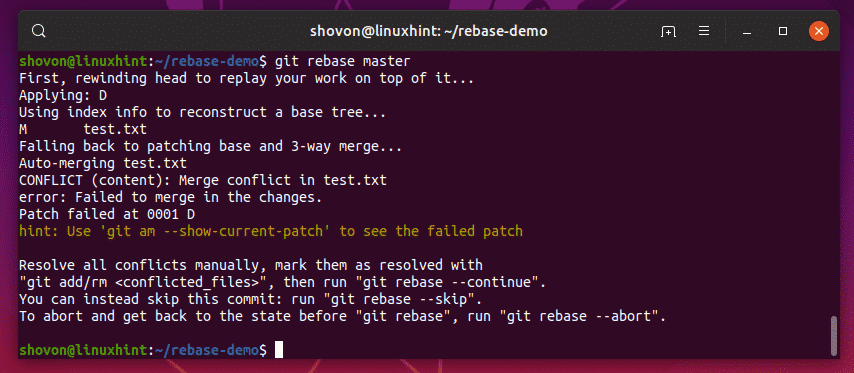
Well, the changes I’ve made to the commit G and D are conflicting with each other. I want to keep both of these.
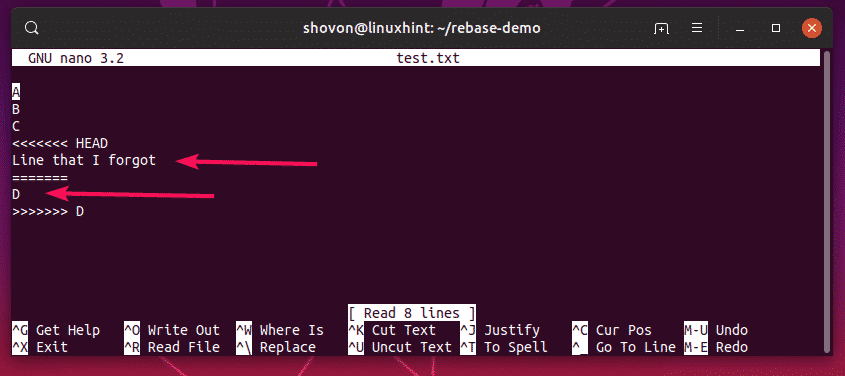
After fixing the merge conflict, the test.txt file should look as follows:

Now, add the changes to the staging area as follows:

Now, continue the rebase operating as follows:

Another merge conflict! Well, this can happen. Rebase changes the git commit history. So, things like this are expected.

It seems that the merge process failed due to some empty lines. Let’s fix that.
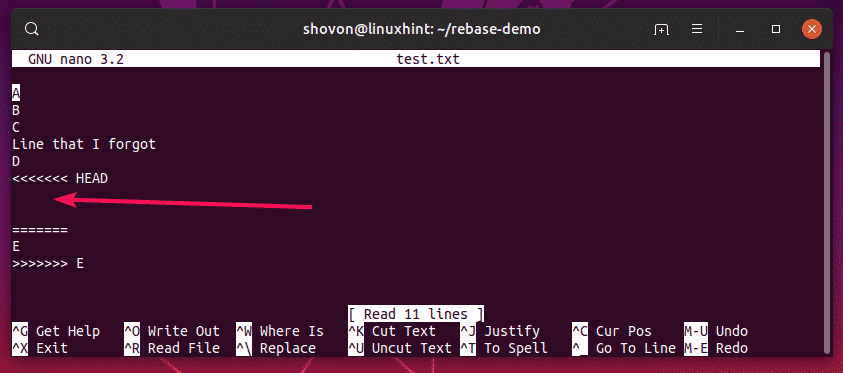
After fixing the merge conflict, the test.txt file should look as follows.
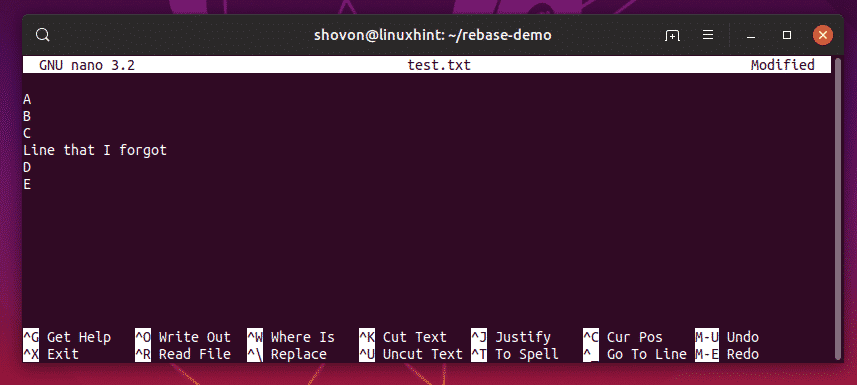
Now, add the changes to the staging area as follows:

Now, continue the rebase operation as follows:

Git rebase is complete.

As you can see, the commit history of the new-feature branch is updated. Now, the commit history is as follows:
Just as expected.

The final test.txt file should look as follows.

Git rebase is a powerful tool. But, you should never use it on shared Git repositories. Only use it on the Git repositories that you work only. Otherwise, you will face a lot of problems along the way.
So, that’s how you use git rebase. Thanks for reading this article.
