Before we proceed with how to change from DHCP to Static IP Address in Ubuntu 17.04, lets review what a DHCP is and why you might want to switch to a static IP instead.
DHCP which stands for Dynamic Host Configuration Protocol, is a network service that allows computer hosts in a network to be assigned settings automatically from another server, instead of manually configuring each network host. Computers configured to be DHCP clients have no control over the settings it receives from the DHCP server, and the configuration is transparent to the computer’s user.
Why Switch to Static?
One and probably the most comon reason why adminsitrators switch from a DCHP assigned settings to a manually configured settings is if the the computer or server is runing a service that requires others to access via its IP address especially in an environment where DNS isn’t setup. This is typically found in an intranet setup meaning its only available local on the internal network.
How to change from DHCP to Static IP Address
- There are 2 ways we can do this. Either using the GUI network manager interface or via the command line
Using Network Manager GUI
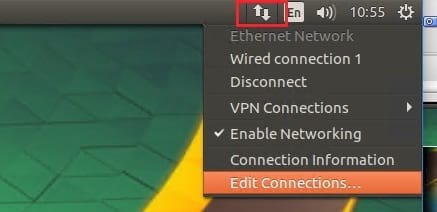
- Click on the Ethernet Network icon at top right and click Edit Connections…
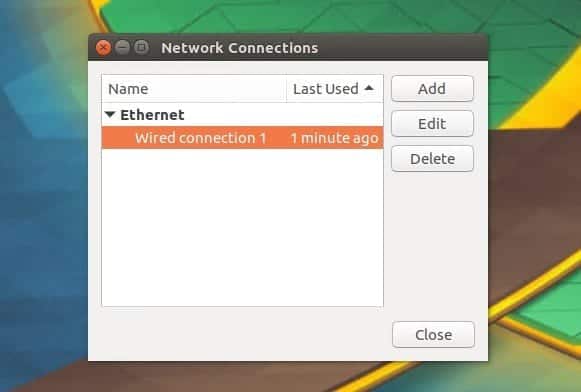
- Select the network and click Edit
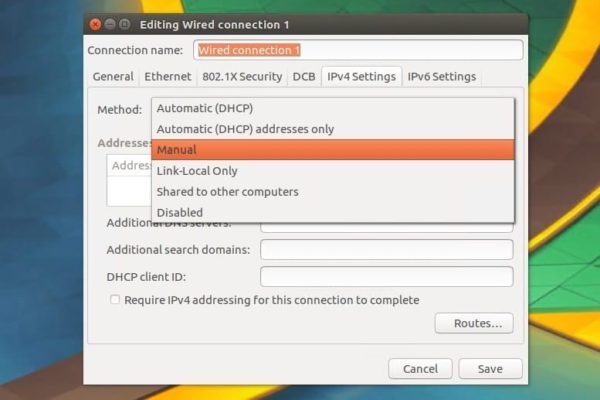
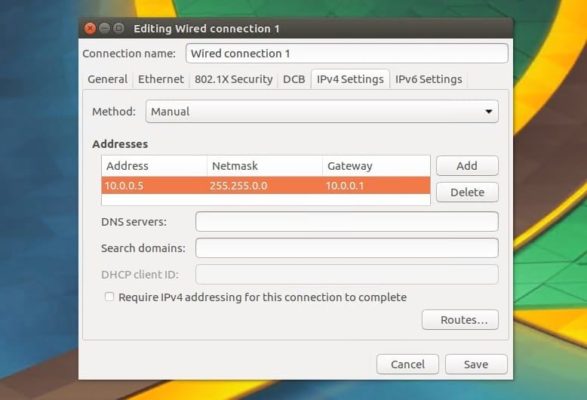
- Click the IPv4 Settings tab > Change Method from DHCP to Manual
- Click the Add button under Addresses and enter the details as seen below (Obvious the IP/Netmask/Gateway will be yours). If you have a DNS server, enter the IP as well
- Save changes and restart your network daemon by running the following command
sudo /etc/init.d/network-manager restart
Change via the network interface using the command line
- First we disable the network configuration daemon to avoid any interferance
systemctl stop NetworkManager.service
systemctl disable NetworkManager.service
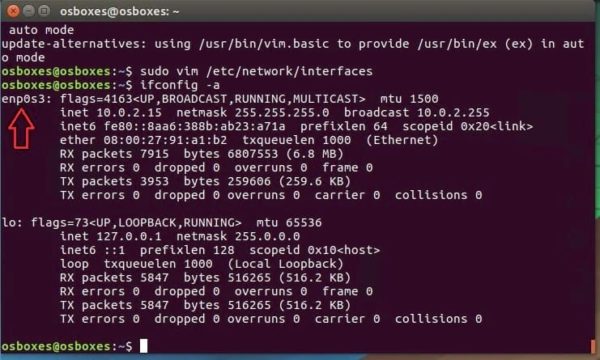
- Indentify your network adapter name by running following commands
ifconfig -a
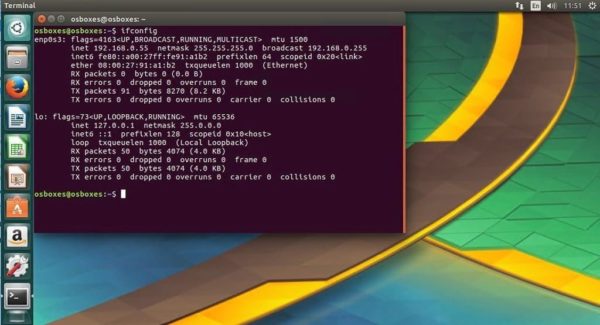
As seen, mine is called enp0s3
- Next lets change the configuration on /etc/network/interfaces from dhcp to static by running the following command in terminal. First lets install vim editor because of its unique looks
sudo apt-get install vim
sudo vim /etc/network/interfaces
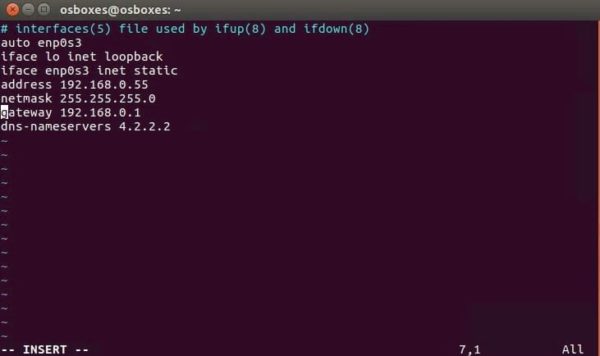
- Now replace the content in the file with following. Note: I have commented on lines that needs replacing or add incase your file contains more info
auto lo enp0s3 #here replace the adapter name with yours
iface lo inet loopback # leave this

# add the following lines
iface enp0s3 inet static
address 192.168.0.55
netmask 255.255.255.0
gateway 192.168.0.1
dns-nameservers 4.2.2.2
- Save changes using cntrl + x and restart ubuntu network interface
sudo /etc/init.d/networking restart

or
sudo systemctl restart networking
Note: If after restarting the services, the changes does not take effect, then reboot the machine.
