In a previous article we deployed a Kubernetes Cluster with one master and one worker node. Kubernetes clusters are mainly about two things; Nodes and Pods. Pods are the containerized applications that you want to deploy on the cluster and nodes are the individual compute servers responsible for either managing the cluster or running the apps. To make matters simpler, we start with a stateless application and introduce various concepts like labels and selectors which are used to bind pods with each other.
There are other important concepts like replica sets, services and deployments all of which we shall be learning in this article.
Traditional app deployment
If you look at the traditional approach to deploy a web app, scalability is something you would have to consider before starting out. If you need a database separate from your web front-end, you are better off doing it right now rather than doing it later. Do you plan on running more than one web app? Better configure a Reverse Proxy server beforehand.
With Kubernetes the approach has shifted. Deployment can be done with current needs in mind and can later be scale as your business grows. Containerization allows you to segregate essential components of your web services, even when they are running on a single node. Later when you scale horizontally (which means you add more servers to your environment) you simply need to spin up more containers, and Kubernetes will schedule it on appropriate nodes for you. Reverse proxy? Kubernetes services would come in to solve that problem.
Pods
As a first step, let’s spin up a pod. To do that we would need a YAML file defining various attributes of the pod.
kind: Pod
metadata:
name: nginx
spec:
containers:
– name: nginx
image: nginx:1.7.9
ports:
– containerPort: 80
Add the contents above in a pod.yaml file and save it. Looking at the text above, you can see that the kind of resource we are creating is a pod. We named it nginx, and the image is nginx:1.7.9 which, by default, means Kubernetes will fetch the appropriate nginx image from Docker hub’s publicly available images.
In large scale organizations, K8 is often configured to point at a private registry from which it can pull the appropriate container images.
Now to start the pod run:
You can’t access the pod from outside the cluster. It is not exposed yet, and it only exists as a solitary pod. To ensure that it is indeed deployed, run:
To get rid of the pod named nginx, run the command:
Deployments
Getting just one functioning pod is not the point of Kubernetes, what we would want, ideally, is multiple replicas of a pod, often scheduled on different nodes so if one or more nodes fail, the rest of the pods will still be there to take up the additional workload.
Moreover, from a development standpoint we would need to have some way of rolling out pods with a newer version of the software and making the older pods dormant. In case, there’s an issue with the newer pod we can roll back by bringing back older pods and deleting the failed version. Deployments allow us to do that.
The following is a very common way of defining a deployment:
kind: Deployment
metadata:
name: nginx-deployment
spec:
replicas: 2
template:
metadata:
labels:
app: nginx
spec:
containers:
– name: nginx
image: nginx:1.7.9
ports:
– containerPort: 80
You will notice, among other things a key-value pair which is:
labels:
app: nginx
Labels are important for cluster management as they help in keeping track of a large number of pods all with the same duty. Pods are created on the command of the master node, and they do communicate with the master node. However, we still need an effective way for them to talk with each other and work together as a team.
Services
Each pod has its own internal IP address and a communication layer like Flannel helps pods to communicate with one another. This IP address, however, changes quite a bit and, after all, the entire point of having many pods is to let them be disposable. Pods are killed and resurrected often.
The question that now arises is this – How will the front-end pods talk to the back-end pods when things are so dynamic in the cluster?
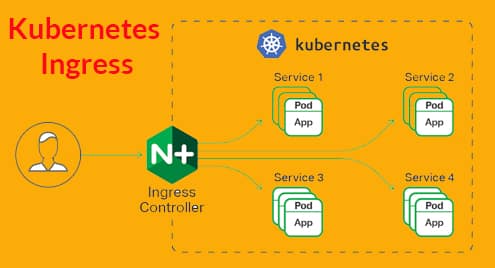
Services come into the picture to resolve this complexity. A service is yet another pod that acts like a load balancer between a subset of pods and the rest of the Kubernetes cluster. It binds itself to all the pods that have a specific label attached to them, for example, database, and then it exposes them for the rest of the cluster.
For example if we have a database service with 10 database pods, some of the database pods can come up, or get killed, but the service would ensure that the rest of the cluster gets the ‘service’ that is a database. Services can also be used to expose the front-end to the rest of the Internet.
Here’s a typical definition of a service.
kind: Service
metadata:
name: wordpress–mysql
labels:
app: wordpress
spec:
ports:
– port: 3306
selector:
app: wordpress
tier: mysql
clusterIP: None
The pods labelled WordPress with the specified mysql tier are the ones that will be picked up by this service and exposed to the webserver pods for a typical WordPress set up done on Kubernetes.
Word of Caution
When deploying a giant multi-tier app targeted towards a large consumer base, it becomes very tempting to write a lot of services (or a microservices, as they are popularly known). While this is an elegant solution for most use cases, things can quickly get out of hand.
Services, like pods, are prone to failure. The only difference is that when a service fails a lot of pods, which are perfectly functional, are rendered useless. Consequently, if you have a large interconnection of services (both internal and external) and something fails, figuring out the point of failure would become impossible.
As a rule of thumb, if you have a rough visualization of the cluster, or if you can use software like cockpit to look at cluster and make sense of it, your setup is fine. Kubernetes, at the end of the day, is designed to reduce complexity, not enhance it.
