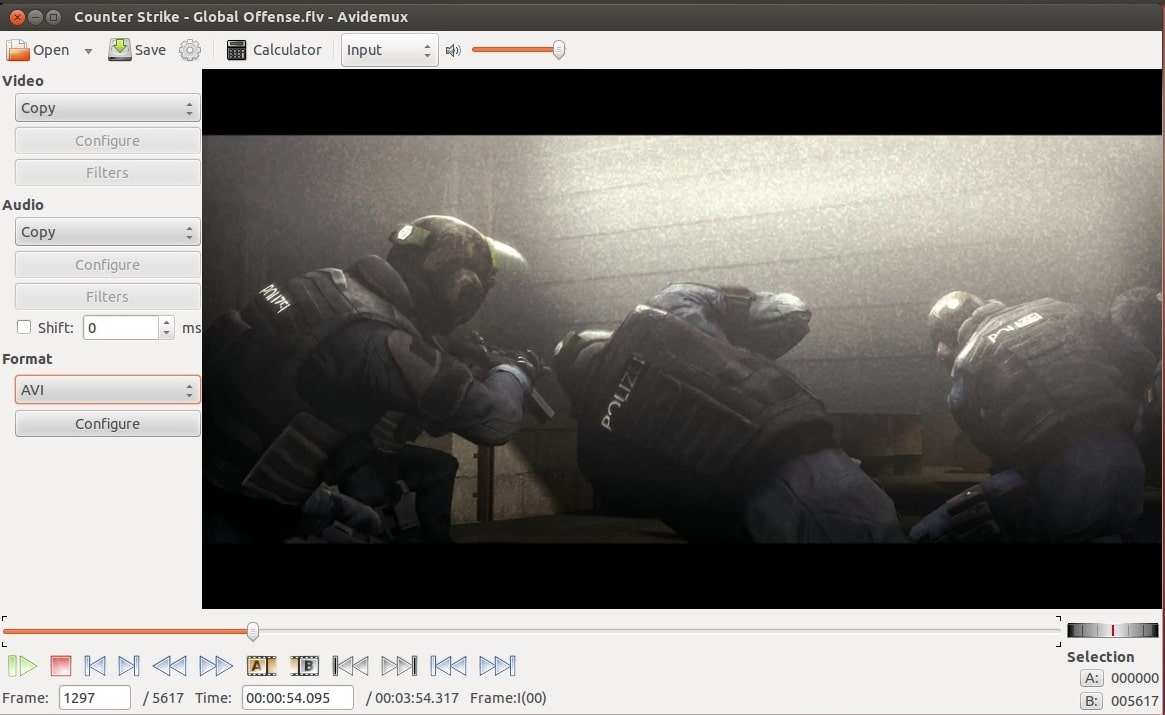
Linux doesn’t have its own video editing software like Windows Movie Maker for Windows OS and iMovie for Mac OS. But there are many open source video editing tools available for Linux and Avidemux Video Editor is one of them. Avidemux is a simple and free open source video editor available for Linux platform. It is designed for simple cutting, filtering, merging and encoding tasks.
Avidemux is cross platform video editing software and is also available for Microsoft Windows and Mac OS X under the GNU GPL license.
Avidemux Features
User Interface
Avidemux Video Editor has very simple and easy to understand user interface. Any new or professional in video editing will find it very easy to use.
As we can see in the above screenshot everything is place perfectly on the home screen. The user just needs to select a video file he/she wish to convert by clicking the ‘Open” button and then his can select output video and audio format from the dropdown list.
Supported Video/Audio Formats
Avidemux video editor supports various input and output video formats like AVI, MP4, H.264, H.265, etc. Avidemux also has support for various audio formats like MP3, AAC and other input/output audio formats.
Editing and Converting
Avidemux is a free video editor but it provides various features present in any premium video editor. It provides feature like applying video effects and transitions while converting any video file which is a very common feature in other paid video editors.
Avidemux provides for support for applying an external audio file to any video or extracting an audio file from a video file. It also supports features like built-in subtitle processing and subtitle formats .SRT, .SUB, .ASS and .SSA.
Avidemux Latest Version
Avidemux released the latest version 2.7.0 recently but 2.6.14 is the most stable version for Linux as of now.
How to Install Avidemux on Ubuntu
Installing Avidemux Video Editor on Ubuntu Linux is very simple task. Installation can be performed in 2 different way:
- Using Terminal
- Or Using Ubuntu Sofware Center.
Avidemux Installation Using Terminal
Step1: Open Terminal from Linux dashboard or by pressing CTRL+ALT+T on keyboard.
Step2: Once the Terminal window is opened type the commands given below one by one in Terminal and press “Enter” after every command. Now Avidemux Video Editor will be installed automatically.
sudo add-apt-repository ppa:rebuntu16/avidemux+unofficial sudo apt-get update sudo apt-get install avidemux2.6-gtk avidemux2.6-qt4
Step3: Once the installation process is complete user can open the Avidemux Video Editor from the App Menu on the left.
Avidemux Installation Using Ubuntu Software Center
Step1: Open Ubuntu Software Center from the App Menu on home screen and search ‘Avidemux Video Editor’ in the search bar.
Step2: Now click on Avidemux Video EditorClick and click “Intsall” button. Now Software Center will download and install Avidemux on Ubuntu Linux automatically.
Step3: Once the installation is complete we can see Avidemux Icon in the App Menu on the left.
Now the user can open Avidemux by clicking on Avidemux Icon and start video editing.
How to Uninstall Avidemux from Ubuntu
To uninstall Avidemux Video Editor just open Ubuntu Software Center and find Avidemux Video Editor in “Installed” tab and click “Remove” as shown in screenshot below.
Then Software Center will automatically uninstall Avidemux from Ubuntu Linux.
So this is everything you need to know about Avidemux Video Editor for Linux. If you are already using it or planning to use avidemux on your Linux system then don’t forget to tell us about your experience with Avidemux Video editor in comment section below.


