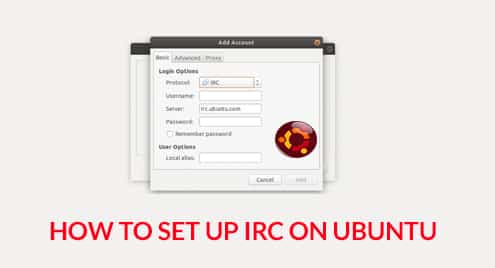
There are a lot of IRC Clients out there; some are available through a browser, but the issue with them is that you’d lose your chat history when you close the page and try to return to it. By using an IRC Client, you can prevent this and have a better experience when using IRC for chats.
You won’t only be seeing how to install these IRC Clients, you’ll also see how you can set them up and join “chat rooms” or ”channels” to begin communicating.
IRC Clients
To make use of IRC on your computer, you need to make use of an IRC Client. In this article, you’ll learn how to set up your IRC Client using two Ubuntu applications.
The IRC Clients you’ll learn to set up are:
- Polari
- Pidgin
Both IRC Clients serve the same purpose, but Pidgin can work for other purposes besides being an IRC Client, while Polari is mainly an IRC Client.
Polari
Polari is a powerful IRC Client that lets users easily connect to IRC servers and rooms; it has a good user interface and feels like a modern messenger app.
You can install Polari through three methods:
- The App Store
- The Package Management Tool
- Flatpak
The App Store
The easiest means of installing Polari is through the App Store as you can simply search for “Polari” on the App Store and click the install button to have the amazing tool installed on your computer.
The Package Management Tool
The package management tool is also another method of installing Polari, this can be through the apt or apt-get utility tool.
If you prefer using apt, you can install Polari with the command below:
You can also install Polari through the apt-get tool; this can be done with the command below:
Using any of both tools will produce the same results; hence it’s just a case of your preference.
Flatpak
Flatpak is also another alternative for installing Polari; to use Flatpak, you need to have it installed on your machine.
The command below is used to install Polari through Flatpak:
If you have Flatpak installed, it is likely that you’ll find different versions of Polari on the App Store; however you’ll be able to differentiate between the Polari app provided by the App Store and the one provided by Flatpak.
Connecting to a Server
After installing Polari on your computer, you can easily connect to an IRC Server as the app is easy to use.
You can do that in the following steps:
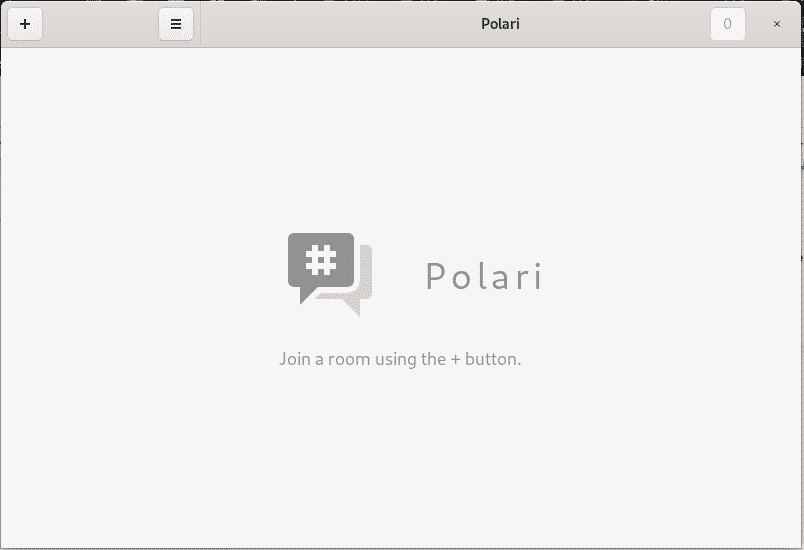
Click on the Add (+) button at the top left corner of the application.
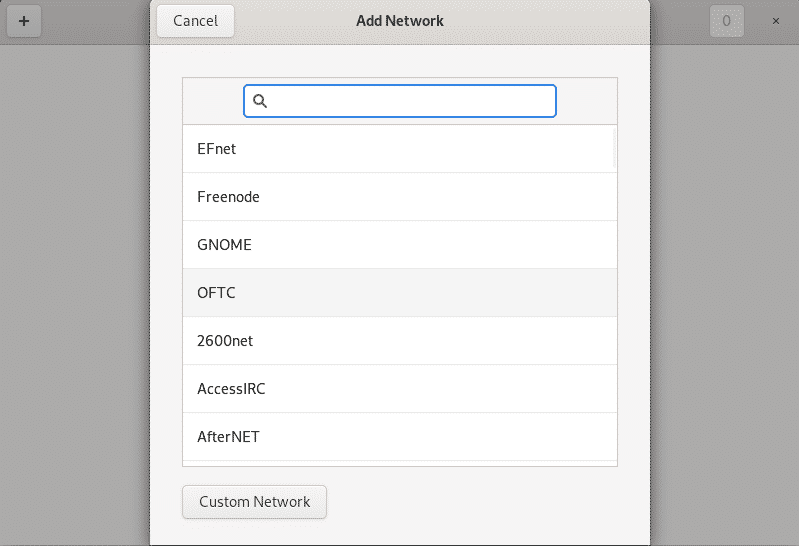
Select the network of choice; you’ll find different networks available to be selected such as Freenode, EFnet, GNOME.
By default, Polari makes selecting a chatroom easy as it loads popular chat rooms under that network.
Click on the chat room of interest to join.
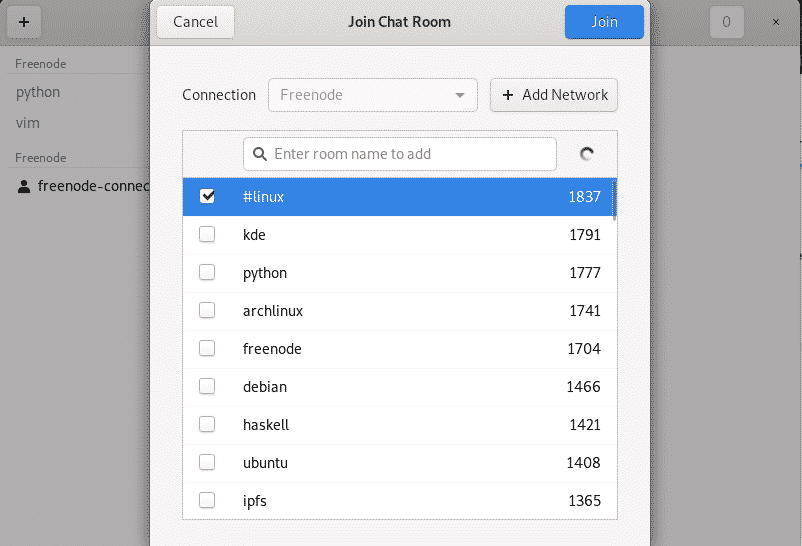
It is easy as that; you should however note that chat rooms will require you to be registered and will provide steps for you to go about the registration process.
That aside, Polari has done its job.
Pidgin
Unlike Polari, Pidgin serves other purposes asides being an IRC Client. Pidgin is a tool that also works for other protocols such as Instant Messaging, AIM, ICQ, Gadu-Gadu.
You can install Pidgin through three methods:
- The App Store
- The Package Management Tool
- Flatpak
The App Store
The App Store serves as a quick method of installing Pidgin. You can search for “Pidgin” on the store, you’ll find it having a purple color with a bird looking like a pigeon. When you find it, click the install button to install Pidgin.
The Package Management Tool
You can also install Pidgin using the package management tools, apt or apt-get. Using any of these tools will install the same Pidgin app on your Ubuntu machine, so your choice is simply a matter of preference.
You can install Pidgin through apt with the command below:
You can also install Pidgin through apt-get with the command below:
Flatpak
Like Polari, you can also install Pidgin through the Flatpak software utility tool. You need to have Flatpak installed on your Ubuntu machine to install apps through it.
The command below is used to install Pidgin through Flatpak:
Applications available through Flatpak will often show up in the App Store, so you may find multiple versions of Pidgin when you search for it on the App Store.
Connecting to Server
When Pidgin is installed, you can set it up to use as an IRC Client or any other Client by following the steps below:
Click on the “Accounts” menu from the “Buddy List” page.

Click on “Add” to add a server to the IRC Client.

Choose the protocol, username and password; in this case “IRC” will be chosen since the goal is to connect to an IRC Server, then click on “Add”.
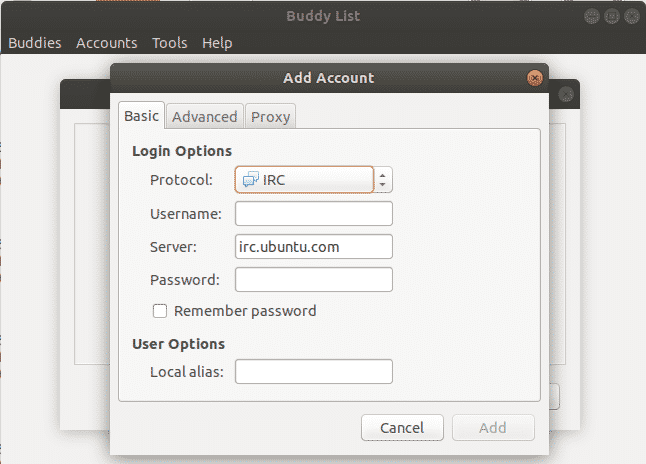
You’ll get to see a popup after a while, then you can join chat rooms by clicking on “Conversation” and “Join a Chat.”
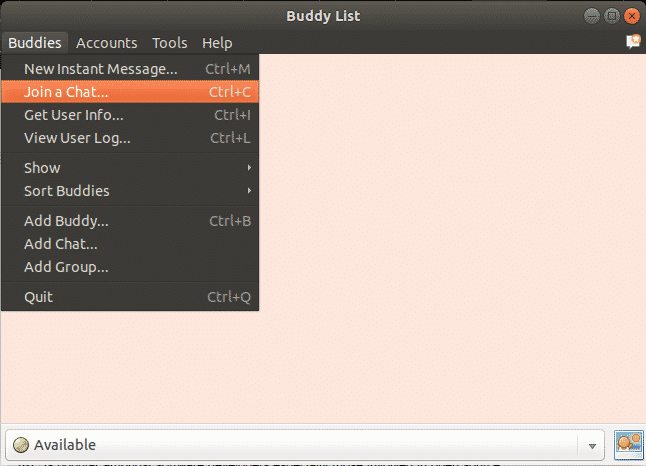
If you have a channel name in mind, you can type it in and click “Join.”
You can also click “Room List” and Pidgin will provide a list of Chat Rooms for that server.
Conclusion
IRC is popular amongst software developers especially those involved in open source projects, however, you may also find it being used among other groups of people. While some people think IRC is dead, it is not as it is performs well in areas of low bandwidth and is fault tolerant.
In this article, you’ve seen how to install two powerful IRC Clients on your Ubuntu machine and the step-by-step process in setting up these IRC Clients.
