The tar command comes preinstalled in almost every Linux distribution out there. So, it’s ready when you need it.
In this article, I am going to show you how to use the Linux tar command to compress files and decompress compressed files. So, let’s get started.
Creating tar Archives:
I have a directory ~/projects in my home directory. I have the following files and directories in the ~/projects directory. I will use these files and directories to demonstrate how to make archive files with the tar command in this article.
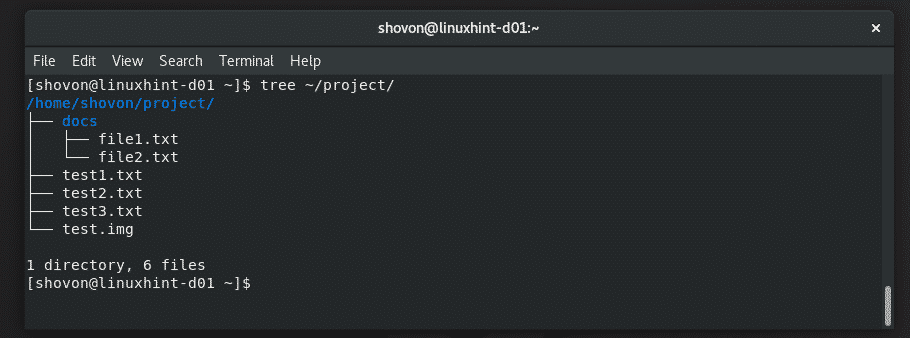
To create a tar archive of everything in the ~/project directory, run the tar command as follows:

The archive project.tar should be created.

As you can see, the archive file project.tar is created. It is 51 MB in size.

By default, the tar archive is not compressed. But, if you want you can compress the contents of the archive using gzip and bzip2 algorithm.
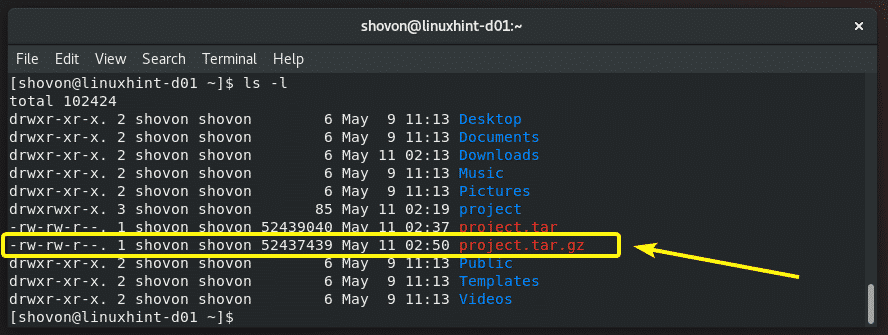
To perform gzip compression in the earlier example, you have to use the -z option of the tar command as follows:

project.tar.gz archive should be created. As you can see, the file size is slightly smaller than the uncompressed version. In real life scenario, you will get better results because I generated these files using the /dev/urandom and dd commands. So, the compression algorithms didn’t work that well.
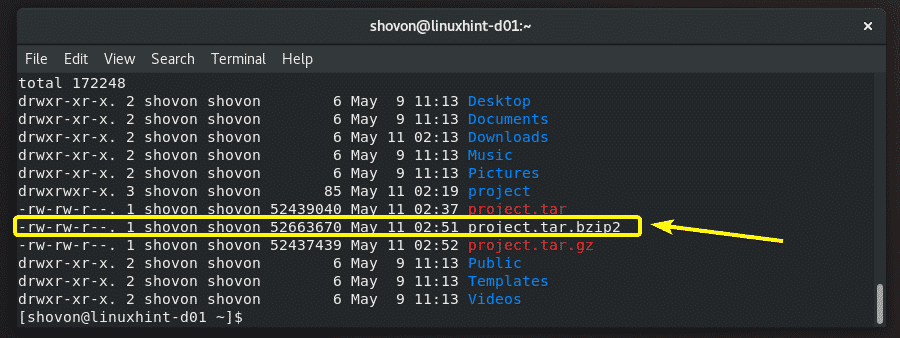
To perform bzip2 compression in the earlier example, you have to use the -z option of the tar command as follows:

As you can see, the project.tar.bzip2 archive is created.
Compressing Specific Files and Directories:
You don’t have to compress a directory if you don’t want to. You can specify different files and directories in different path (relative or absolute) in the tar command and compress them as follows:

The specified files and directories are compressed into an archive file is important_etc.tar.gz.

Excluding Files and Directories:
When you need to compress an entire directory with the tar command and you don’t want to include some files and directories within, you can use the –exclude option of the tar command as follows:

As you can see, the test.img file and docs/ directory including its contents are excluded from the archive.

Listing the Contents of a tar Archive:
Before you extract a tar archive, it’s always a good idea to know the file and directory structure of a tar archive. You can list all the files and directories inside of a tar archive with the following command:
As you can see, the file and directory structure of the tar archive is printed.

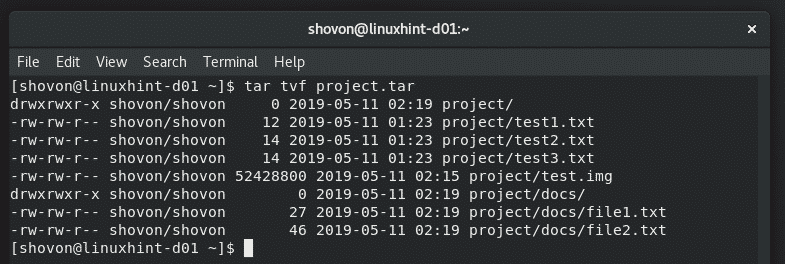
To see the file and directory permissions and other information about the files and directories inside a tar archive, run the tar command as follows:
As you can see, the contents of the tar archive and a lot of information about each files and directories are listed.
Extracting tar Archives:
To extract a tar archive, you have to know whether the archive is compressed or not. If the archive is compressed, then you have to know what compression algorithm is used to compress the archive as well.
Usually, you find this information from the archive filename. If the archive filename ends with .tar, then by convention this is a tar archive and is not compressed.
If the filename of the archive ends with .tar.gz, then it’s a gzip compressed archive.
If the filename of the archive ends with .tar.bzip2, then it’s a bzip2 compressed archive.
Still, people can use any file extension they want to represent the tar archive file. Nothing is stopping them. So, a better way is to use the file command.
To find information about an archive (let’s say project2.tar), run the file command as follows:
As you can see, even though the file extension is not correctly set, the file command still says it’s a gzip compressed archive.

Now, to extract the non-compressed tar archive project.tar you just created on your current working directory, run the following command:
This command will extract the archive in your current working directory.
If you want to extract the archive to some other directory, let’s say ~/Downloads, then run the tar command as follows:
NOTE: The directory you’re extracting the archive must exist before you run the command. If it does not, tar will not be able to extract the archive. So, make sure the directory exists and if it does not, create the directory with the mkdir command.

The archive project.tar is extracted into the ~/Downloads directory.

As you can see, the contents of the archive are now available in the ~/Downloads directory.

If the archive is gzip compressed, then use the -z option when you extract the archive as follows.
If the archive is bzip2 compressed, then use the -j option when you extract the archive as follows.
Getting Help:
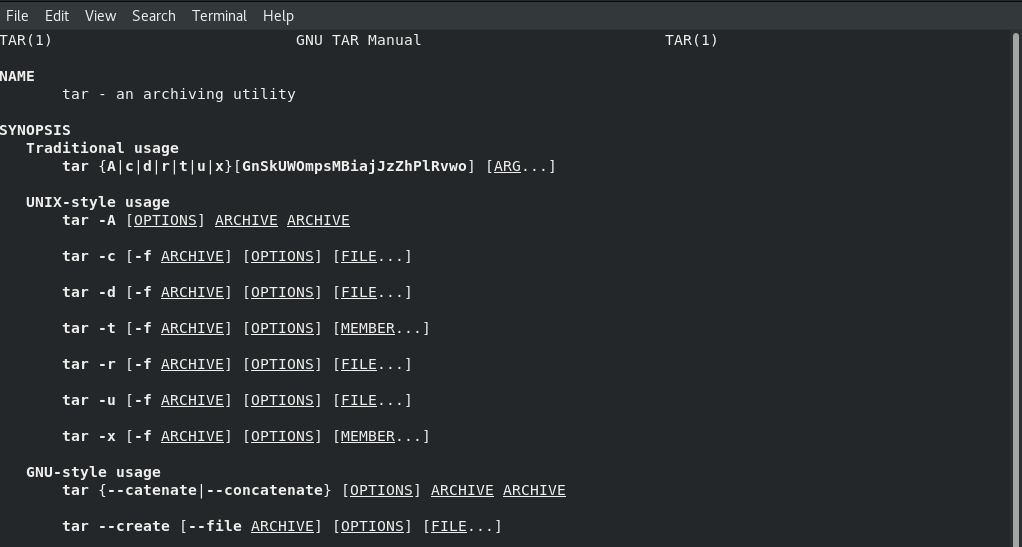
The tar command has a lot of options. It’s not possible to cover every one of them in this article. But, you can read the manpage of the tar command to learn more about it. I’ve shown you how to get started with the tar command in this article. Now, you should be able to move forward on your own.
To open the manpage of the tar command, run the following command:
So, that’s how you use the tar command in Linux. Thanks for reading this article.


