Requirements:
You need at least a spare partition or a hard drive on your computer to configure LVM based home directories.
I recommend you use a dedicated hard drive in a production environment. If you’re learning, then using a partition is just fine.
Installing LVM:
On Ubuntu, you can install LVM from the official package repository of Ubuntu.
First, update the APT package repository cache with the following command:

Now, install LVM with the following command:

Now, press y and then press <Enter>.

LVM should be installed.

If you’re using CentOS 7 or RHEL 7, you can install LVM with the following command:
Initial Setup of LVM:
Now, you have to tell LVM which partition or hard drive you want to manage with LVM. In order to do that, you need to know the device name of the partition or hard drive you want to use.
You can find the device name of the partition or hard drive with the following command:
All the partitions and hard drives installed on your computer should be listed. Here, I am going to use the dedicated hard drive sdb to configure LVM. But you can also use a partition such as sda2, sda3, sdb2 or whatever you have.

Now, create a LVM physical volume of your hard drive with the following command:
NOTE: Replace sdb with the device name of your hard drive or partition.

Now, create a LVM volume group (let’s call it home) of your hard drive with the following command:

Creating LVM Logical Volumes for Users:
Now, you have to create the required logical volumes for each of your login users and use it as the home directory.
Let’s say, we have 3 users, lily, linda and bob. User lily and linda wants 512 MB of disk space and bob wants 2 GB of disk space.
To create a 512 MB logical volume for lily, run the following command:
Or
$ sudo lvcreate –size 512M –name lily home

The same way, create a 512 MB logical volume for linda with the following command:

Now, create a 2 GB logical volume for bob with the following command:

Now, you have to format the logical volumes that you just created. I will use EXT4 filesystem.
To format the logical volume of lily /dev/home/lily, run the following command:

To format the logical volume of linda /dev/home/linda, run the following command:

To format the logical volume of bob /dev/home/bob, run the following command:

Creating Users:
Now, let’s create the users lily, linda and bob. I will use the useradd command to create the users because the useradd command does not create a home directory by default.
To create the user lily, run the following command:

Now, set a password for the user lily with the following command:

Now, type in the password you want to set for the user lily. The password should be set.

The same way, create the user linda with the following command:
Also, set a password for the user linda with the following command:
Again, create the user bob with the following command:
Now, set a password for the user bob with the following command:
Mounting LVM Logical Volumes as Home Directories:
Now, you have to create the mount points for the LVM logical volumes that you’ve just created. As they are going to be the home directories of lily, linda and bob, the mount points should be /home/lily, /home/linda, and /home/bob respectively.
To create the mount point for the user lily, run the following command:

To create the mount point for the user linda, run the following command:

To create the mount point for the user bob, run the following command:

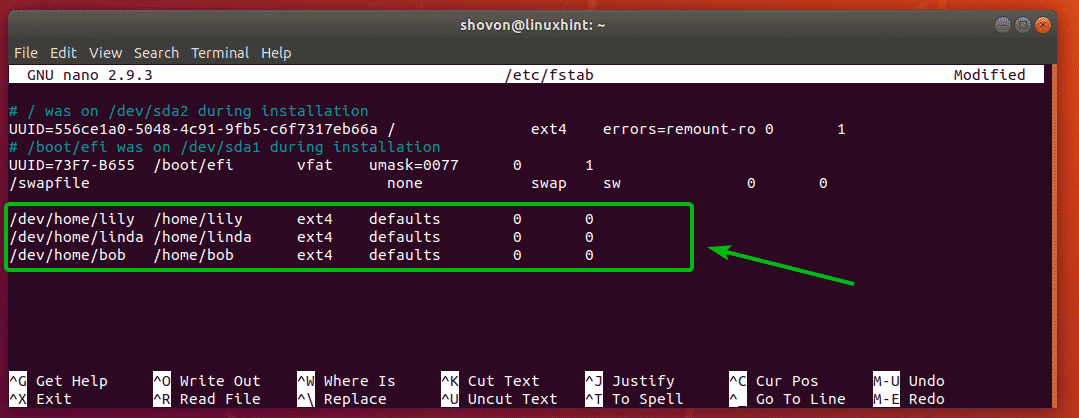
Now, open the /etc/fstab file with the following command:

Now, type in the following lines at the end of the file. Once you’re done, save the file with <Ctrl> + x followed by y and then press <Enter>.

Now, to mount the LVM logical volumes to the user home directories, run the following command:

Now, to confirm that the LVM logical volumes are mounted correctly, run the following command:
As you can see, the LVM logical volumes are mounted correctly for each user.

Now, you have to fix the permissions for each mounted LVM logical volumes. Otherwise, the users won’t be able to create or delete any files. Also, you should copy all the files from the /etc/skel directory to each home directory.
To copy the files from the /etc/skel directory to the home directories, run the following commands:
$ sudo cp -RT /etc/skel /home/linda
$ sudo cp -RT /etc/skel /home/bob

Now, fix the permissions of lily’s home directory with the following command:

To fix the permissions of linda’s home directory, run the following command:

To fix the permissions of bob’s home directory, run the following command:

As you can see, the correct permissions are assigned to each home directory.

You can also login as any of the users and it should work.

So, that’s how you use LVM for user home directories in multi user environment in Linux. Thanks for reading this article.


