You can also share a Docker volume to many containers. Let’s talk about a scenario to find out why it’s important.
Let’s say you have a PHP web application. Now you want to test whether it works on PHP version 5.4, 7.0, 7.1, and 7.2. You can create a Docker volume, let’s call it webapp. Then copy the source code files of your PHP web app to the Docker volume webapp. Then you can create containers of different PHP versions and attach the Docker volume webapp to WEBROOT of all these containers. That way, you can easily test how your web app performs on different PHP versions.
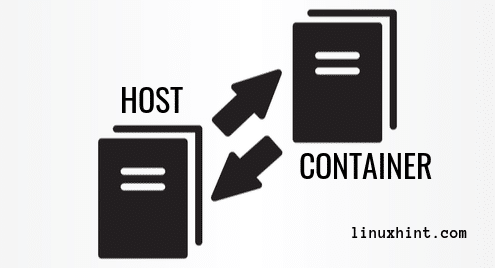
In this article, I will show you how to use Docker volumes to share data between containers and the host computer. Let’s get started.
Creating Docker Volumes:
Before you can add a Docker volume to your container, you have to create a Docker volume.
To create a Docker volume (let’s say data1), run the following command:

data1 volume should be created.

Listing Docker Volumes:
You can list all the Docker volumes that you created with the following command:
As you can see, all the Docker volumes are listed. Right now, I have only data1 Docker volume. If I created more, it would show up here.

Inspecting Docker Volumes:
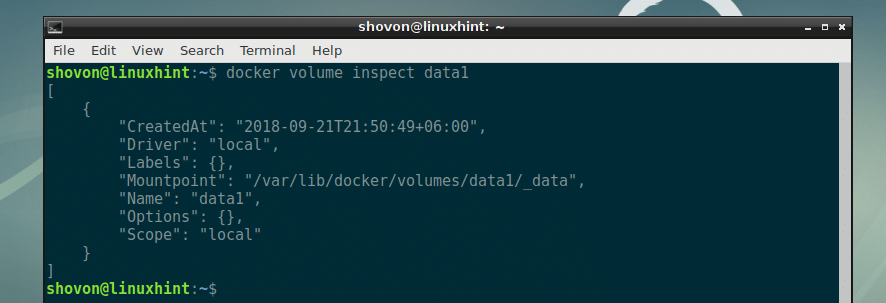
You can see more information about a certain Docker volume (let’s say data1) with the following command:
As you can see, a lot of information about the data1 volume is listed in JSON format. The most important one is Mountpoint. Mountpoint tells you the path of the local file system where the volume is mounted. Here, the data1 volume is mounted on /var/lib/docker/volumes/data1/_data on my local file system. I will show you how to modify data on your Docker volumes from your host computer in a later section of this article below.
Adding Volumes to Containers and Sharing Volumes Between Containers:
Now I am going to create a simple Docker container from the httpd:2.4 Docker image for running Apache 2 webserver. Then I am going to mount the data1 volume to /usr/local/apache2 /htdocs directory of that Docker container. I will also give the container a name (let’s say www) just to easily manage it.
To do that, run the following command:
httpd:2.4

The container www should be created.

Now to check whether the data1 volume was mounted to the www container, run the following command:
It’s a long list of information. But on the Mounts, you can see that, the name of the volume is data1, it is mounted to /usr/local/apache2/htdocs on the www container.

Now I am going to connect to the www container and run the bash shell there with the following command:

As you can see, bash shell is running.

Now let’s create a simple html file in the /usr/local/apache2/htdocs directory where the data1 volume is mounted.

Now exit out of the www Docker container with the following command:

Now find out the IP address of the www container with the following command:
As you can see, the IP address of the www container is 172.17.0.2 (in my case).

When I access the www container from the web browser, you can see that, the page I just created is displayed.

Now I am going to create another container www2 and attach the data1 volume to it the same way and see if the changes to the data1 volume (mounted in /usr/local/apache2/htdocs in www and www2 container) from one container is visible to the other container.
To create a new container www2, and attach the data1 volume to it, run the following command:
httpd:2.4

Now let’s find the IP address of the www2 container with the following command:

As you can see, I get the same page when I access the www2 container from a web browser. It means that the data from the www container persisted and shared to the www2 container.

Now I am going to make a changes to the index.html (in the data1 volume mounted in /usr/local/apache2/htdocs) page from the www2 container and check if the change reflects to both the www and www2 containers.
As you can see, the changes made to one container (www2 in this case) is reflected to the other container (www in this case).
Accessing Docker Volumes from Host Computer:
NOTE: For this to work, you must be logged in as root user.
You can run the following command to find the path of the data1 Docker volume in your host computer:
As you can see, the data1 volume is in the /var/lib/docker/volumes/data1/_data directory of my host computer.

Now navigate to the /var/lib/docker/volumes/data1/_data directory with the following command:

As you can see, the index.html file we just created is there.

Also the contents of the index.html file is the same.

Now, let’s edit the index.html file and see if the changes are reflected in the www and www2 containers.
I changed the contents of the index.html file to this:

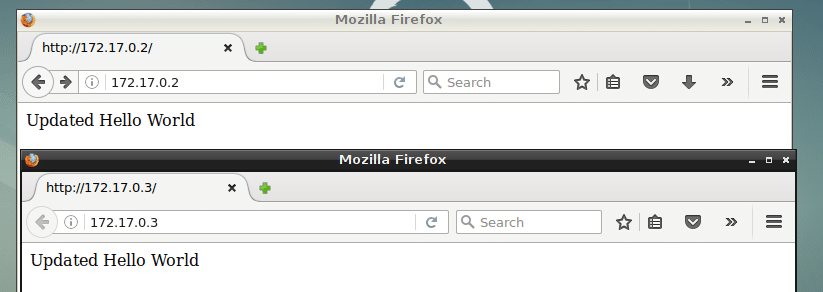
As you can see, the changes are reflected to the www and the www2 containers.

Removing Docker Volumes:
If you want, you can delete a Docker volume as well. To delete a Docker volume, let’s say data2, run the following command:
The Docker volume data2 should be deleted permanently.

That’s how you share Docker volumes between containers and the host computer. Thanks for reading this article.
