In this article, I am going to show you how to install QGIS plugins and I will show you how to work with some of the popular QGIS plugins. Let’s get started.
Where to Find QGIS Plugins?
QGIS has an official plugins repository where you can search for plugins, see what they do, user ratings of these plugins and many more. So you can find the plugin you need easily.
Go to the official plugins repository of QGIS at https://plugins.qgis.org/plugins/ and you should see the following page. You can list plugins by different categories like Stable, Popular and so on.

Installing a QGIS Plugin:
Installing a QGIS plugin is very easy. Most of the plugins that are available in the official plugins repository of QGIS can be installed from the QGIS Plugin Manager.
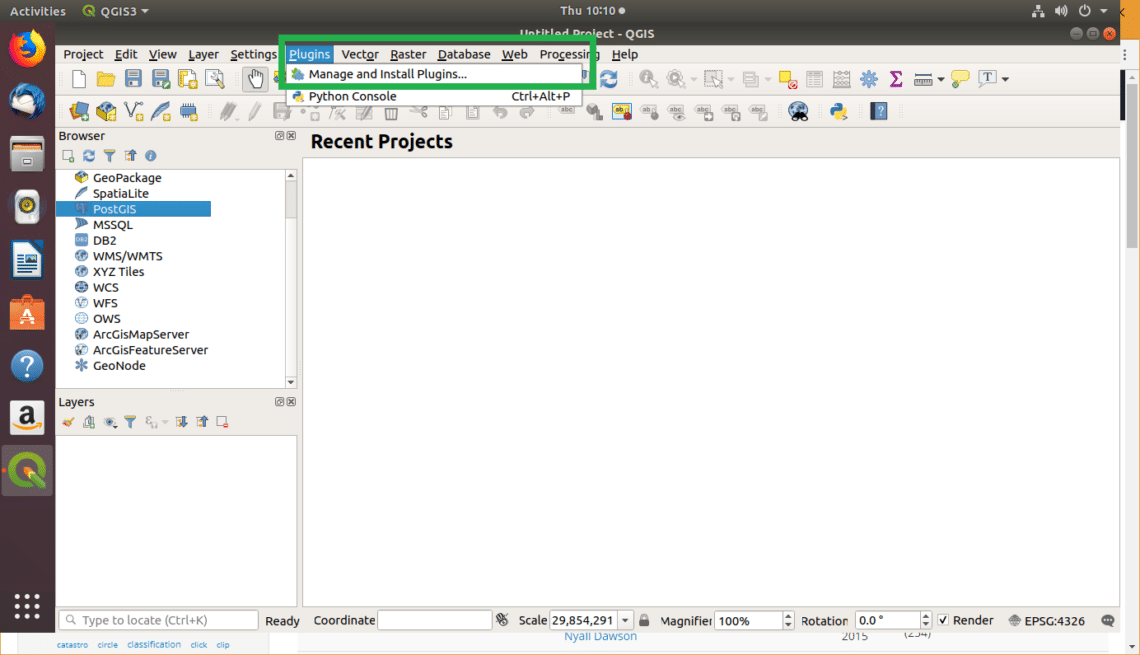
To open QGIS Plugin Manager, go to Plugins > Manage and Install Plugins…
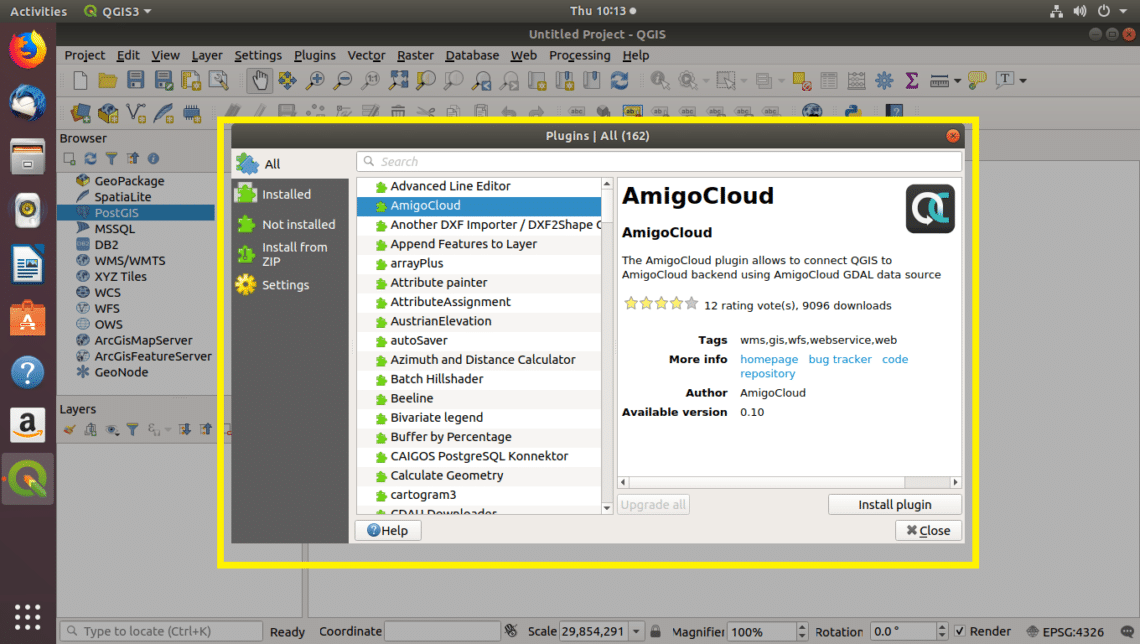
QGIS Plugin Manager should open. From here you can list installed plugins, activate or deactivate installed plugins, install plugins from a zip archive and many more.
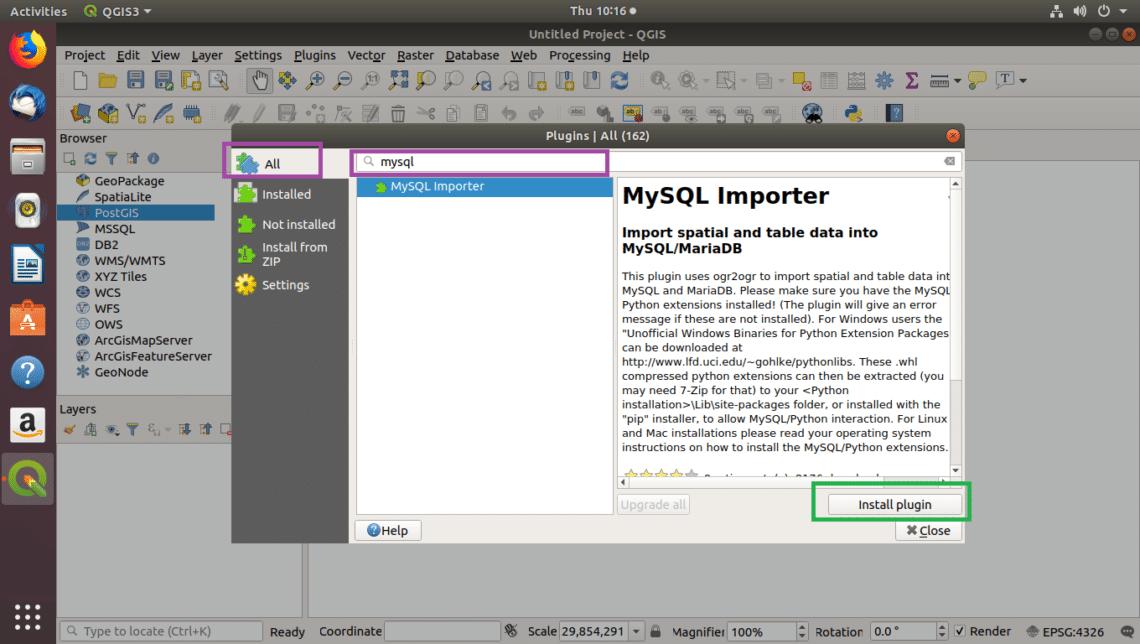
To search for a QGIS plugin, from the QGIS Plugin Manager, go to the All tab and type in your search query. The result should be displayed. Then you can click on any of the plugins and the information about that plugin should show up. Once you’re sure that this is exactly what you want, click on the Install plugin button as marked in the screenshot below, the plugin should be installed.
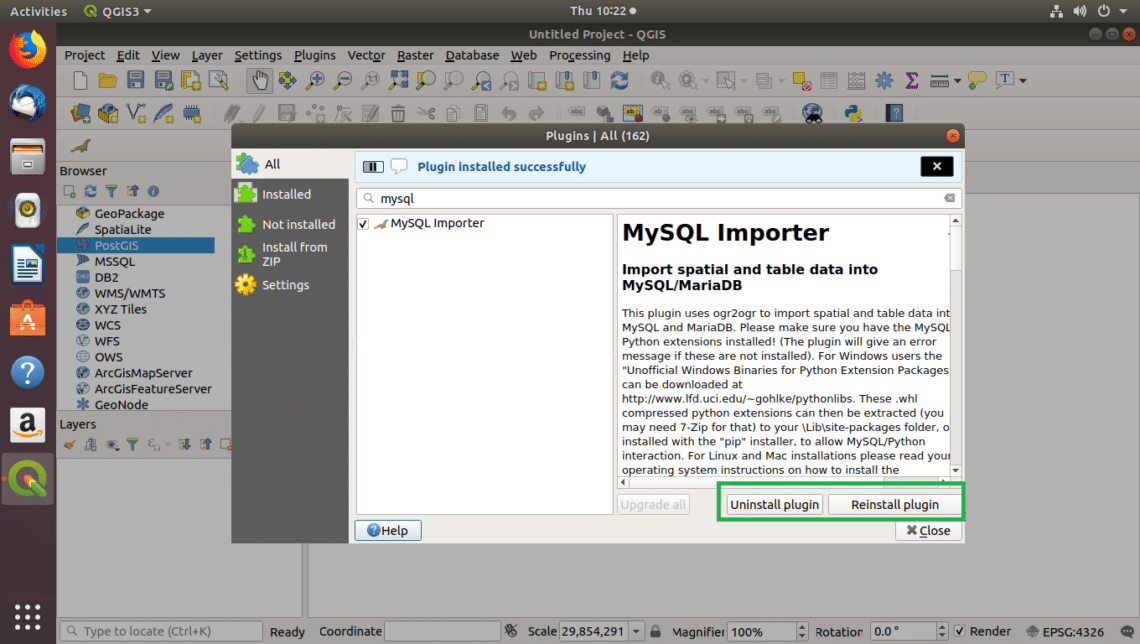
Once you click on the Install plugin button, the plugin should be downloaded and installed.
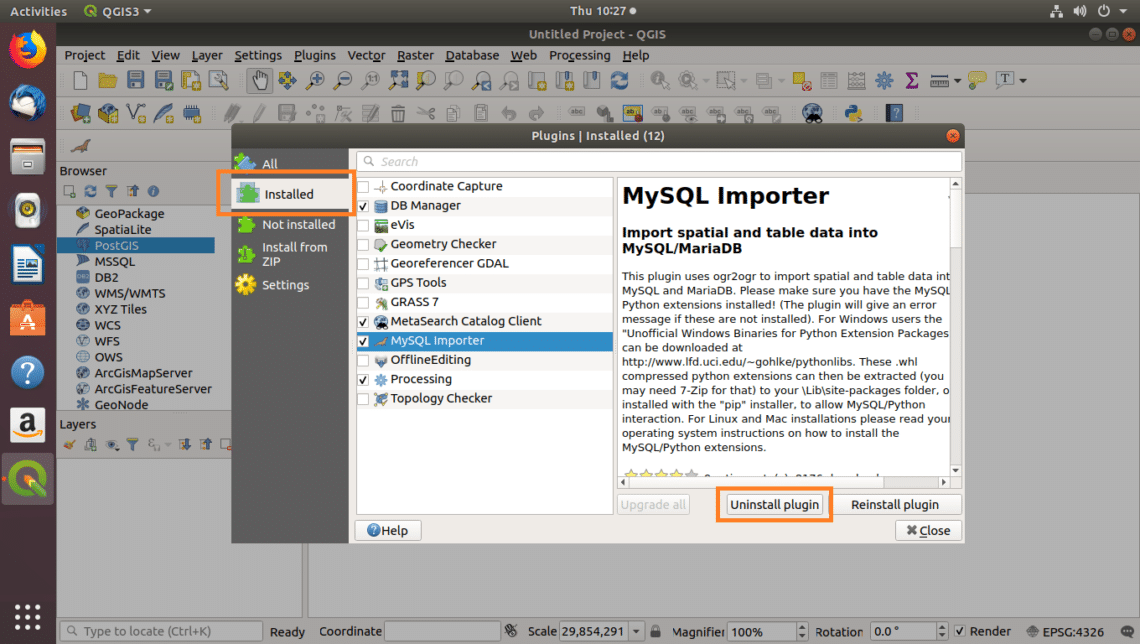
You can see all the plugins that you have installed on QGIS from the Installed tab of QGIS Plugin Manager. If you want to uninstall any of them, just select it and click on the Uninstall plugin button as marked in the screenshot below.
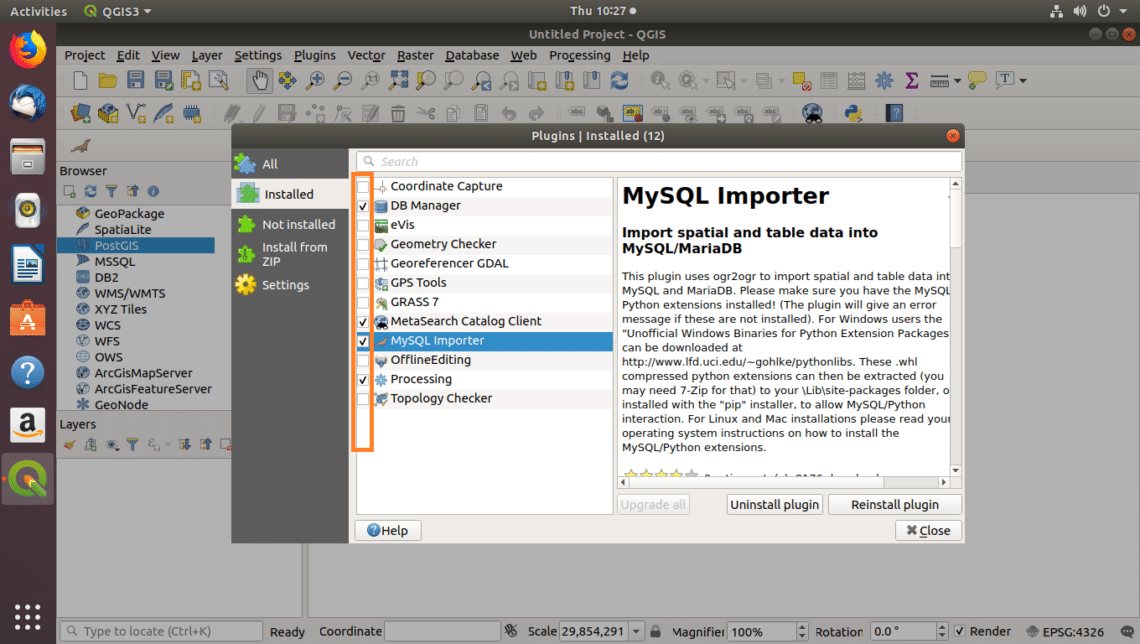
If a plugin is enabled, then you see a check mark on it. You can also enable or disable a plugin by toggling the check mark of the plugin as you can see from the screenshot below.
Installing OpenLayers Plugin on QGIS 3:
You can directly download a plugin from the official plugins repository of QGIS and install it using the QGIS Plugin Manager.
The OpenLayers plugin is used to import map data from Google, Bing and other providers to QGIS, according to which you can draw your own map or mark some portion of it. It is a very popular QGIS plugin.
In this section, I will show you how to install the OpenLayers plugin on QGIS 3. The OpenLayers plugin has an experimental version for QGIS 3 released recently. On QGIS 2, you can easily install it from the QGIS Plugin Manager. It does not show up on QGIS 3 Plugin Manager. Till it’s stable for QGIS 3, it won’t show up on QGIS 3 Plugin Manager. So this is how you install it.
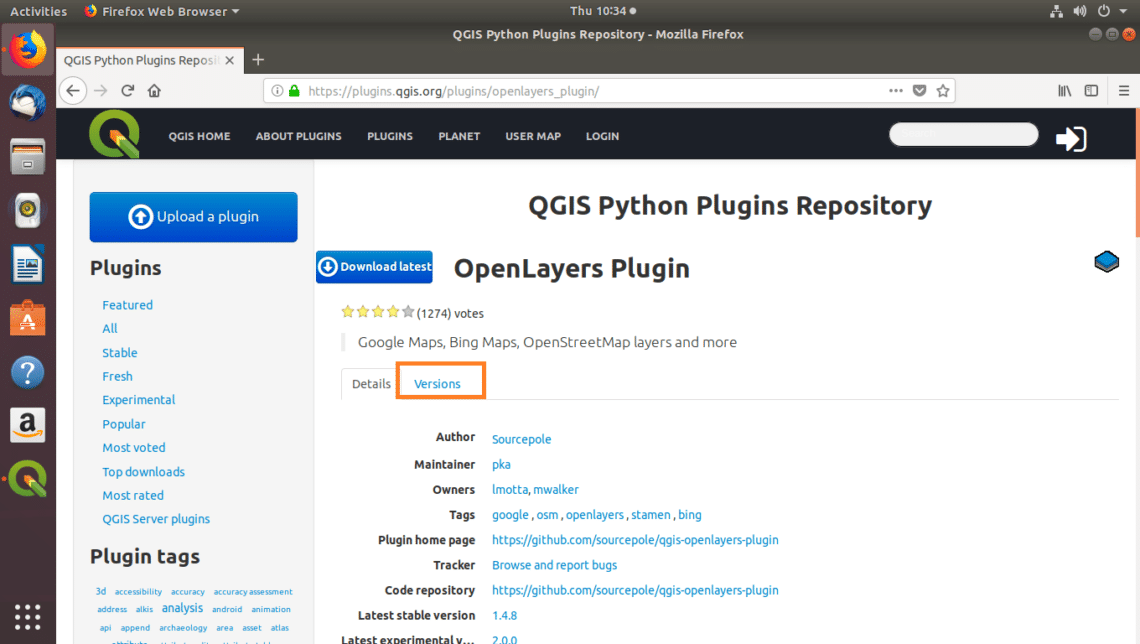
First go to the official plugins page of the OpenLayers plugin at https://plugins.qgis.org/plugins/openlayers_plugin/ and click on Versions.
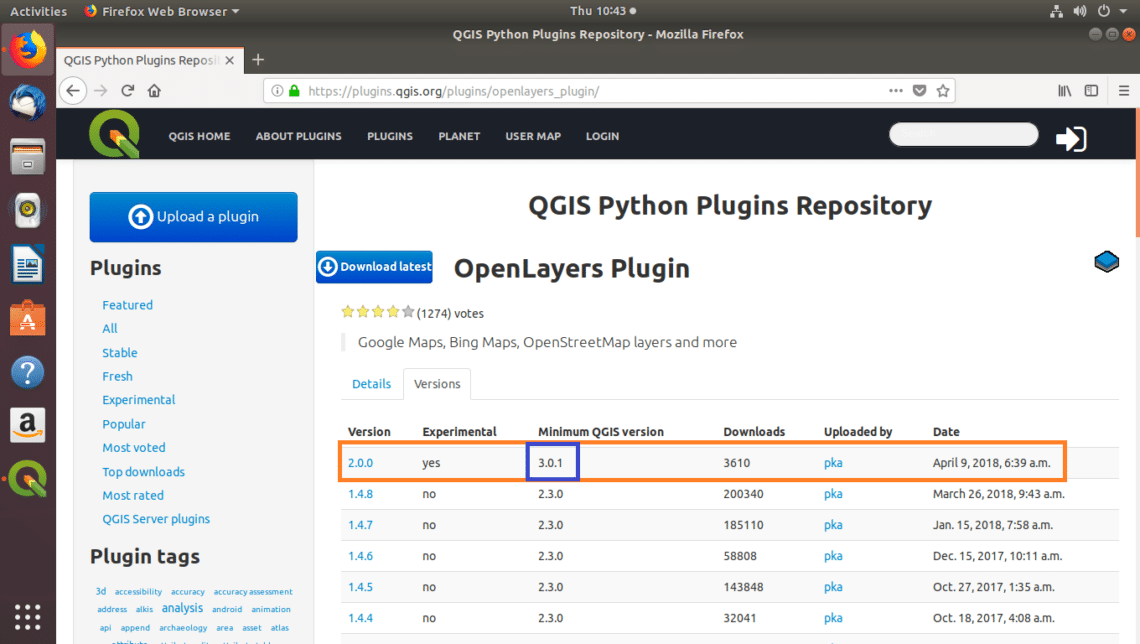
Now click on the version (at the time of this writing, it’s 2.0.0) that has Minimum QGIS version 3.x.x as you can see in the marked section of the screenshot below.
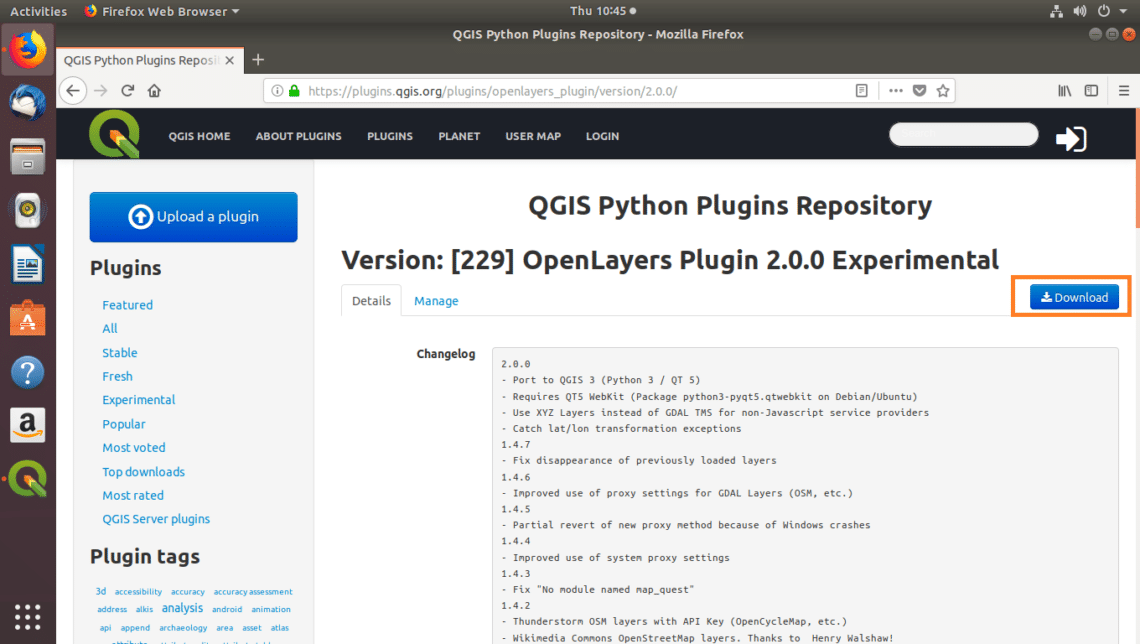
Now click on Download.
Now click on Save File and then click on OK.
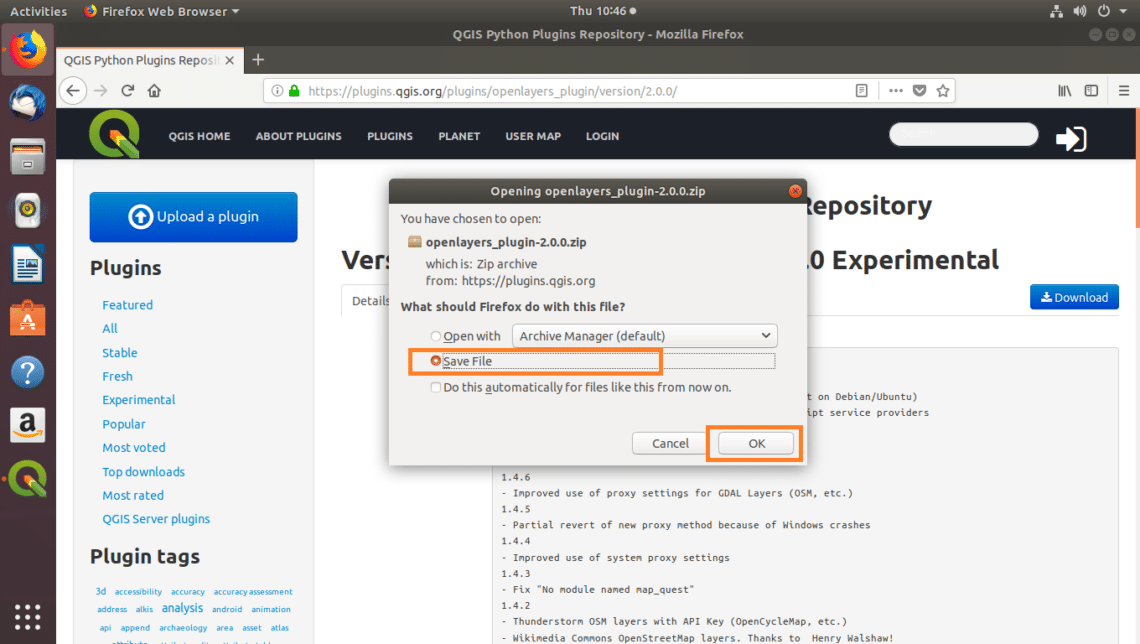
The OpenLayers plugin ZIP file should be downloaded.

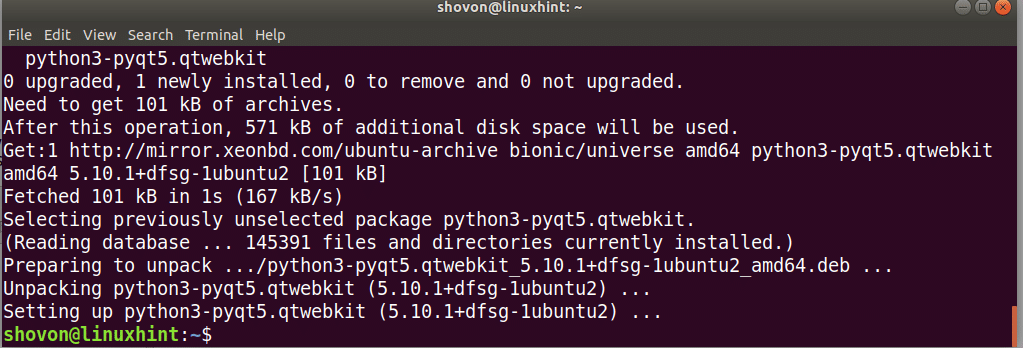
The OpenLayers plugin for QGIS 3 depends on Python Qt5 WebKit package. To install it, run the following command on Ubuntu 18.04 LTS or Debian 9 Stretch:

It should be installed.
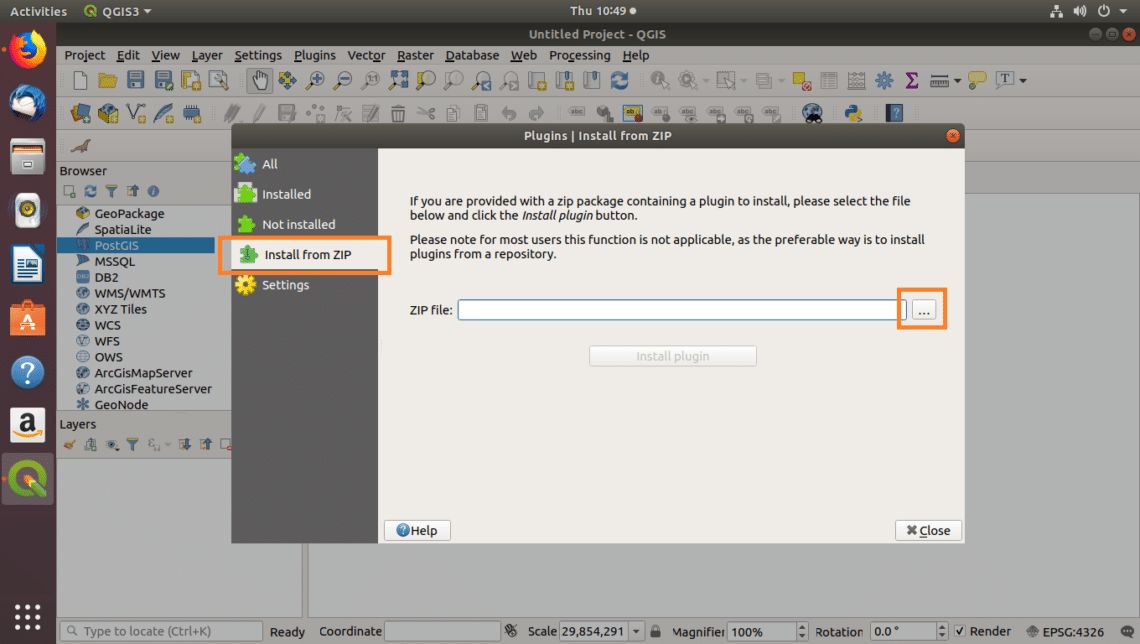
Now from the QGIS 3 Plugin Manager, go to the Install from ZIP tab and click on the … button.
A File Browser should open. Now select your OpenLayers plugin ZIP file and click on Open.
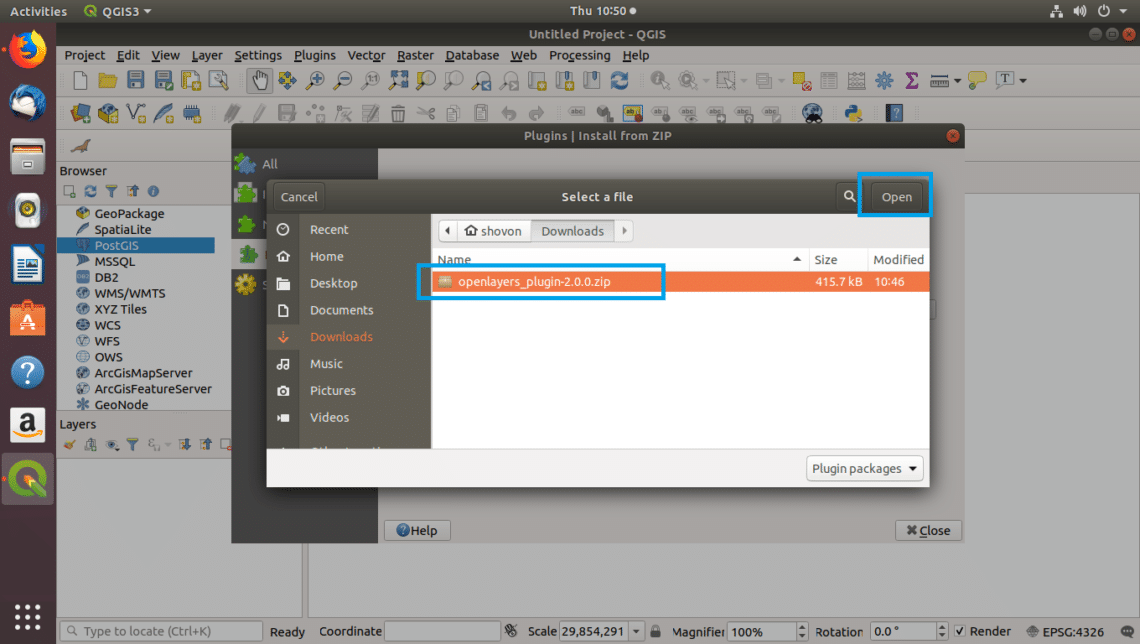
Once you’re done, click on Install plugin.
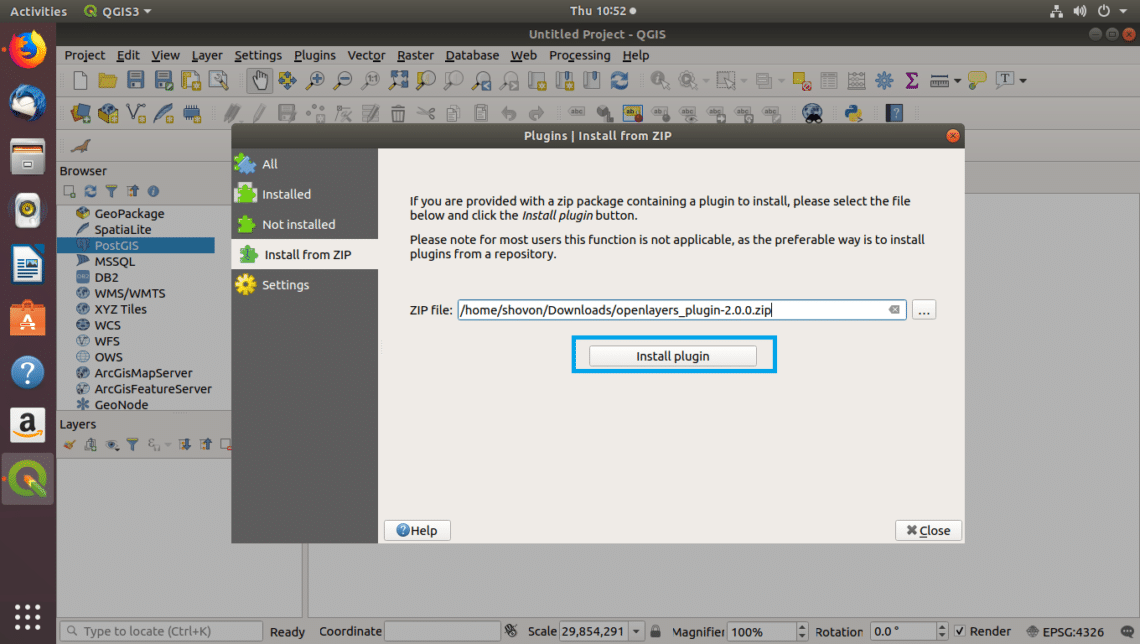
The plugin should be installed.
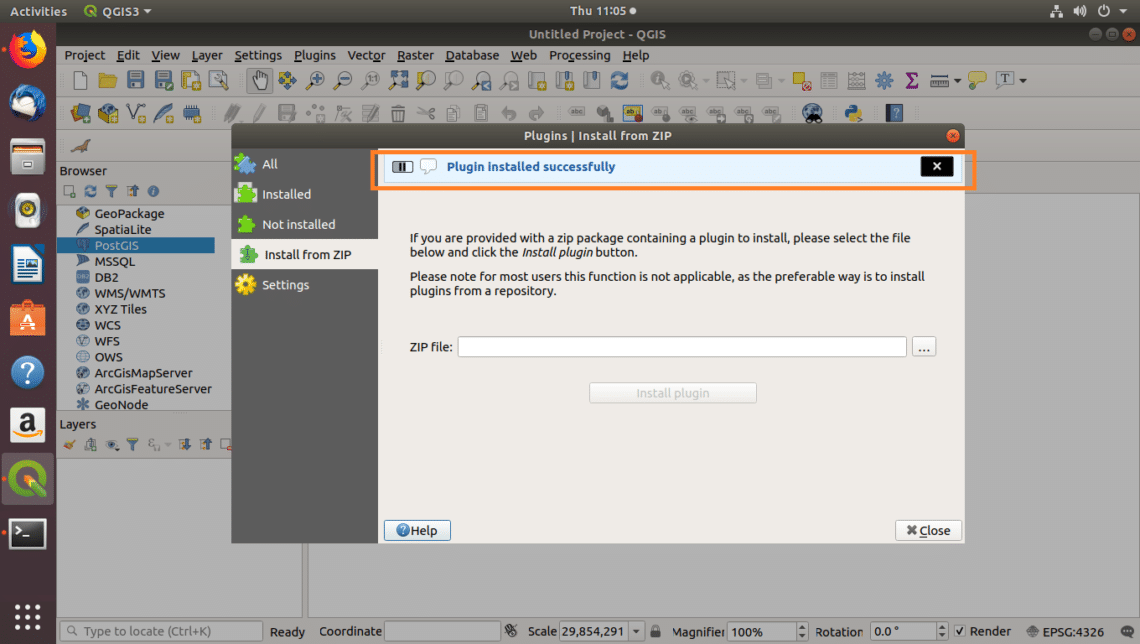
Now go to the Installed tab and enable OpenLayers plugin. That’s it.

Using the OpenLayers Plugin on QGIS 3:
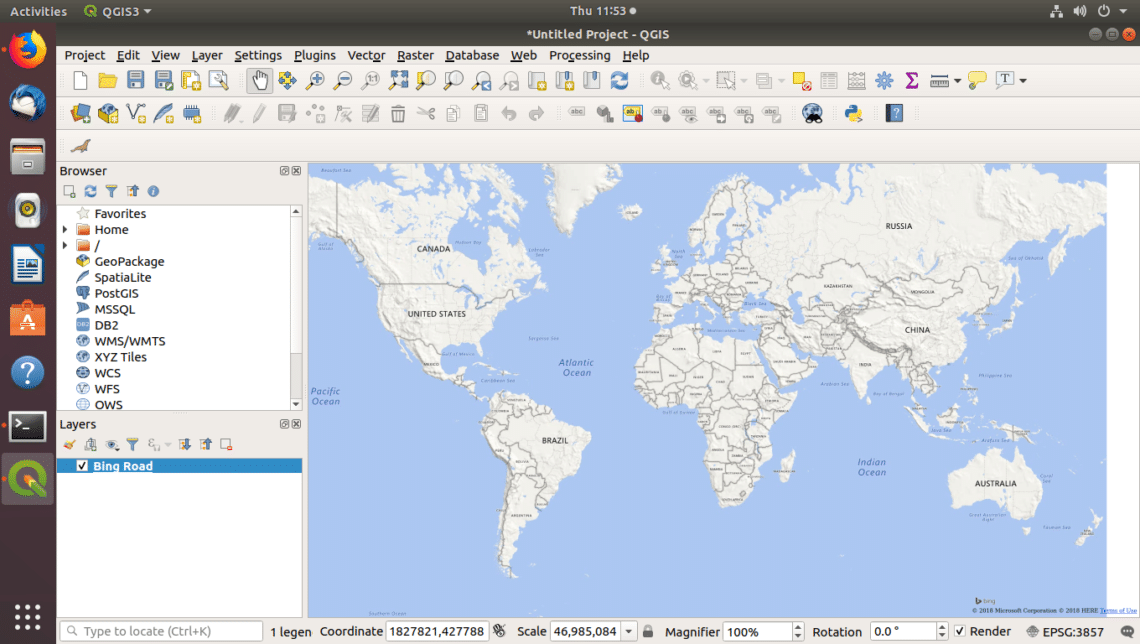
To use OpenLayers to import map to QGIS 3, go to Web > OpenLayers plugin and pick what you want. I am going to import Bing Maps > Bing Road.
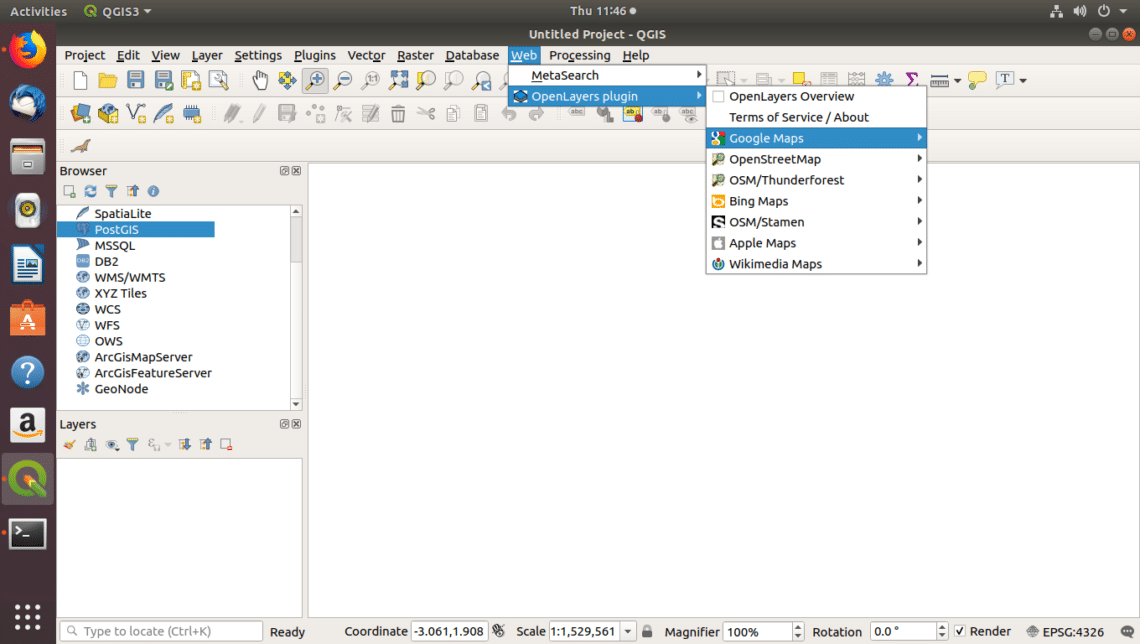
As you can see, the Bing Road map is added as the QGIS layer. Now you can do whatever you want with it.
Exporting QGIS Data to MySQL/MariaDB Database:
The MySQL Importer plugin is used to import geospatial data from QGIS to MySQL or MariaDB.
In the earlier section, I showed you how to install the MySQL Importer plugin and enable it.
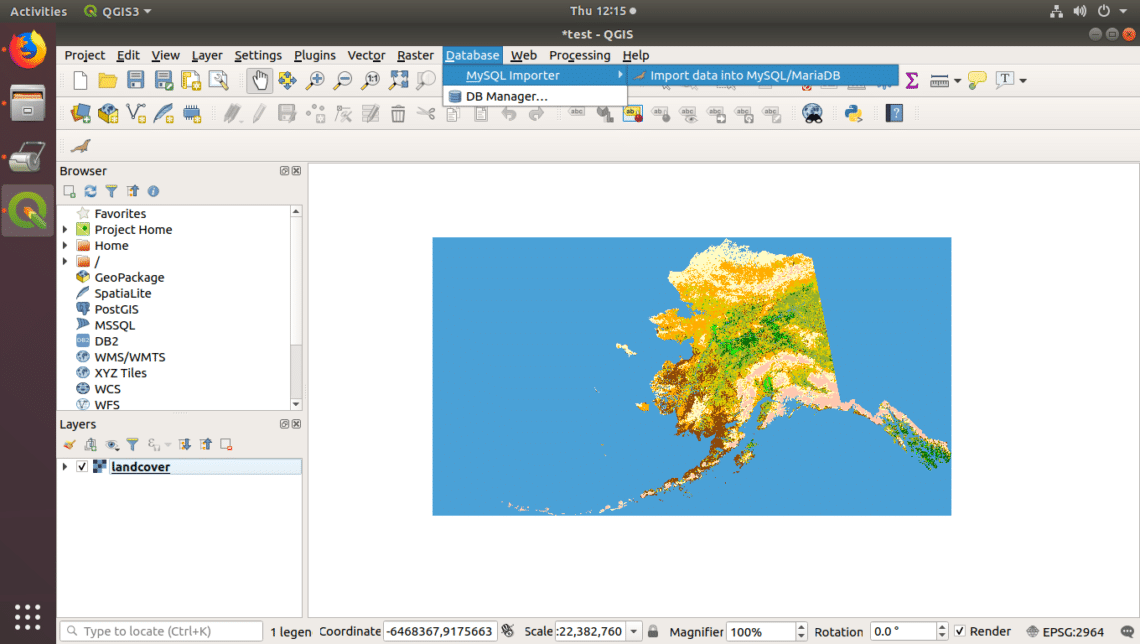
To export geospatial data from QGIS to MySQL, go to Database > MySQL Importer > Import data into MySQL/MariaDB
In the MySQL/MariaDB importer window, type in your MySQL/MariaDB login credentials and click on Test Connection.
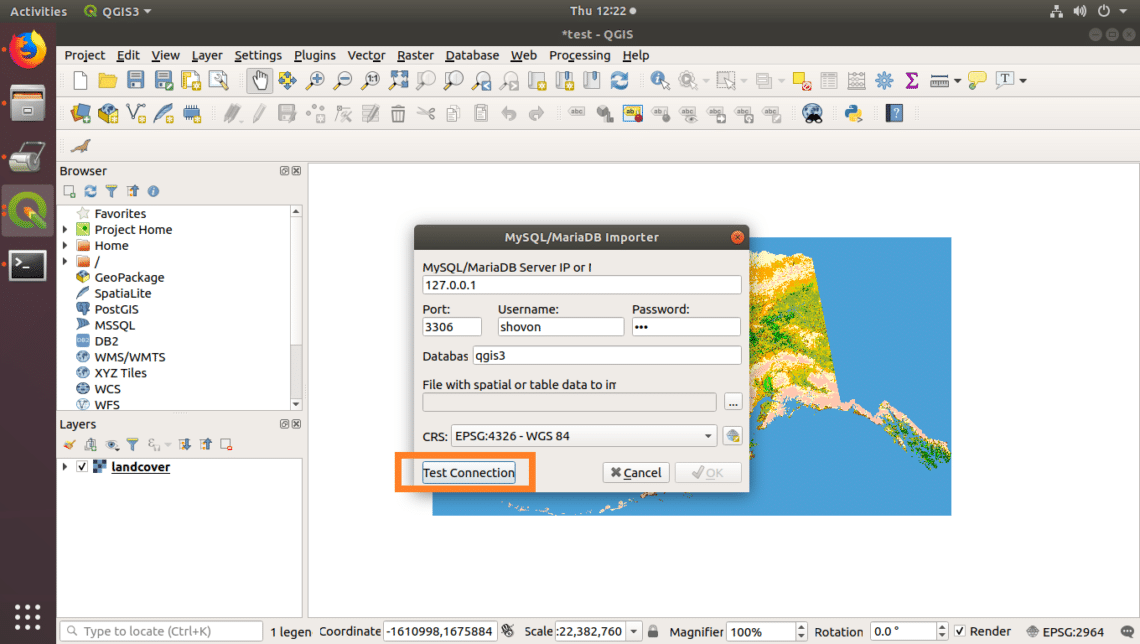
If the credentials are right, then you should see the following message.

Now click on the … button.
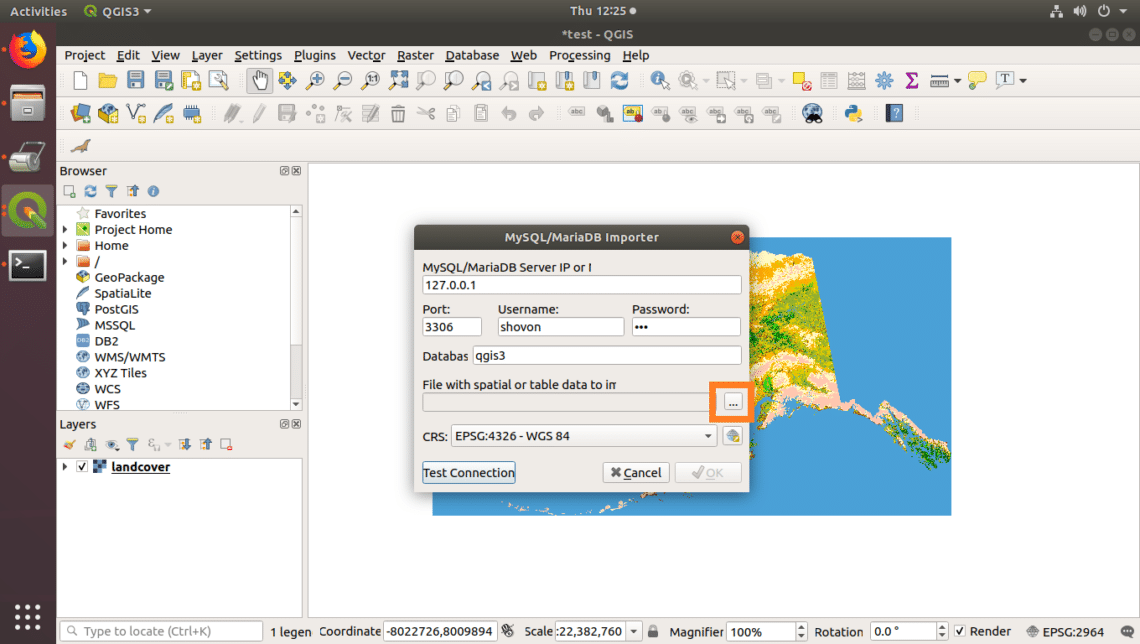
Select a QGIS Shape file and click on Open.
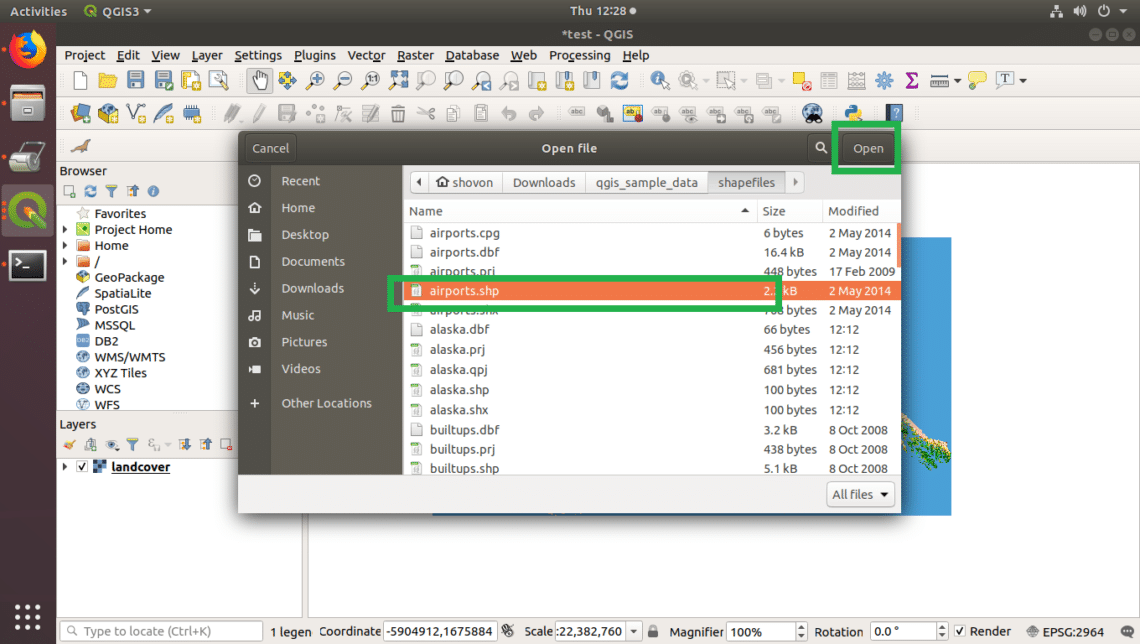
Then click on OK.
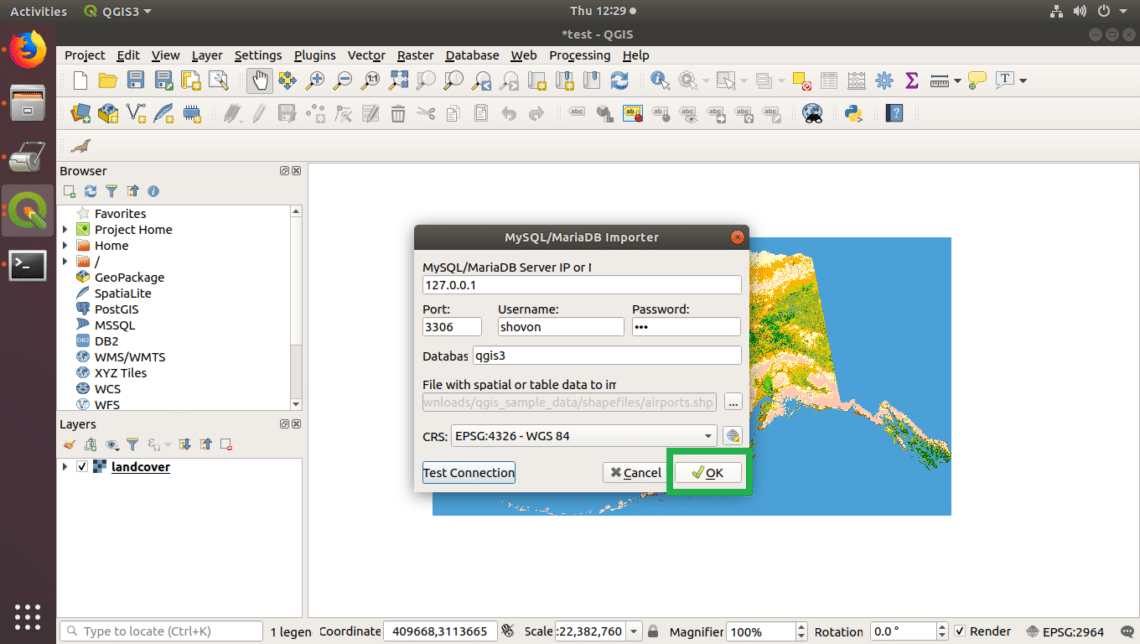
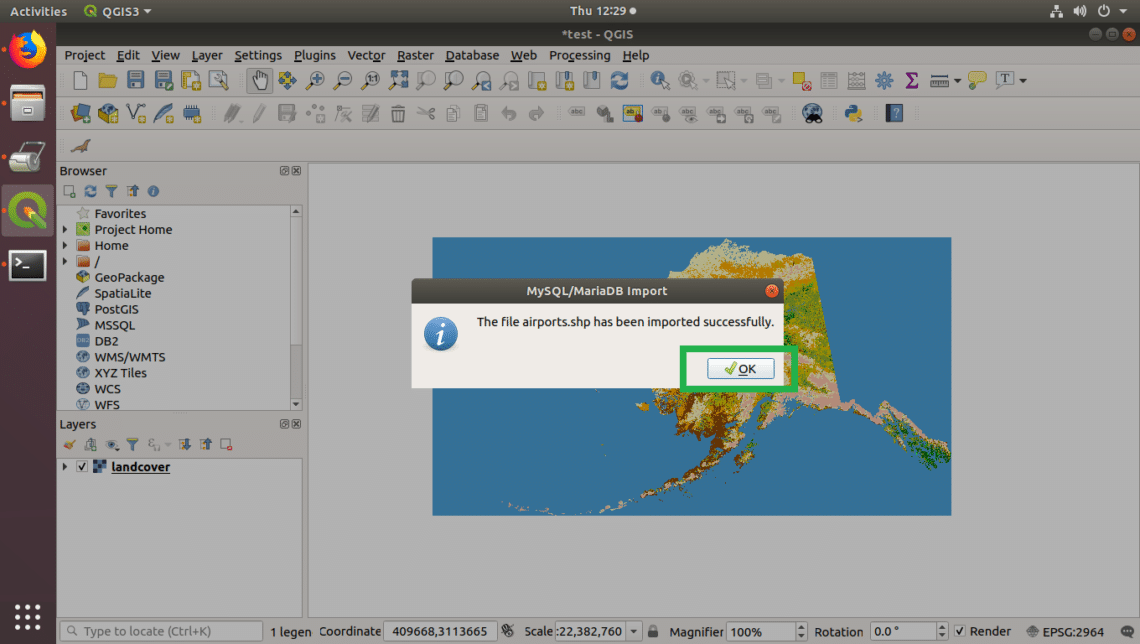
The data should be exported to the MySQL/MariaDB database. Click on OK.
Other Popular QGIS Plugins:
There are many more QGIS plugins that you can use. I am going to list some of them and what they do.
Cad Tools:
This plugin adds some CAD (Computer Aided Design) like functions to QGIS.
Plugin URL: https://plugins.qgis.org/plugins/cadtools/
GEarthView:
This plugin adds some GQIS features to Google Earth desktop software as well as Google Earth Pro.
Plugin URL: https://plugins.qgis.org/plugins/gearthview/
QGIS Cloud Plugin:
This plugin lets you export your map to QGIS cloud. You can use it to share your project.
Plugin URL: https://plugins.qgis.org/plugins/qgiscloud/
Qgis2threejs:
This plugin lets you export your QGIS map as WebGL and Three.js based 3D web page.
Plugin URL: https://plugins.qgis.org/plugins/Qgis2threejs/
TimeManager:
You can add time based animation to your QGIS maps with this plugin.
Plugin URL: https://plugins.qgis.org/plugins/timemanager/
That’s how you work with plugins on QGIS. Thanks for reading this article.
