You may use your Ubuntu installation as a workstation, as a server, or as a testing platform, but when it comes to upgrading the OS, the inner sysadmin in you would scream in protest. Paying due respect to that voice, let’s install Ubuntu 18.04 inside VirtualBox. This way you can see whether or not it is for you.
Step 1: Creating a VM
The VirtualBox manager (its GUI) is something you are probably familiar with. If not, then let’s go through the steps of creating a new Virtual Machine.
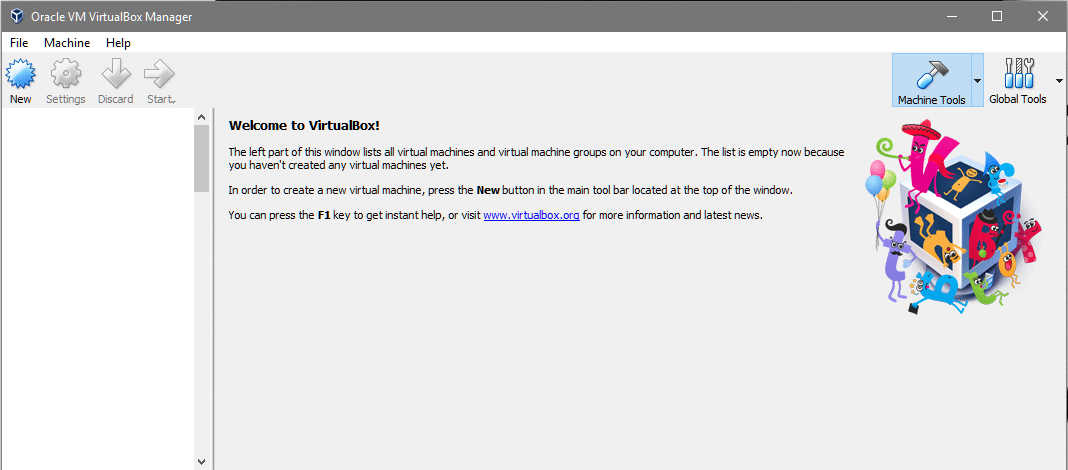
The newer VirtualBox UI has changed a few things, but the basic flow is still the same. Click on the New icon to create a new machine. We will be using Expert Mode (see below) instead of guided mode because it is a lot quicker.
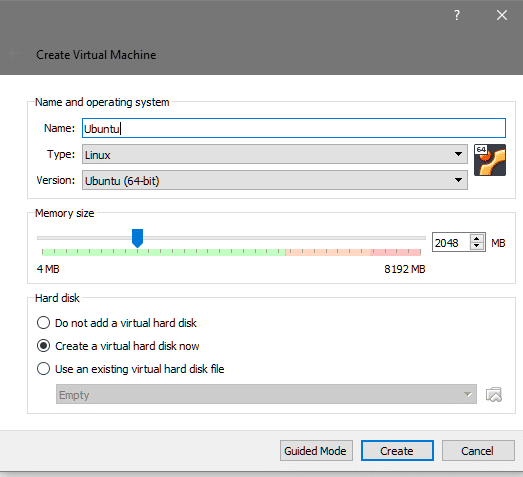
Just by entering a reasonable name like ‘Ubuntu’ it automatically sets the Type to Linux and Version to Ubuntu 64-bit. If that doesn’t work, you should use the drop-down menu to select those exact options anyways.
Next comes the turn of allocating RAM. The more memory you can afford to allocate, the better. We will be settling for 2048MB in this example. Finally, you need to create a virtual disk. Select the “Create a virtual hard disk now” option and click on Create to continue. We will be setting the disk type to VDI and the size to be 40GB.
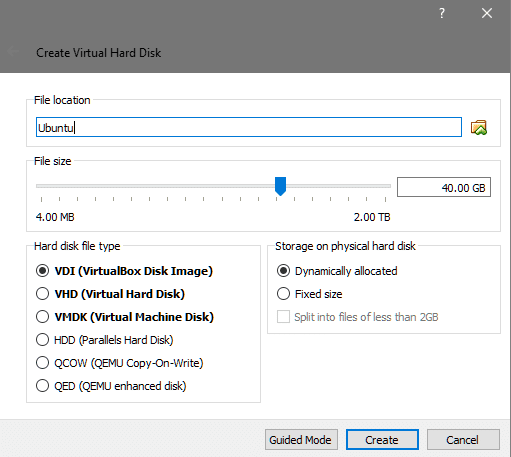
And that’s it! Your VM is ready for Ubuntu 18.04 installation.
Step 2: Installing Ubuntu 18.04
Installation media set up
You can get the official LTS release of Ubuntu 18.04 Desktop here this is a 64-bit OS, so make sure that you are not running it on a really archaic hardware (even if its in a VM). The installation media is 1.8GB in size, so it may take you a while to get your copy downloaded.
Once you have your .iso file you can proceed with the installation.

Select the newly created VM and click Start.
The VM console window will pop up along with an additional window asking you to specific what start-up disk you wish to use (Since the virtual hard disk is not yet bootable).

Click on the folder icon and from your file explorer select the Ubuntu 18.04 iso file which you downloaded earlier. Once that is done and you can start the system we are now in business!
Language and Keyboard Preferences
The Ubuntu 18.04 LTS has made the process of installation much quicker and simpler than its previous LTS release but at the same time it is still familiar and friendly to long-term users.

Click on the Install Ubuntu option, after making sure that your prefered language is selected. After that you will be asked for the information regarding your keyboard layout and we are going to stick to the default option here. If you happened to have a more esoteric layout like Dvorak, please make sure that that is selected.
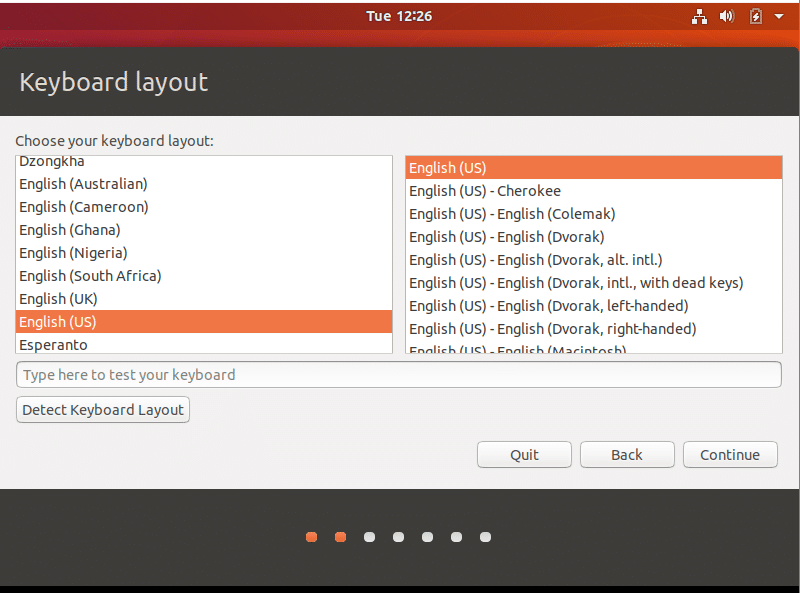
You can also select “Detect Keyboard Layout” option, if you are having troubles. Although, it is pretty safe to go with the defaults as shown above.
Minimal Install Option and Third Party Software
Now we see our first new feature that is the minimal installation option.

This is especially useful, if you want to run Ubuntu primarily as a workstation, or as a developer’s rig. Also when creating a VM (like in our case) it makes sense to use the minimal installation option, since you might want to use the host system for games, media playback, office suite and other utilities. Minimal install gives you a web browser and a handful of other utilities and that’s it.
If you can, try also to select the options for downloading updates and installing third-party softwares as shown in the screenshot above.’
Disk Layout and Installation Type
Now comes the most controversial part of any Linux installation — The disk layout. If it were your main rig, you would have to consider a lot of variables, like whether or not you are going to dual-boot, what partitions you would need and will you go for LVM or not.
Since, we are using a VM and we have one quite disposable Virtual Disk to experiment with, we can simply select “Erase Disk and Install Ubuntu” option, as shown below:

It will give you a warning sign, saying that permanent changes will be made on the hard disk, click Continue to continue.
Setting Up User Profile
Select your timezone, by simply clicking on the world map indicating roughly where you live.

Enter your desired username, computer’s name and password,
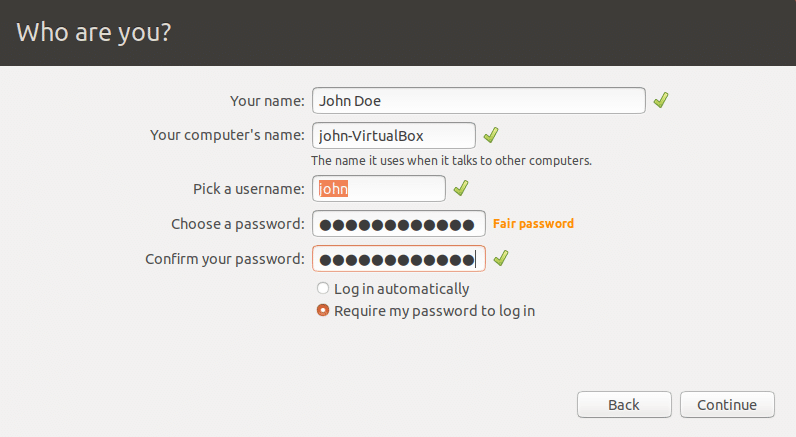
And now we simply wait, as Ubuntu configures rest of the things for us. Once the installation finishes it will prompt you to restart the system. You can do that or just close the window and then shutdown the system and move on to step 3.
(Optional) Step 3: Managing Installation Media
VirtualBox automatically detaches the installation media (the .iso file) from your VM once the installation is complete. However, if you wish to do so manually, or reinsert installation media to make changes, you can do so by selecting the VM in VirtualBox GUI, selecting the Settings options and then navigating to Storage settings.
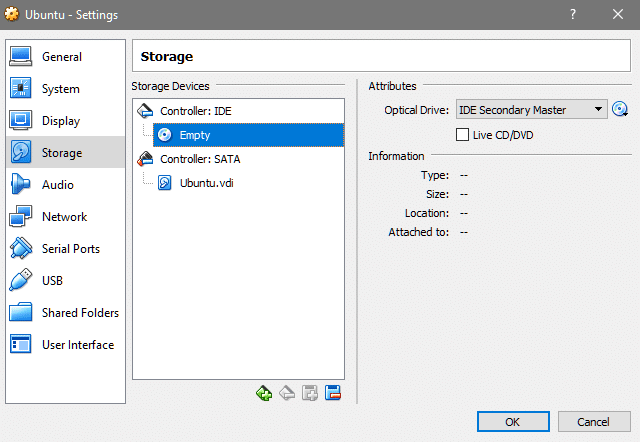
Here, you select the empty slot under the IDE controller and then click on the CD icon on the right hand column to select your .iso file and the next time you boot you will be in the installation media again.
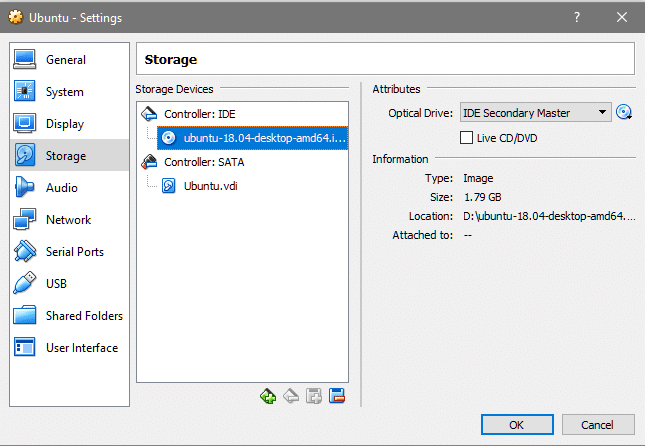
It is equally easy to remove the attached iso by clicking on the same CD icon and selecting “Remove Disk from Virtual Machine”.
What’s new?
So what’s new with this LTS release of Ubuntu? To enumerate a few major changes:
- After having issues with Wayland, they have switched back to XOrg
- Python 3.6 is now available
- Gnome is the default desktop environment
- Linux Kernel 4.15
- LXD 3.0.0
Tell us what you thoughts are regarding the latest LTS release and stay tuned for more tutorials, guides and news on the latest and greatest open source technologies.
