Apache Hadoop is a big data solution for storing and analyzing large amounts of data. In this article we will detail the complex setup steps for Apache Hadoop to get you started with it on Ubuntu as rapidly as possible. In this post, we will install Apache Hadoop on a Ubuntu 17.10 machine.
For this guide, we will use Ubuntu version 17.10 (GNU/Linux 4.13.0-38-generic x86_64).
Updating existing packages
To start the installation for Hadoop, it is necessary that we update our machine with latest software packages available. We can do this with:
As Hadoop is based on Java, we need to install it on our machine. We can use any Java version above Java 6. Here, we will be using Java 8:
Downloading Hadoop files
All the necessary packages now exist on our machine. We’re ready to download the required Hadoop TAR files so that we can start setting them up and run a sample program with Hadoop as well.
In this guide, we will be installing Hadoop v3.0.1. Download the corresponding files with this command:
Depending upon the network speed, this can take up to a few minutes as the file is big in size:
Find latest Hadoop binaries here. Now that we have the TAR file downloaded, we can extract in the current directory:
This will take a few seconds to complete due to big file size of the archive:
Added a new Hadoop User Group
As Hadoop operates over HDFS, a new file system can disturn our own file system on the Ubuntu machine as well. To avoid this collission, we will create a completely separate User Group and assign it to Hadoop so it contains its own permissions. We can add a new user group with this command:
We will see something like:
We are ready to add a new user to this group:
Please take note that all the commands we run are as root user itself. With aove command, we were able to add a new user to the group we created.
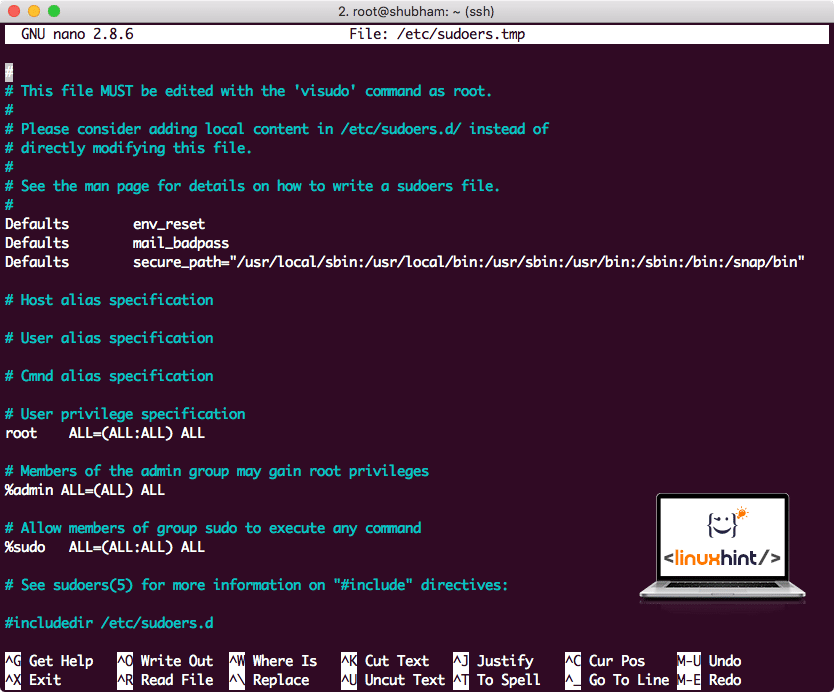
To allow Hadoop user to perform operations, we need to provide it with root access as well. Open the /etc/sudoers file with this command:
Before we add anything, the file will look like:
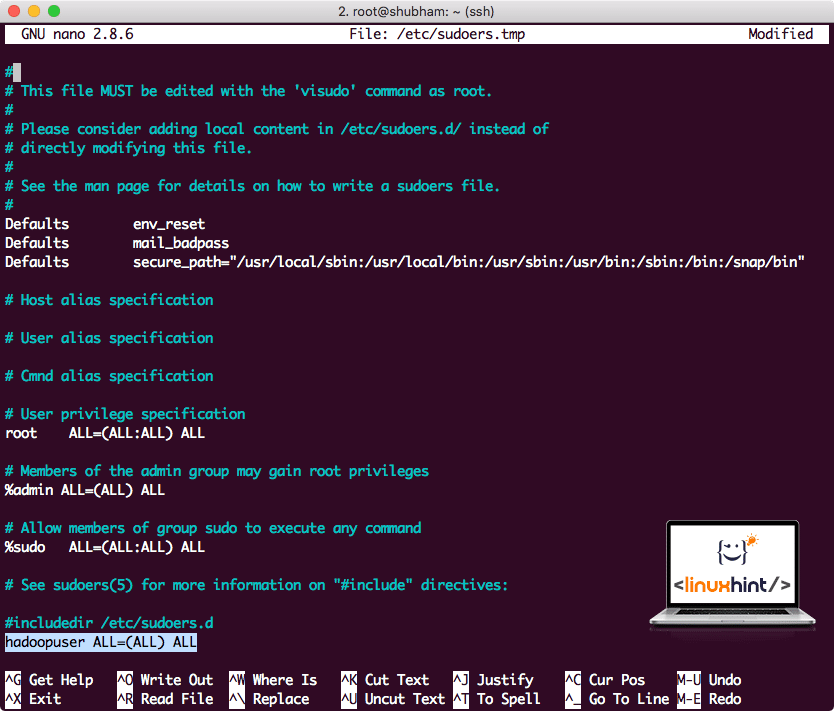
Add the following line to the end of the file:
Now the file will look like:
This was the main setup for providing Hadoop a platform to perform actions. We are ready to setup a single node Hadoop cluster now.
Hadoop Single Node Setup: Standalone Mode
When it comes to the real power of Hadoop, it is usually set up across multiple servers so that it can scale on top of a large amount of dataset present in Hadoop Distributed File System (HDFS). This is usually fine with debugging environments and not used for production usage. To keep the process simple, we will explain how we can do a single node setup for Hadoop here.
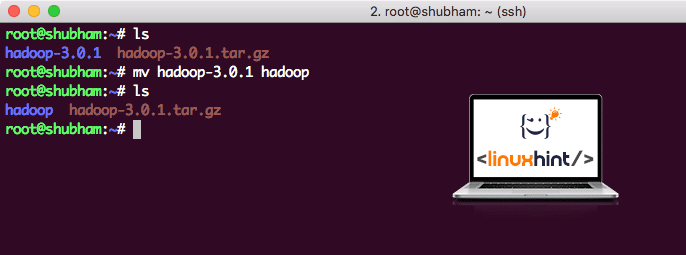
Once we’re done installing Hadoop, we will also run a sample application on Hadoop. As of now, Hadoop file is named as hadoop-3.0.1. let’s rename it to hadoop for simpler usage:
The file now looks like:
Time to make use of the hadoop user we created earlier and assign the ownership of this file to that user:
A better location for Hadoop will be the /usr/local/ directory, so let’s move it there:
cd /usr/local/
Adding Hadoop to Path
To execute Hadoop scripts, we will be adding it to the path now. To do this, open the bashrc file:
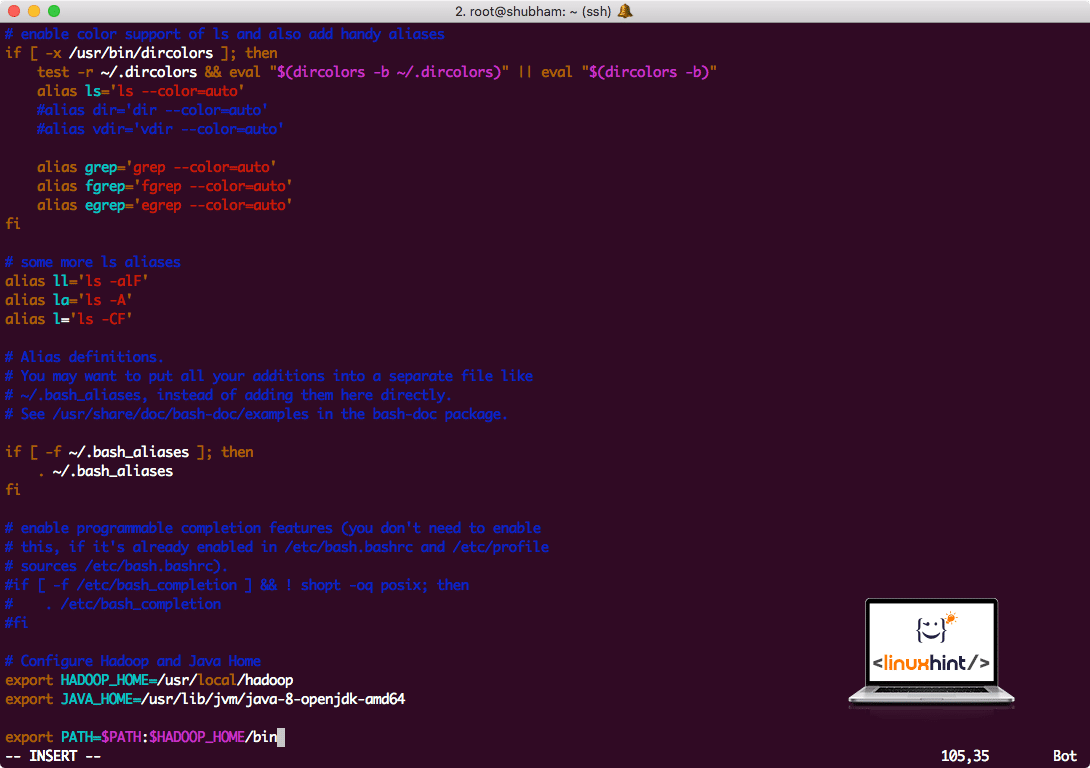
Add these lines to the end of the .bashrc file so that path can contain the Hadoop executable file path:
export HADOOP_HOME=/usr/local/hadoop
export JAVA_HOME=/usr/lib/jvm/java-8-openjdk-amd64
export PATH=$PATH:$HADOOP_HOME/bin
File looks like:
As Hadoop makes use of Java, we need to tell the Hadoop environment file hadoop-env.sh where it is located. The location of this file can vary based on Hadoop versions. To easily find where this file is located, run the following command right outside the Hadoop directory:
We will get the output for the file location:
Let’s edit this file to inform Hadoop about the Java JDK location and insert this on the last line of the file and save it:
The Hadoop installation and setup is now complete. We are ready to run our sample application now. But wait, we never made a sample application!
Running Sample application with Hadoop
Actually, Hadoop installation comes with an in-built sample application which is ready to run once we are done with installing Hadoop. Sounds good, right?
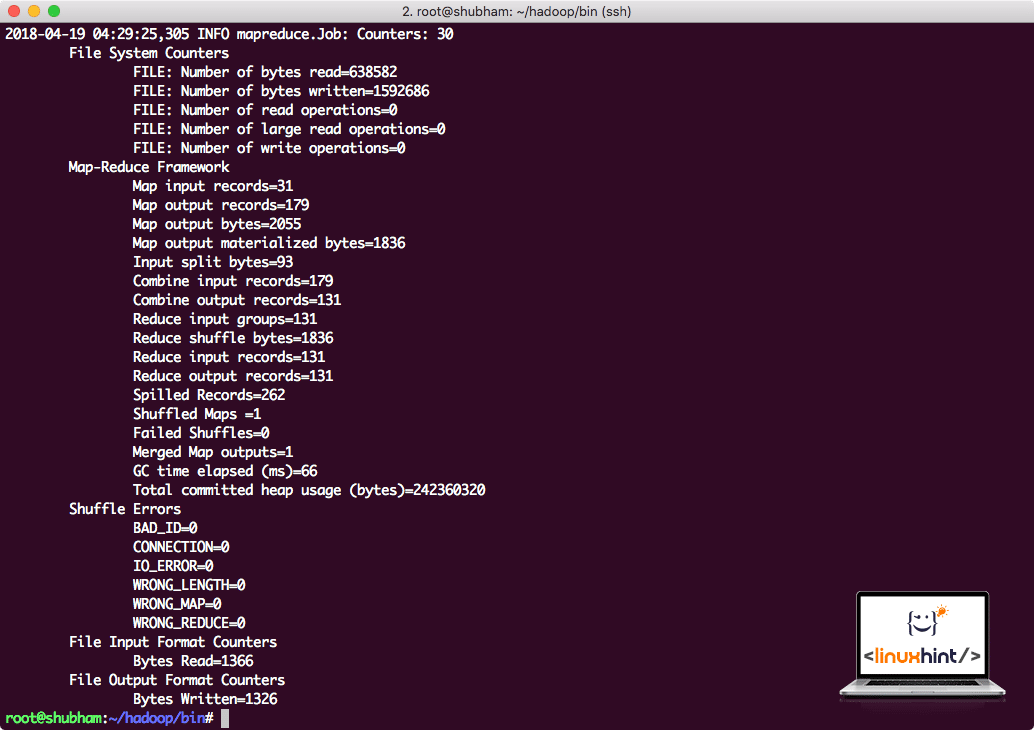
Run the following command to run the JAR example:
Hadoop will show how much processing it did at the node:
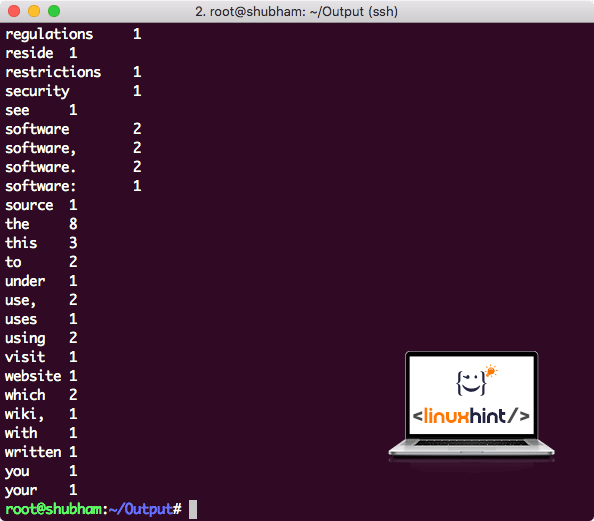
Once you execute the following command, we see the file part-r-00000 as an output. Go ahead and look at the content of the output:
You will get something like:
Conclusion
In this lesson, we looked at how we can install and start using Apache Hadoop on Ubuntu 17.10 machine. Hadoop is great for storing and analyzing vast amount of data and I hope this article will help you get started using it on Ubuntu quickly.


