Install PostgreSQL 10 on Ubuntu 17.10
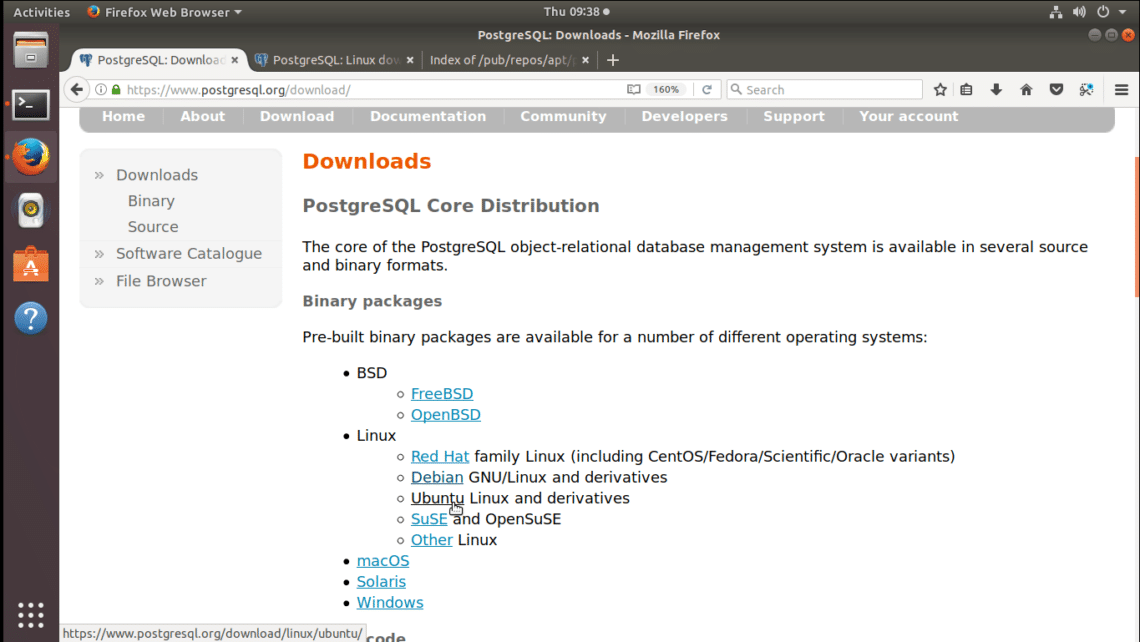
PostgreSQL is an open source database that is widely used all over the world. The latest version of PostgreSQL is 10. In this article I will show you how to install PostgreSQL 10 on Ubuntu 17.10 Artful Aardvark. Let’s get started. First go to the official website of PostgreSQL, https://www.postgresql.org and you should see the following window. Click on “Download” as shown in the screenshot below.
You should see the following window. Now click on “Ubuntu” as shown in the screenshot.
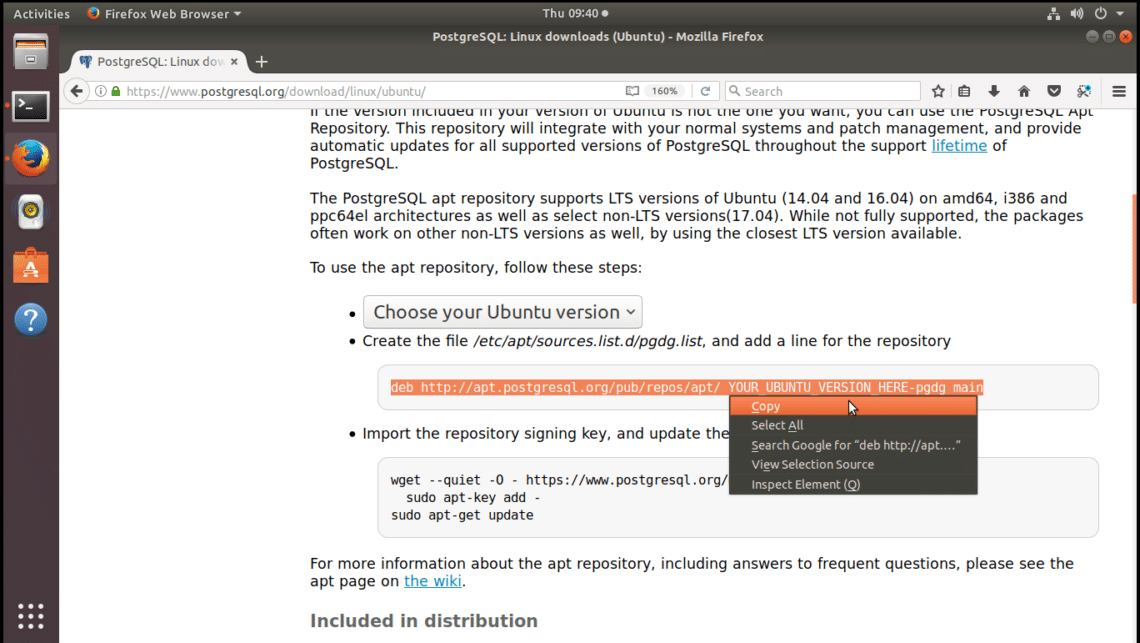
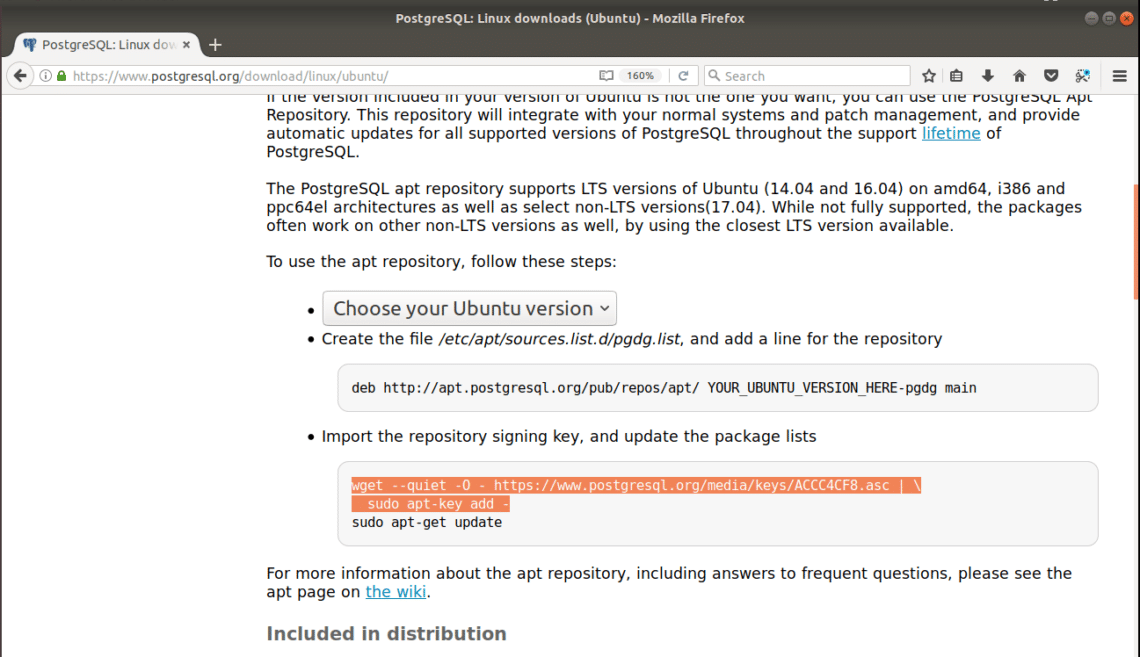
You should see the following page. The marked section is the line that you should add into /etc/apt/sources.list file. Select the line and copy it.
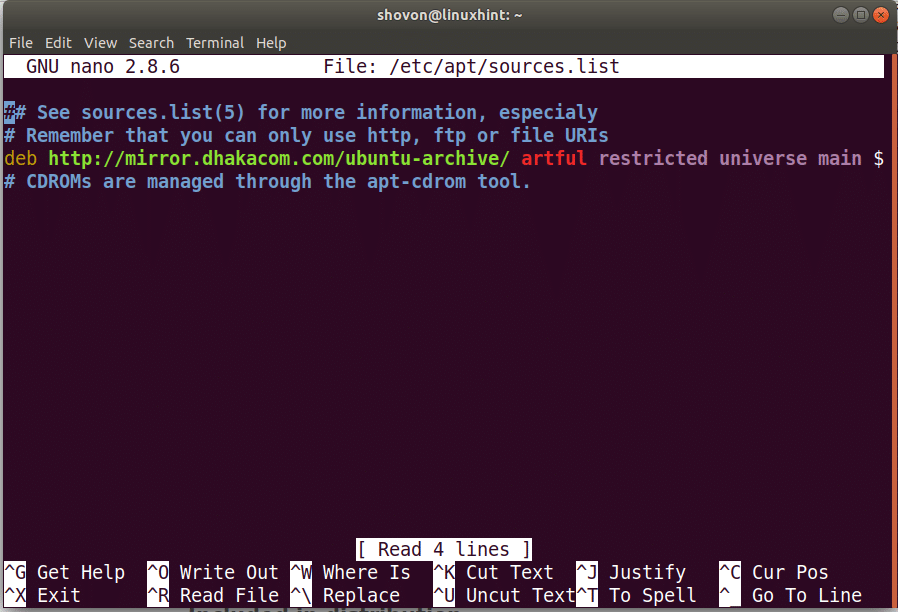
Now open a terminal by pressing Ctrl+Alt+T or from the Applications menu. Run the following command to edit the /etc/apt/sources.list file. I am using nano text editor here. If you want, you can use vim or whatever you like.
$ sudo nano /etc/apt/sources.list
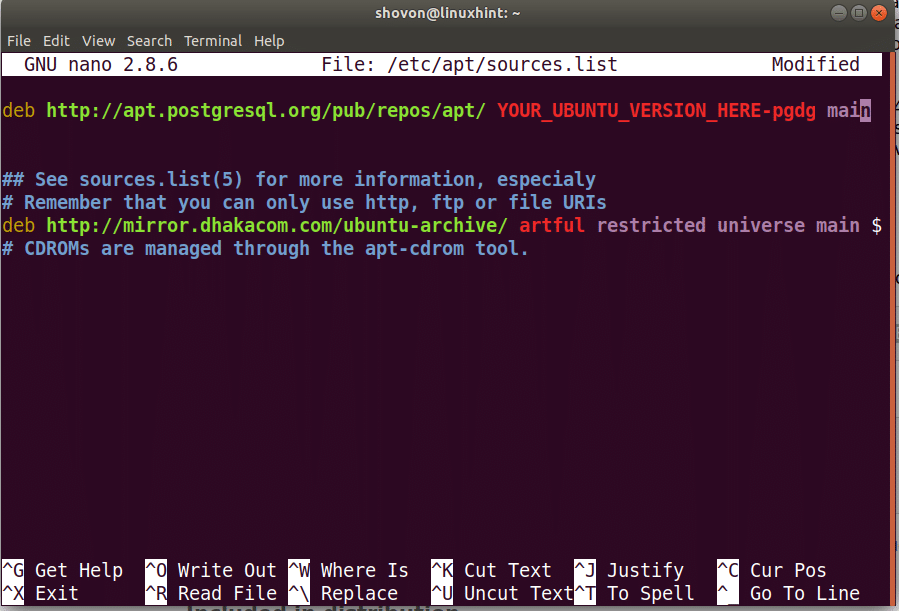
You should see the following window. This is where you should paste the line that you just copied.
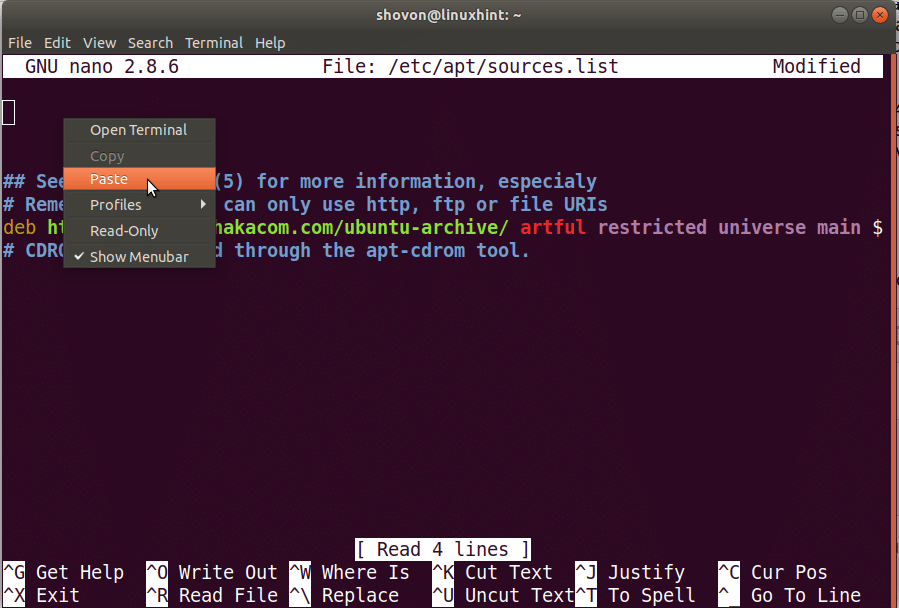
Press the arrow keys to move the cursor to an empty location. Then press the right mouse button and click on “Paste” to paste the line you just copied.
Now change ‘YOUR_UBUNTU_VERSION_HERE-pgdg’ to ‘zesty-pgdg’. PostgreSQL 10 is not available for Ubuntu 17.10 Artful Aardvark yet. So I added the repository for Ubuntu 17.04 Zesty Zapus. It works pretty well.
Once everything is done, the file should look like this. Now press Ctrl+X, then press ‘y’ and press <Enter> to save the file.
Now we have to add the GPG key of PostgreSQL on Ubuntu 17.10. Copy the following line from the Ubuntu download page of PostgreSQL website.
Open a terminal and press the right mouse button and click on “Paste” as shown in the screenshot.
This is how it should look now. Press <Enter> to run the command.
You can see that the GPG key is added.
Now we have to update the package repository cache of our Ubuntu operating system. Run the following command to do that:
$ sudo apt-get update
At this point, we are ready to install PostgreSQL 10. Run the following command to install PostgreSQL 10:
$ sudo apt-get install postgresql-10
Once you run the command, you should see the following window. Just press ‘y’ and then press <Enter> to continue.
The installation should be complete in a while.
Once the installation is complete, run the following command to check whether PostgreSQL is running or not.
$ sudo systemctl status postgresql
You can see that postgresql is running correctly from the output.
We can only login to postgresql as ‘postgres’ user after the installation. Then we have to create other user and databases as we like from there to access it without using ‘postgres’ user.
To login as ‘postgres’ user, first set up a password for ‘postgres’ user using the following command:
$ sudo passwd postgres
Now login as ‘postgres’ user with the following command:
$ su - postgres
Once you’re logged in as ‘postgres’ user, run the following command to access the command line interface of PostgreSQL 10:
$ psql
You can see that, you’re using PostgreSQL 10.1 and the prompt where you can run other PostgreSQL commands.
So that’s how you install PostgreSQL 10 on Ubuntu 17.10 Artful Aardvark. Thanks for reading this article.


