7 LibreOffice Writer Hacks to Improve Your Productivity
As we have discussed in our earlier article OpenOffice vs LibreOffice, OpenOffice and LibreOffice are two of the best alternatives to Microsoft Office. LibreOffice is a default office suite in almost all the recent releases of Linux. With almost all the features of Microsoft Office available in LibreOffice, it is considered as a most viable competitor to Microsoft office suite.
Many of us find it very difficult to switch from Microsoft Office to LibreOffice even though both office suites have almost similar functions. Many of you might have faced some issue while using word or presentation file saved in LibreOffice on Microsoft Office and other compatibility issues while switching between Microsoft Office and LibreOffice.
So today we will have a look at 7 hacks which will improve your LibreOffice Writer user experience as well as productivity.
1. Keyboard Shortcuts
If you want to improve your productivity and speed up your workflow with any application software then learning all the important keyboard shortcuts is the best possible way.
Here are some of the important keyboard shortcuts to improve your productivity.
Navigation
- Home: Takes cursor to the beginning of current line.
- End: Takes cursor to the end of current line.
- Ctrl + Home: Takes cursor to the start of document.
- Ctrl + End: Takes cursor to the end of document.
Function Key
- F2: To open Formula bar.
- F3: To complete AutoText.
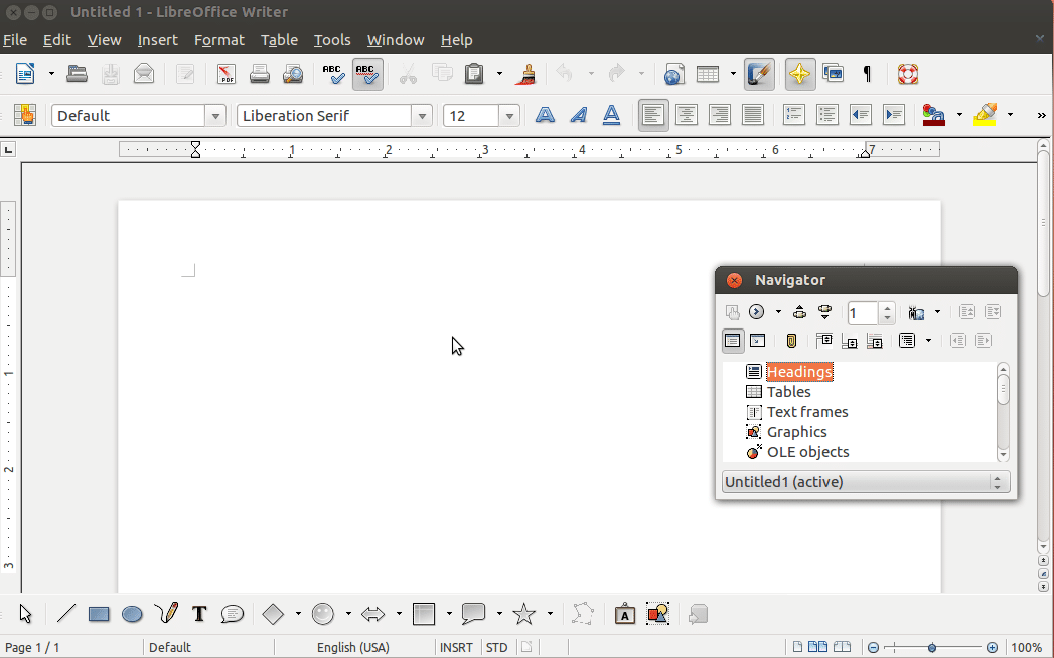
- F5: To open Navigator.
- F7: To open Spelling and Grammar.
- F11: To open Styles and Formatting.
- Shift + F11: To create a new style.
Formatting
- Ctrl + E: To center the paragraph.
- Ctrl + J: To justify the paragraph.
- Ctrl + L: To left align the paragraph.
- Ctrl + R: To right align the paragraph.
- Ctrl + Page Up: To toggle to the header.
- Ctrl + Page Down: To toggle to the footer.
- Ctrl + Shift + P: To toggle Superscript.
- Ctrl + Shift + B: To toggle Subscript.
- Ctrl + Enter: To insert a page break.
2. Change the Default Save File Format
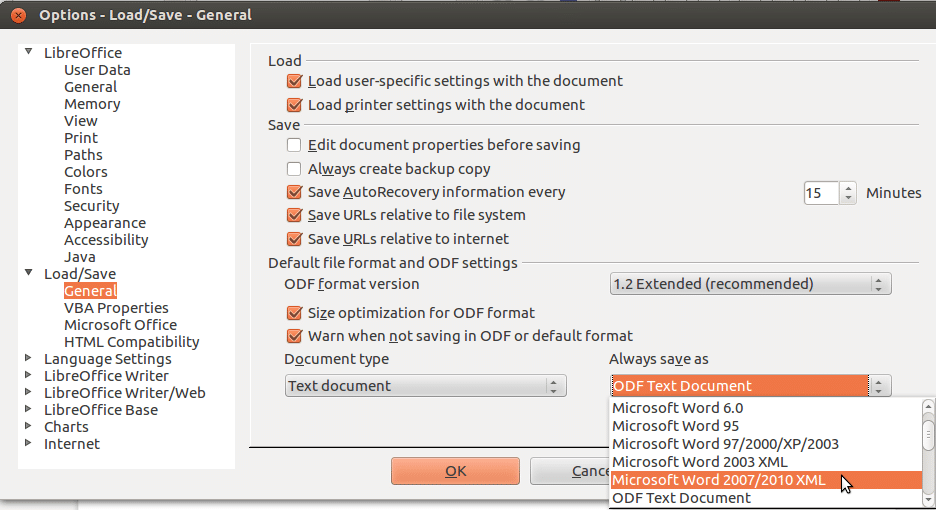
LibreOffice by default saves document file in Open Document File format (.odt) which is basically a good idea because it is technically designed to work with almost all the office suite available out there. But in case if you are going to use this .odt file in Microsoft office you will face some difficulty in opening it properly. To fix this compatibility problem you should to change default save file format to Word format (.docx).
Here is how you can change the default file format in LibreOffice Writer. Just follow these simple steps and you are good to go.
Step 01: Go to Tools -> Options -> Load/Save -> General.
Step 02: Then under Default File Format and ODF Settings from Always save as drop down select Microsoft Word 2017-2013 XML.
That’s it now whatever files you save in future will be saved in Word (.docx) format.
3. Install and Enable Extensions
Yes, LibreOffice supports extensions so that a user can add more functionality to it. LibreOffice Writer comes with lot of pre-installed extensions which you need to enable and you can also download other extensions from the LibreOffice website.
To install or enable extensions in LibreOffice Writer go to
Tools -> Extensions Manager.
Where you can add or updated extensions.
4. Create and Save Templates
If you want to use a common layout and appearance between documents then it is a good idea to create your own template and make the process a bit easier and you can do this in LibreOffice. It also has styles feature which is great for using a common look for elements and paragraphs within a document.
Here is how you can create your own template and set it as the default template for documents.
Step 01: Create a new document and set the styles as you wish.
Step 02: Then go to File menu and select Save as Template under Templates tab.
Step 03: Now select the template you created from Templates tab and click Set as Default.
Now you have your own template which you can also use in future as well.
5. Boost Performance
On some occasions you may have noticed LibreOffice Writer takes little bit of time to load and sometimes lags whiles using it but you can fix this by doing some adjustments within LibreOffice Writer.
Just follow these simple steps to boost up LibreOffice Writer performance.
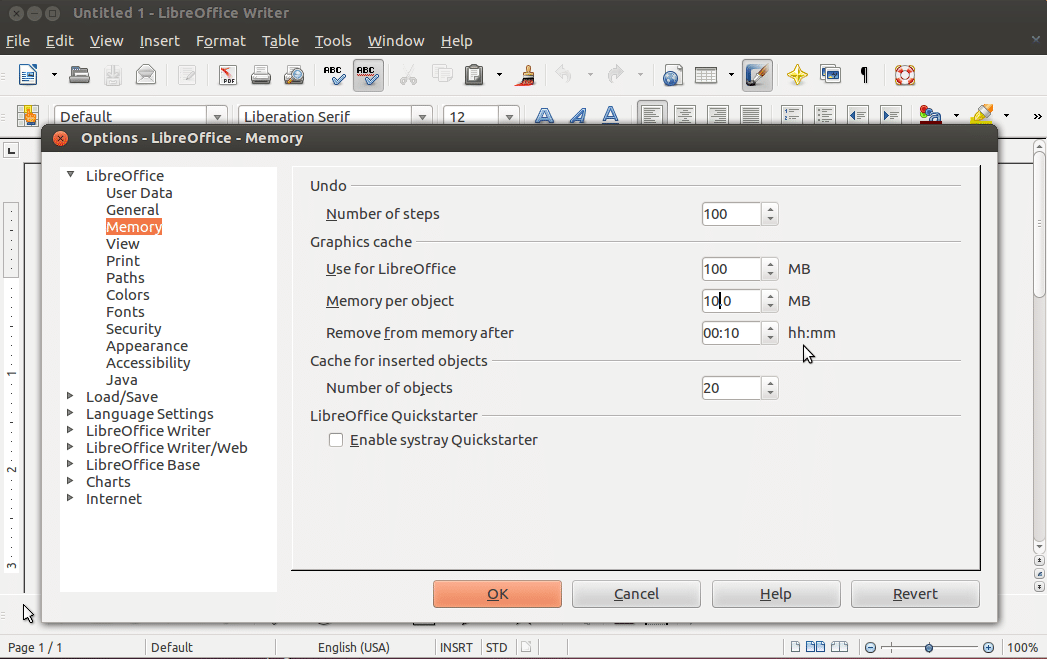
Step 01: Go to Tools menu and select Options.
Step 02: Now select LibreOffice from the sidebar and then select Memory.
Step 03: Under Graphics Cache make changes as follows:
- Set Use for LibreOffice to 128 MB.
- Set Memory per Object to 10 MB.
Step 04: Select Advanced under LibreOffice.
Step 05: Finally uncheck Use a Java runtime environment under Java Options and click OK.
That’s it. Now you will notice the improvement in overall performance of LibreOffice Writer.
6. Create Formatting Styles
You can create your own formatting styles if you regularly write in LibreOffice Writer and have to follow similar style and format every time. To make this process little bit easier you can create your own styles for page layout, fonts, paragraphs, etc.
Following are some the custom styles you can use in LibreOffice Writer.
- List Styles: Using this style you can style the numbers, bullets, etc.
- Frame Styles: Using this style you can apply styles to frame positions and layouts.
- Character Styles: This style will help you apply the specific font style to words or letters within a paragraph.
- Page Styles: You can apply various styles to page layout, headers and footers.
- Paragraph Styles: You can apply fonts, numbers, etc. to the entire paragraph in a document.
Here is how you can create formatting styles in LibreOffice Writer.
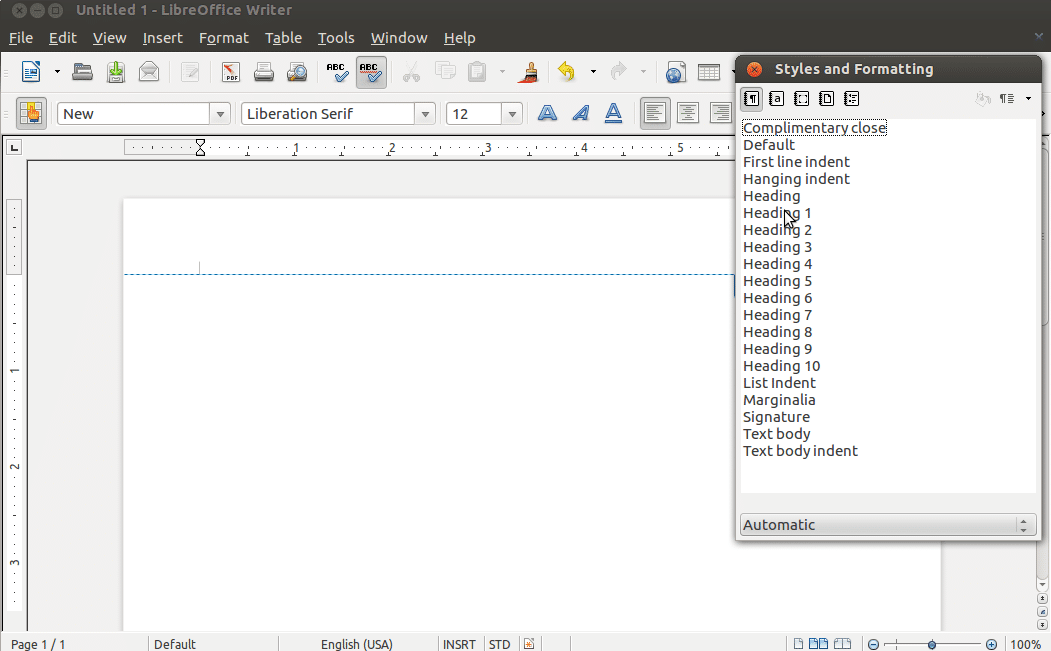
Step 01: Go to Styles then Styles and Formatting.
Step 02: Now right-click on Styles and Formatting and click on New.
Step 03: Here you can give a name to your styles and set styles using different tabs like Font, Font Effect, Borders, etc.
Step 04: Once you are done with setting styles to click on OK to save it for future use.
7. Use Navigator
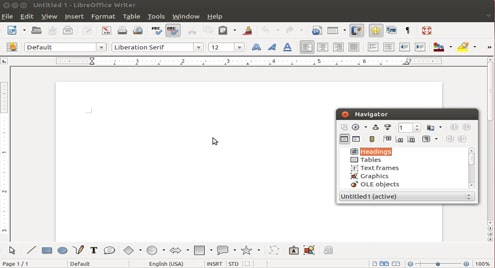
If you often deal with documents with a large number of pages then you should use this tool. Using this tool you can navigate to any page, headline, paragraph, etc. in a document.
Here is how you can enable the Navigator in the sidebar.
Step 01: Go to View menu and select Sidebar.
Step 02: Now click on Navigator.
That’s it now you will see Navigator tab in LibreOffice Writer sidebar.
So these are the 7 hacks that will improve your overall LibreOffice experience and productivity. Feel free to share your own ideas about LibreOffice Writer in the comment section below.
